Education is not preparation for life; education is life itself.
– John Dewey
This quote is most reflective of my teaching and life philosophy. Many years before I had a teaching license or a formal degree, my life revolved around education. Beginning with having a father who was a teacher, I have, throughout my life, been a student, a Girl Scout leader, a school board member and president, a business manager in charge of training employees, a student again, a secondary education instructor, and a college professor. Even my sideline career involves educating people in person and through social media marketing. I love learning and teaching, and everything I do reflects this. This blog is a chance for me to share my loves of food, wine, books, and my fitness journey. By having you share and comment on my writing, I hope to be equally inspired by you!
My new favorite cooking appliance is my electric pellet grill. The hubby bought two of them last winter – one in ND and one in AZ. I know I’ve used them 10 times as much as he has. Thank you Pinterest and the Traeger Women’s group on Facebook! I love the flavors it gives all kinds of food from the usual meats to mac n cheese to bread and even desserts. I’ve brined and smoked a ham, brined and spatchcocked the Thanksgiving turkey and made my own birthday cake – a strawberry margarita upside down cake (my birthday is on Cinco de Mayo, so I had to).
Lately I’ve been seeing a lot of posts about Over the Top Chili, so my suspense got the best of me. Like most recipes, I looked at several and then winged it. It was fabulous!! Here is how I did it. Feel free to sub your choice of spices, veggies and liquids.
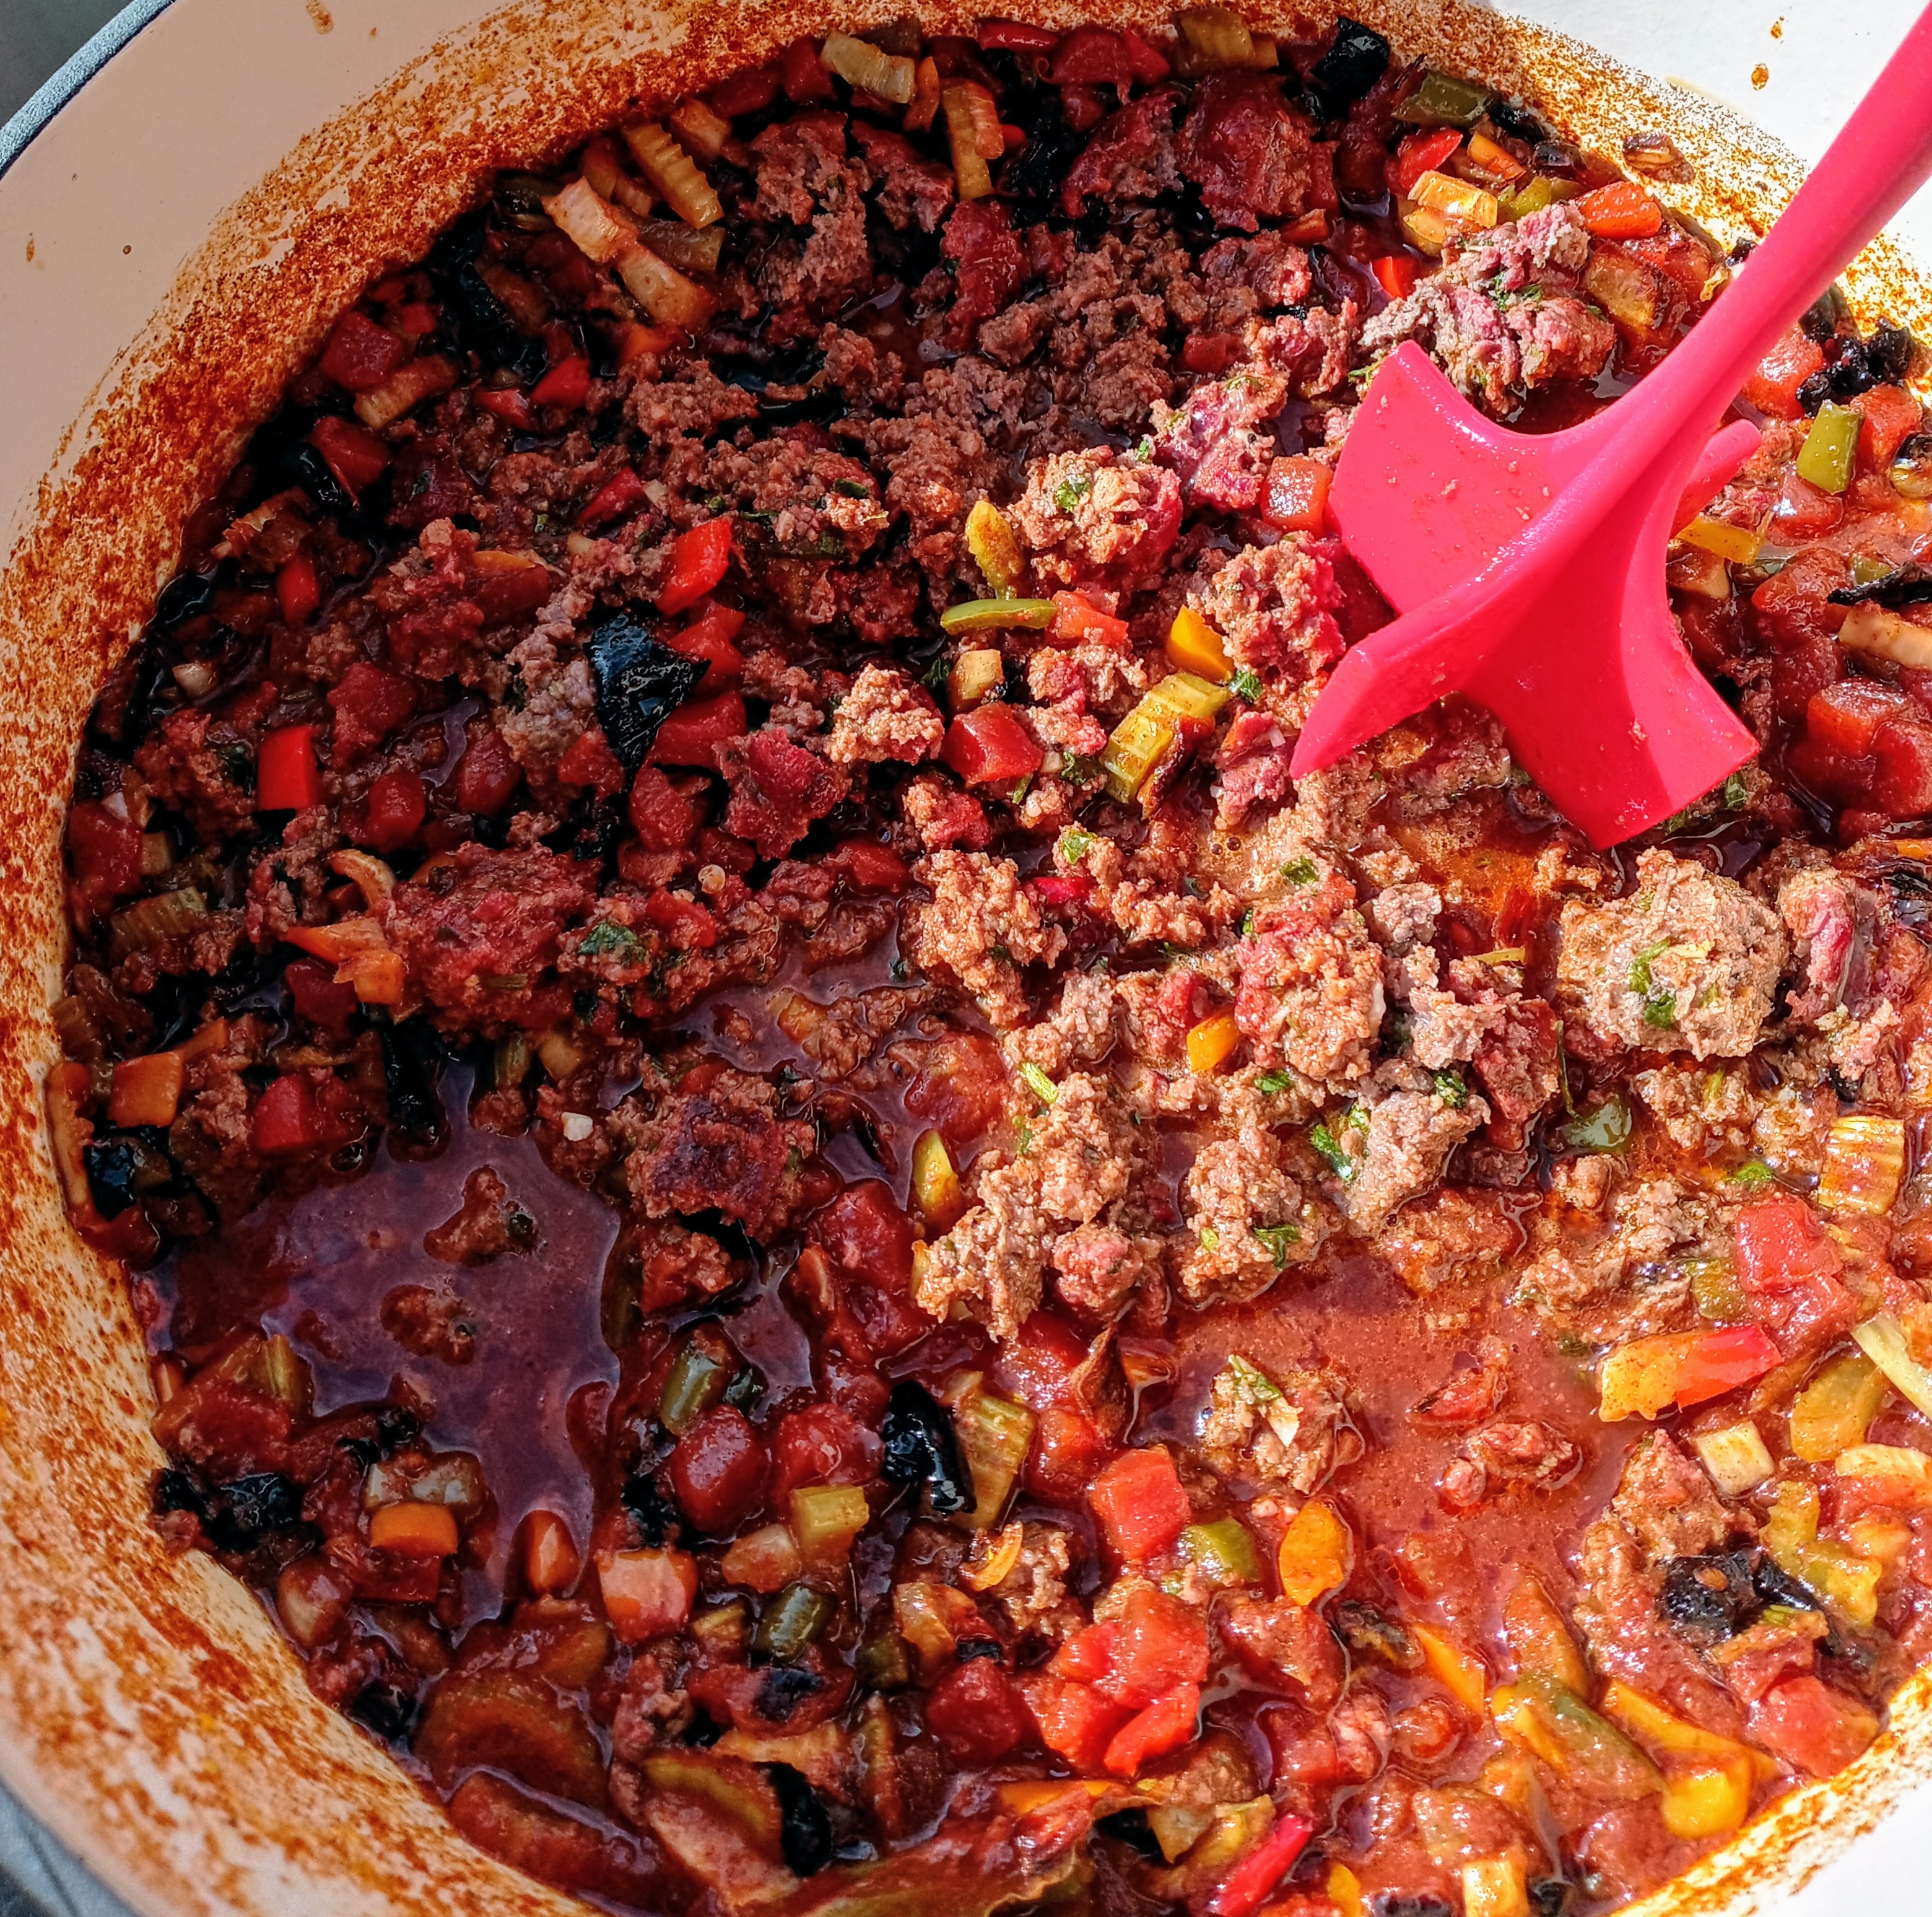
The premise of Over the Top Chili is to make a big hamburger patty with the meat and smoke it on a grate above the rest of the chili ingredients, breaking it up and mixing it in when it’s cooked. I took it one step further and smoked and roasted the veggies as well.
Prep:
2 lbs very lean hamburger. (This is important because it will be cooking over the top of your chili, so you don’t want a bunch of fat dripping into it.)
Seasoning for the burger – I used salt and pepper, chopped fresh garlic and cilantro, and worcestershire sauce.
Mix the seasoning and burger and form a big patty.
1 28 oz can petite diced tomatoes (you can use larger diced, stewed, Rotel, crushed – whatever you please)
2 cups liquid (water, broth, beer, red wine – I used beef broth)
1/4 cup chili powder
2 Tbs. paprika
salt, pepper, and granulated garlic to taste
2 large bay leaves
Mix these ingredients in a large Dutch oven and put the beef patty on a grate over the top of it.
Chop onions, green or multicolored peppers, jalapeno peppers, celery and put them on a tray. I used aluminum pie plates with the perforated bottom to let even more smoke get to them.
Start your smoker grill and get it smoking and set it to low (between 175 and 200). Put the Dutch oven, meat patty, and veggies on the rack and smoke on low for 2 hours.
Turn up the heat to 350 and insert a probe into the middle of the meat. Cook until the internal temp of the meat is 150 – about another hour.
You can mix the veggies into the pot before you increase the heat or leave them out until the meat is cooked through. Leaving them out will allow them to roast for added flavor and texture.
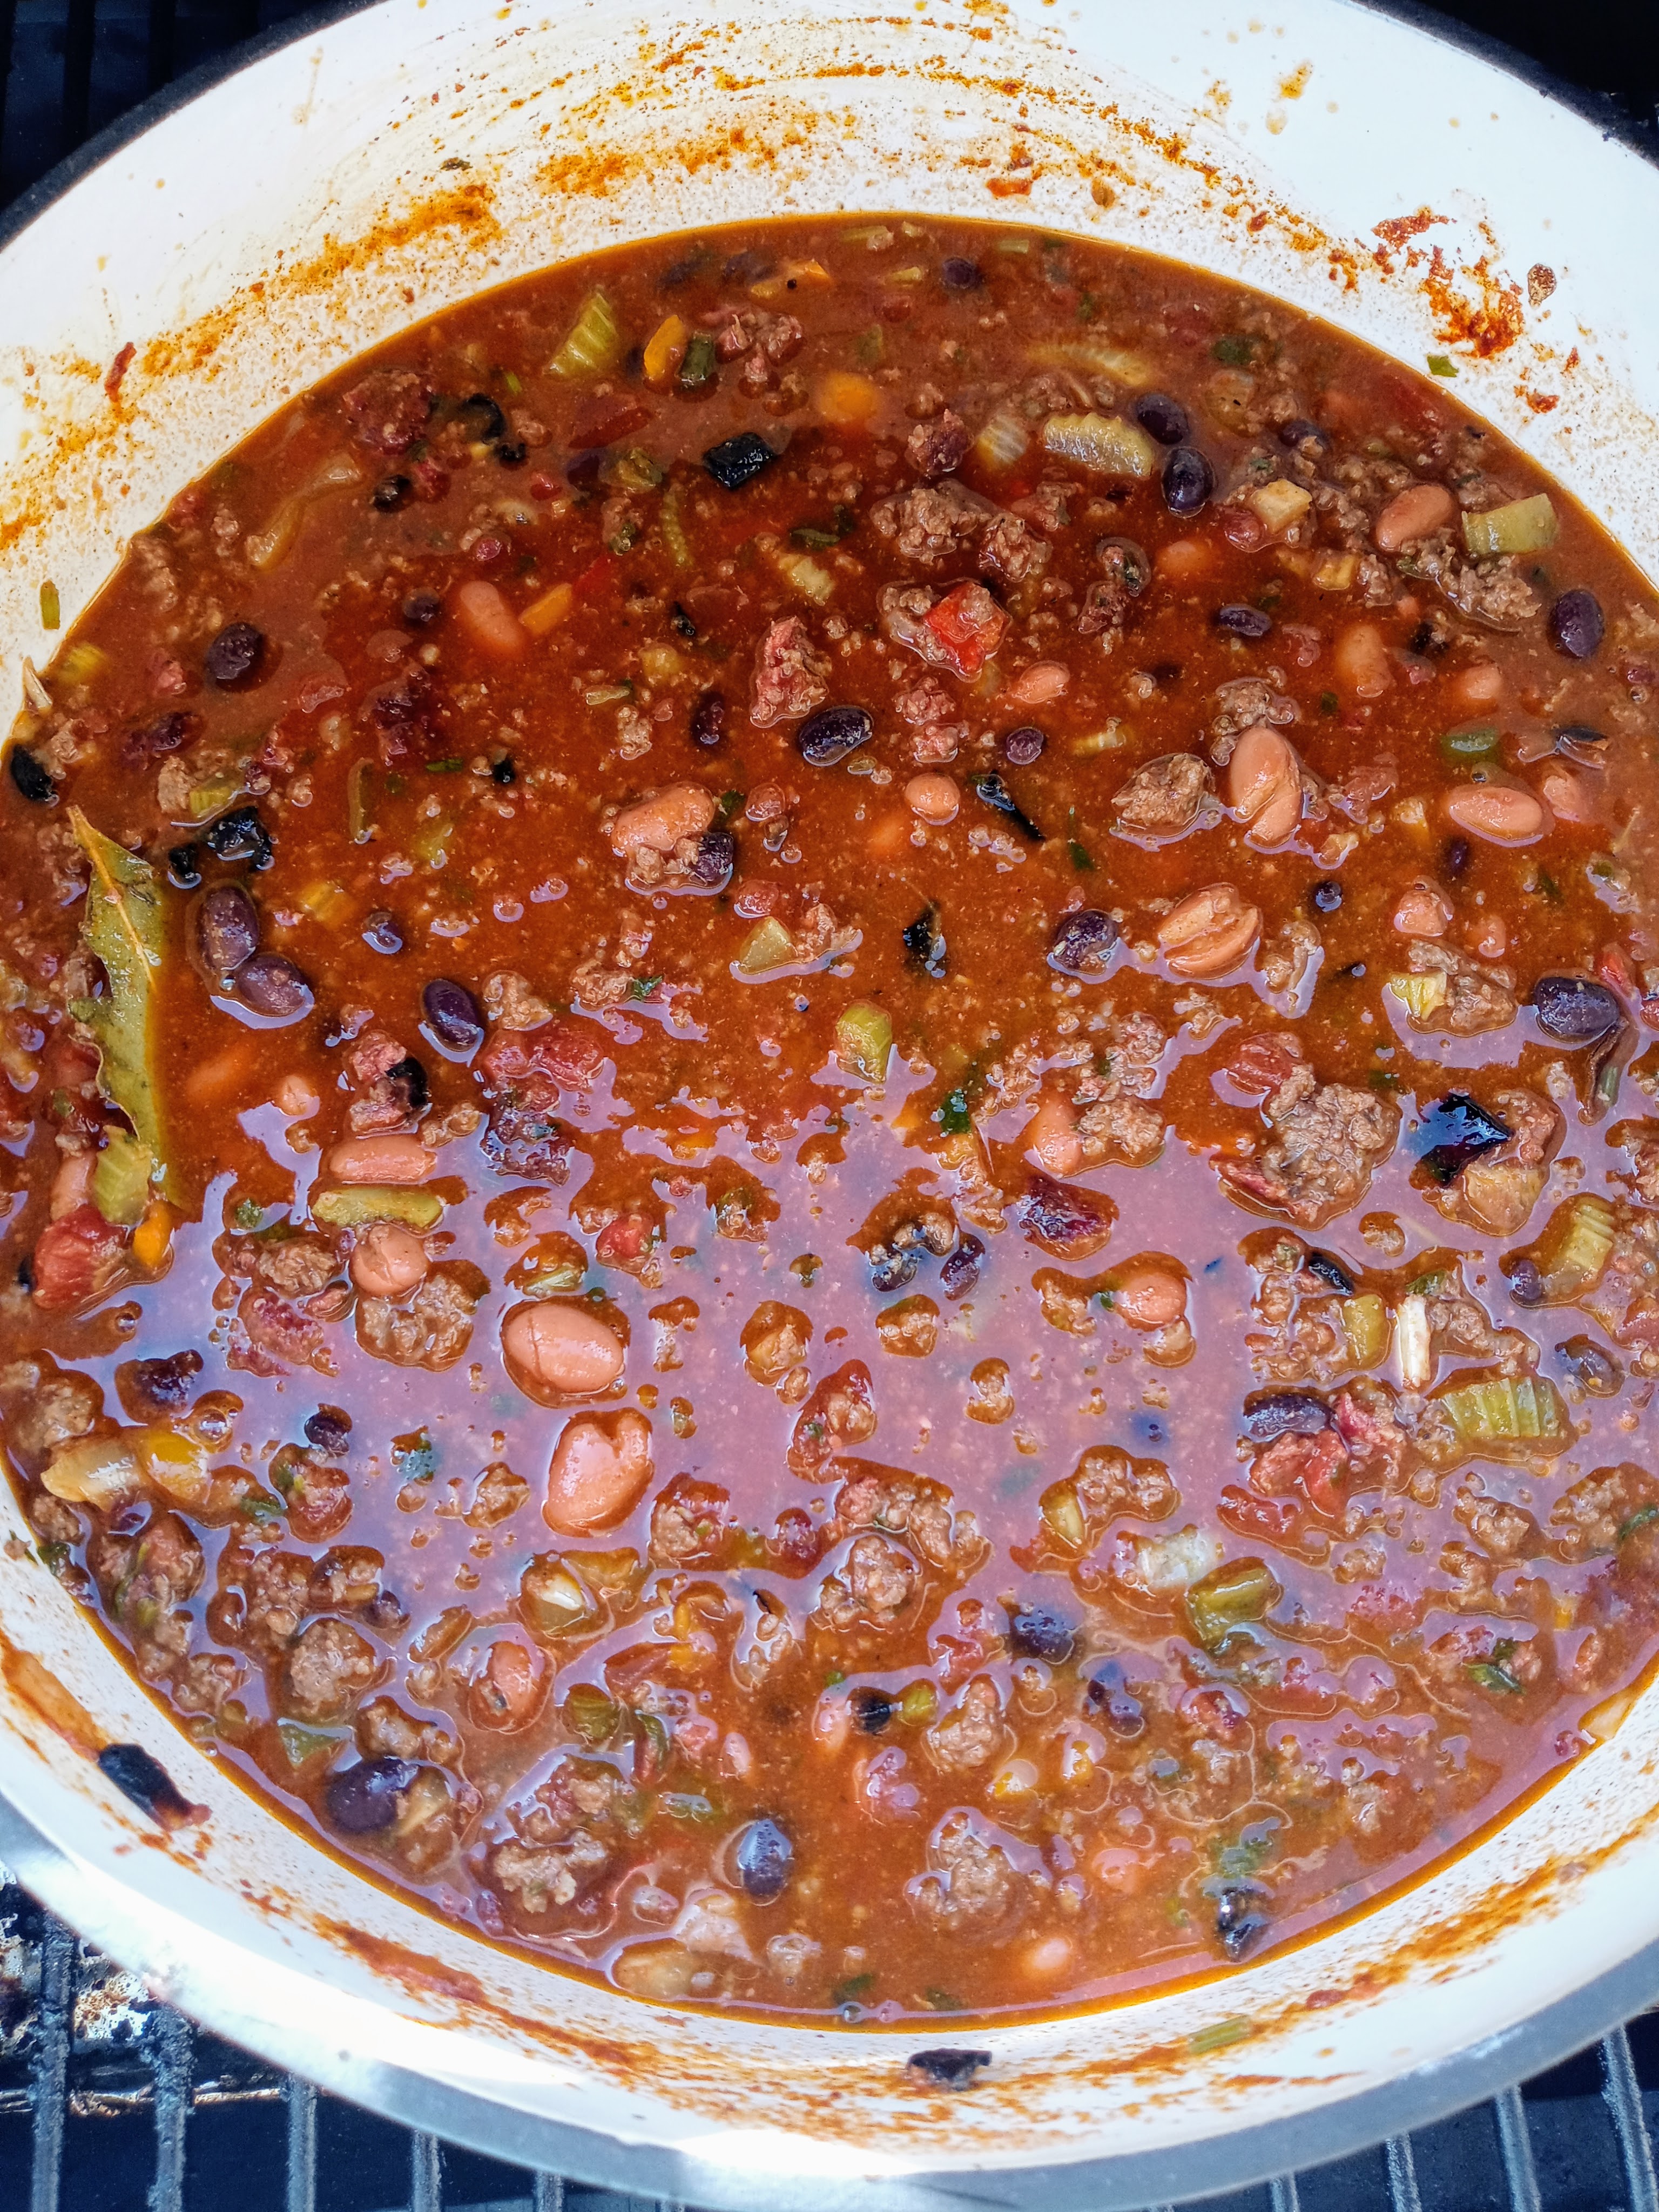
When the internal temp of the meat reaches 150, put it into the pot and break it up. Add the rest of the veggies if you didn’t do it earlier. Add the beans and a couple more cups of liquid. I used one can of chili beans and one can of drained, rinsed black beans. Use a can or two of your favorite or leave them out if you like. I used water for the liquid this time. Give it a stir and return to the grill to simmer for at least half an hour to let the flavors blend.
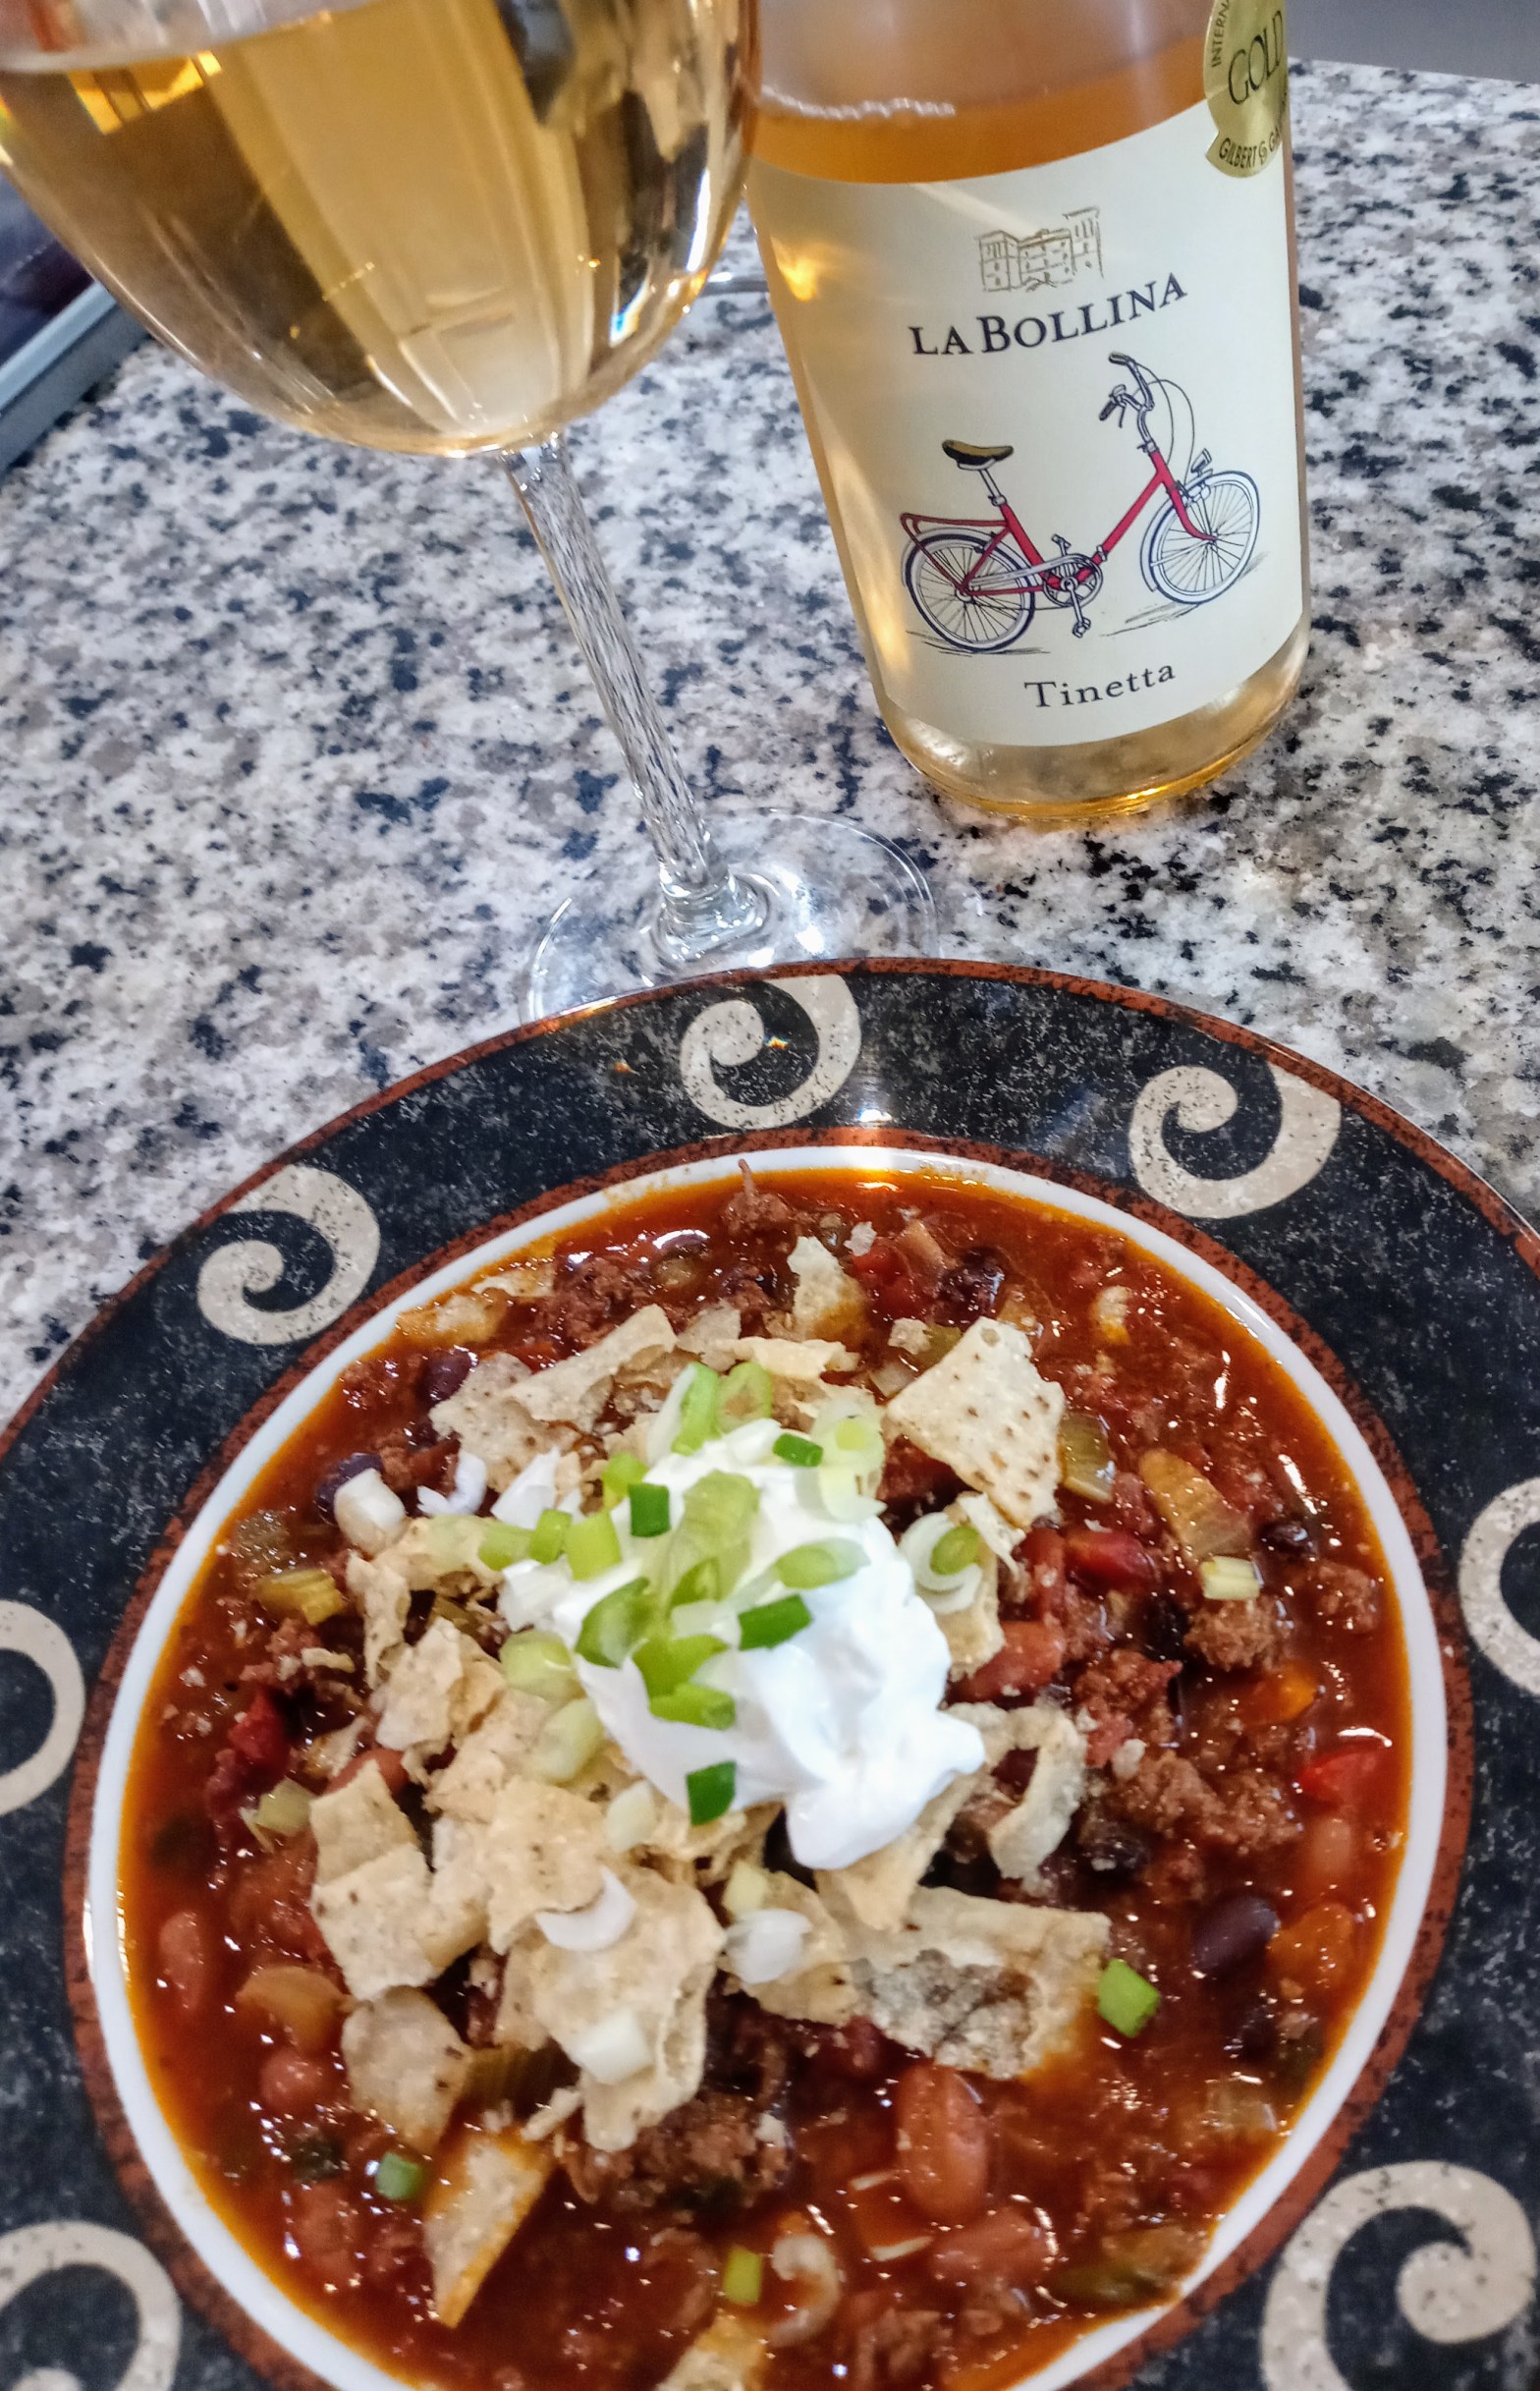
Serve with your favorite toppings – sour cream, green onions, and crushed tortilla chips were my choice tonight.
I paired this chili with a dry Nebbiolo rose. The cool acidity was a perfect palate refresher. Dark reds tend to amplify the heat in spicy dishes so be cautious of that.
This really is over the top, and I’m not just talking about the cooking method! The smoke flavor really comes through in the flavor of the meat to take it to the next level. Let me know if you try this and how you make it your own!
Sundays are usually work days for me, getting all my class materials for the week posted and other prep work for school. They are also my “long run” days since I started marathon training again. I’m hoping to do the full Rock ‘n Roll Marathon here in Phoenix in January – if the pandemic numbers allow. I did the half last year and it was an absolute blast! Bands every mile and a concert in the park featuring the Gin Blossoms afterwards. It’s also my favorite day to get creative in the kitchen and have a glass of champagne with brunch/lunch or whatever meal it ends up being.
About a week ago, a Facebook acquaintance posted a picture of a pizza she had while on vacation in Montana. It had fennel sausage, squash, beets, basil pesto, and goat cheese. Some people are inspired to find the restaurant when they see something unique and yummy like that. Me? I’m inspired to make it!
Whipping up a quick pizza dough is easy, I already had a small squash setting on the counter, homemade pork sausage in the freezer, and a huge basil plant on my front patio, so I was most of the way there. The rest involved a quick stop at the store.
All through my ten mile run this morning and church I patiently waited to come home and put this together. It turned out fabulously! It’s full of healthy vegetables and since I made everything from scratch except the cheese, I know exactly what’s in it.
It took about 2 hours from when I got home to having it on my plate, but since I love doing it, I didn’t mind. Plus it made 4 big servings, and I’m by myself (even if the hubby were here, I’d still be eating it by myself 🙂 ), so that’s three evenings this week I won’t have to cook.
Let’s start with the dough.
1 cup warm water
1 Tbs yeast
1 Tbs sugar
1 Tbs olive oil
1 tsp salt
1/2 tsp granulated garlic
about 2 1/2 cups of flour
Add the yeast and sugar to the water and let it set for 10 minutes or so until it is nice and foamy. (While I was waiting, I cut the squash in half, cut the ends off the beets, seasoned them with S&P and put them in the Instant Pot – on the trivet with a cup of water in the pot – and set it for 10 minutes.)
beets and squash ready to cook
Finish the dough by adding the olive oil, salt, granulated garlic, and about 1 1/2 cups flour and mixing it well. Then add flour gradually and mix until it doesn’t stick to your hands or the sides of the bowl. Knead it for a couple of minutes right in the bowl, cover with a damp dish towel and set it somewhere warm for about 30 minutes. Outside still works in AZ 🙂
While the dough is rising, prep the rest of the ingredients.
We have our own homemade sausage, so I used that. Use whatever you have/like/can find. I ground fennel seeds and added it to the sausage. The fennels adds an amazing flavor.
crushed fennel seeds and ground pork sausage
Brown the sausage and set aside. I used a grill sheet on the smoker since I was going to use it to bake the pizza anyway.
While the sausage is cooking, make the pesto. Chop a handful of fresh basil and 2-3 large cloves of garlic and mix it with a few tablespoons of olive oil. I used my pestle to mash it together even more.
Chop any other veggies you want to add. I used portobello mushrooms and onions. By now the squash and beets will be done in the Instant Pot and the pressure should have released naturally. Put the beets into a bowl of ice water while you chop the squash. Peel the beets and chop them as well.
The dough should also have risen at this point. Punch it down and let it rest for about ten minutes.
Everything should be ready now to assemble and bake! I make my pizzas on the grill all the time down here. The flavor is amazing and it keeps me from having to heat up the house on a hot day.
Roll out the dough and put it on a hot grill sheet for about 5 minutes to get the bottom baked a bit.
Flip the crust and start layering ingredients, beginning with brushing on the pesto. I rarely use pizza sauce. Usually I just brush the crust with olive oil and chopped garlic. That way I can taste the other ingredients on the pizza.
I put the mushrooms and onions on next since they weren’t cooked. Then I layered the sausage, beets and squash, and topped it with the goat cheese and shredded parmesan.
Grill it over low-medium heat until the crust is as done as you like it. With a thicker crust and all the ingredients, if you have the grill too hot, the crust will burn before the toppings are hot and the cheese melted.
Look at those beautiful fall colors!
The savory and earthy flavors of the pizza were the perfect contrast with the bubbles and acidity of the Charles Frey Extra Brut.
Champagne brunch!
When I put the ingredients into MyFitnessPal, it came up with the following nutritional information for 1/4 of the pizza:
Calories – 679
Carbs – 75
Fat – 30g
Protein – 26g
Let me know if you make this and how you like it. As for me – I’d run 10 miles for this any day. Thank goodness I won’t have to for a few days! 🙂
Last week we had a family birthday party to celebrate all 5 grandchildren’s birthdays. Three of their birthdays are on consecutive days and the fourth less than a month before, so we just throw one big party. Most of the family loves angel food cake, so that’s my contribution to the festivities. There are usually about 30 people, so I make one cake and a batch of angel food cupcakes. The result of this is two dozen leftover egg yolks – hence – Pasta Day!
There are so may pasta recipes out there, many of them using the whole egg, but this is my go-to. It’s easy and flexible, and if I haven’t made an angel food cake first, I can make egg white omelets with the leftover whites.
Here is the basic recipe:
3 1/2 cups flour
1 tsp. salt
12 egg yolks
enough water to get the right consistency (1/4-1/2 cup)
From here you can get creative. Add garlic, herbs, tumeric, tomato paste, wine, squid ink, the juice of beets, carrots, or spinach, etc. You can also sub whole wheat flour for part of the flour. (It will change the texture and make the dough a bit harder to work with.) As you can see, you could pretty much make a rainbow of pasta.
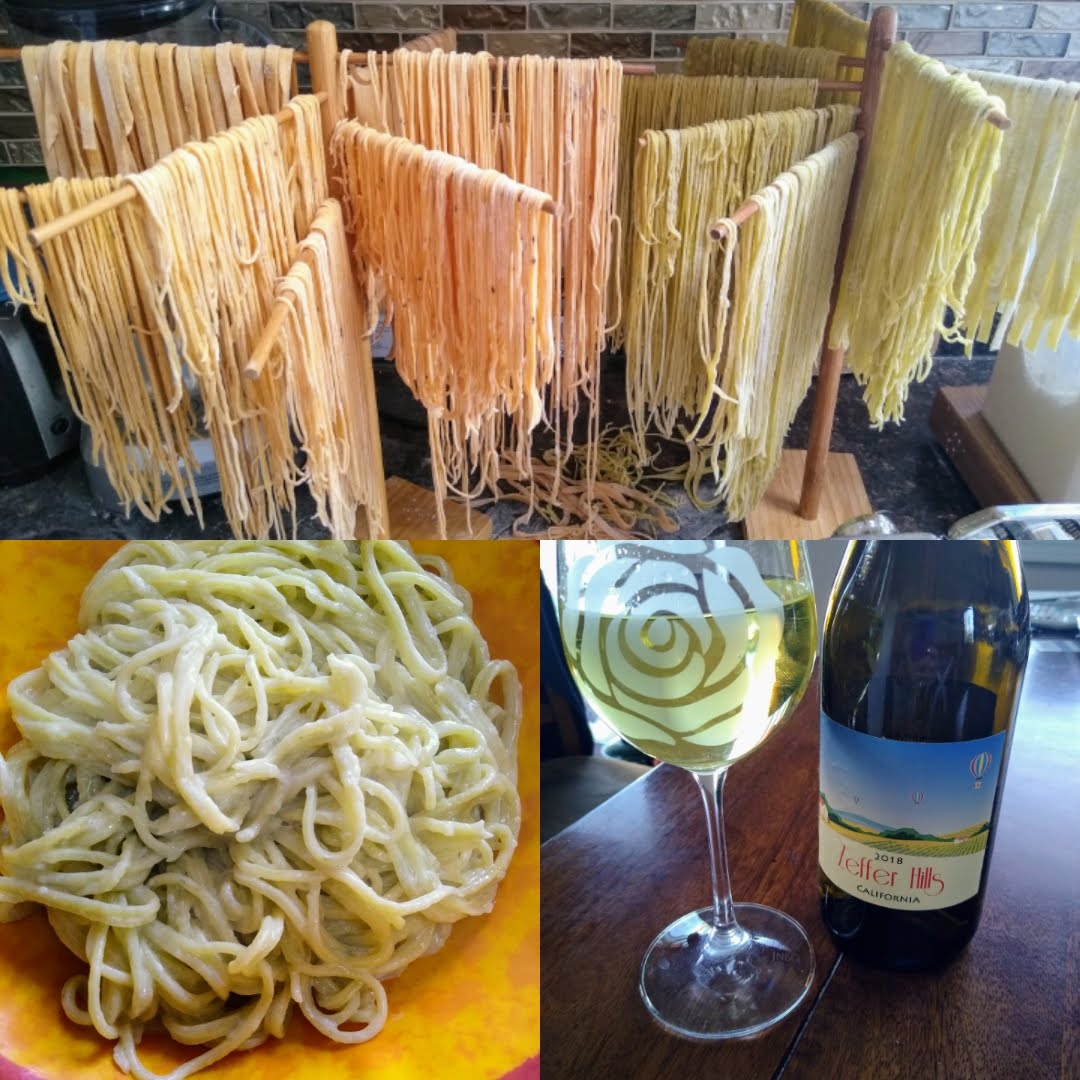
Today I decided to do one batch of garlic and basil and a batch of tomato.
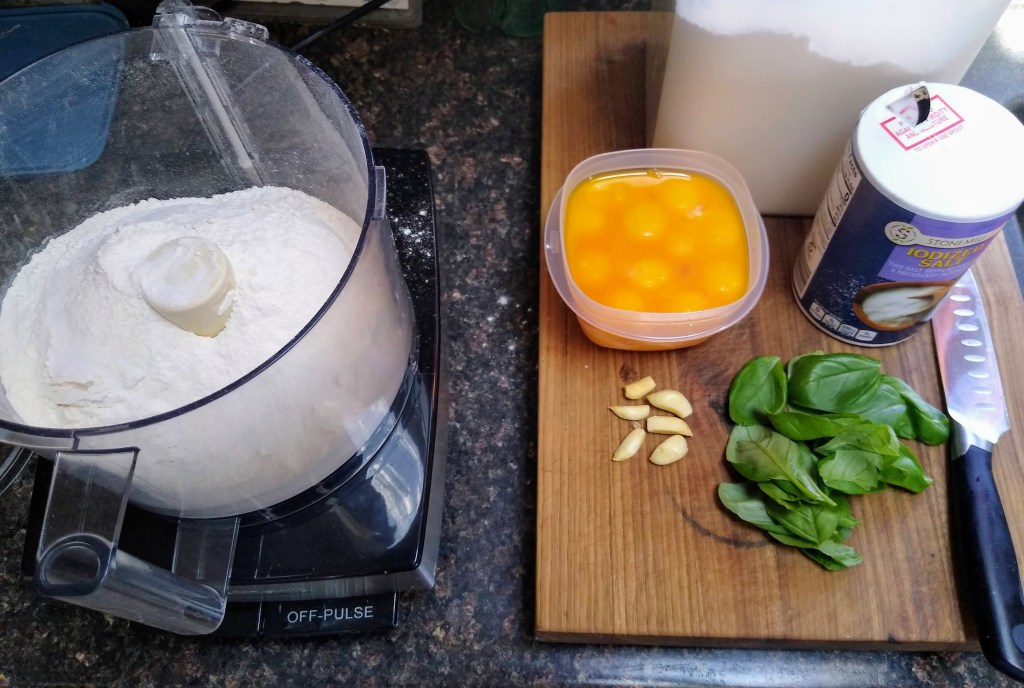
This is what I started with for the garlic basil pasta. I like to use fresh ingredients because they add more flavor, but you can definitely use garlic power and dried basil as well.
I make my dough with the food processor. Although it came with a plastic dough blade, it doesn’t reach the sides, so I use the regular chopping blade. Add the flour and salt to the processor bowl and pulse a few times. If your adding other dry ingredients like spices, you would add those right away as well. Next I add the garlic and basil and mix a few seconds to get it chopped up finely.
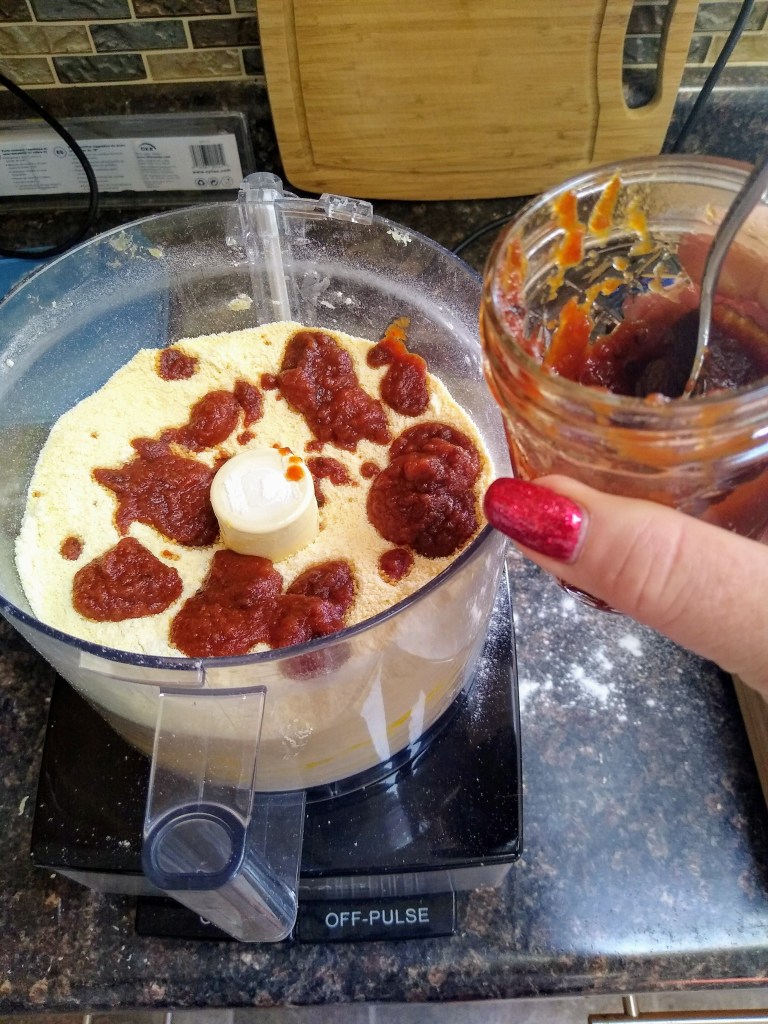
Then it’s time to add the yolks. I turn on the processor and pour the egg yolks through the tube one at a time. At this point the mixture will resemble course crumbs, and won’t hold together well.
If you are adding other wet ingredients, such as squid ink or tomato paste, you would do it now, mixing until the ingredients are blended throughout. For example in the next batch I made, I added the tomato paste after the eggs, but before the water.
This is actually my homemade ketchup, but it’s not as tart and has a much better tomato flavor, so I subbed it for tomato paste.
When adding the water, do it slowly through the tube as the processor is running, stopping when the dough starts to hold together. If you are using beet, carrot, or spinach juice, or wine, you would sub it for the water. One thing to keep in mind when adding flavored and colored ingredients is that you will lose a bit when boiling the pasta, so you can add more than you think.
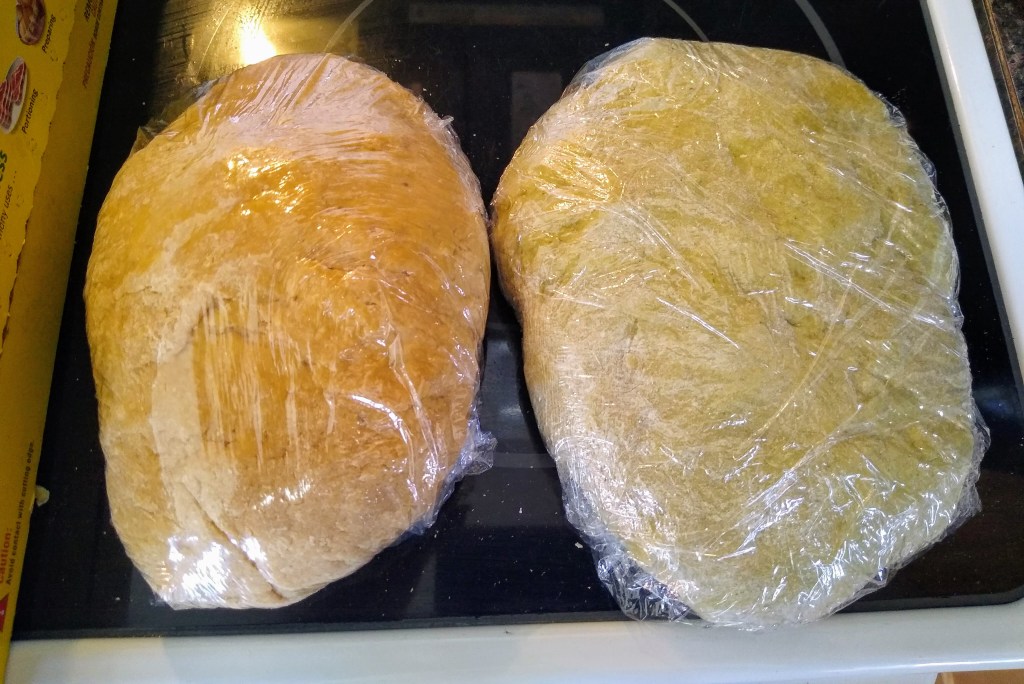
When it’s the right consistency it will hold together and be about like play-doh – pliable, but not sticky.
Dump it onto a floured surface, pull it all together, and knead it for a few minutes. Wrap it in saran wrap and set aside about 30 minutes to rest. This is time enough to make the next batch.
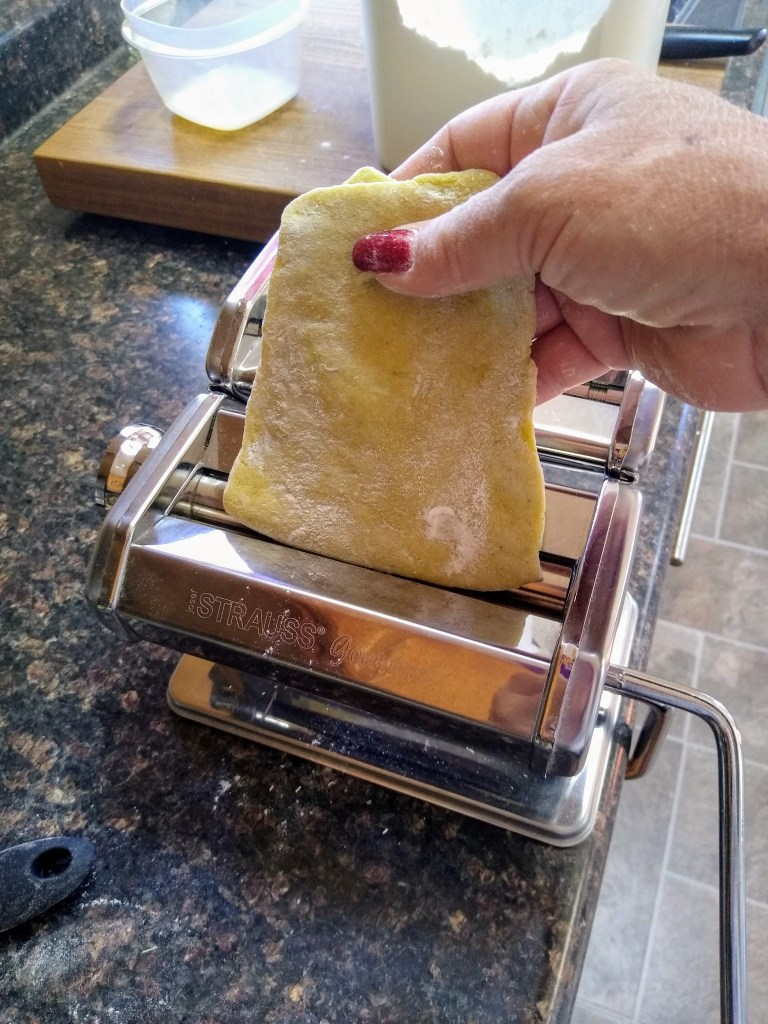
Now it’s time to make the pasta. I have a pretty basic manual pasta maker that cost about $25 a few years ago. It came with the basic attachment for angel hair and fettuccine noodles, but I also purchased a lasagna attachment. Some have electric machines or attachments for their Kitchen Aid mixers. Use what you have or can afford. I’ve also made it using a rolling pin and pizza cutter, so no need for any special equipment at all. A wine bottle can also serve as a rolling pin. Ask me how I know this. 🙂
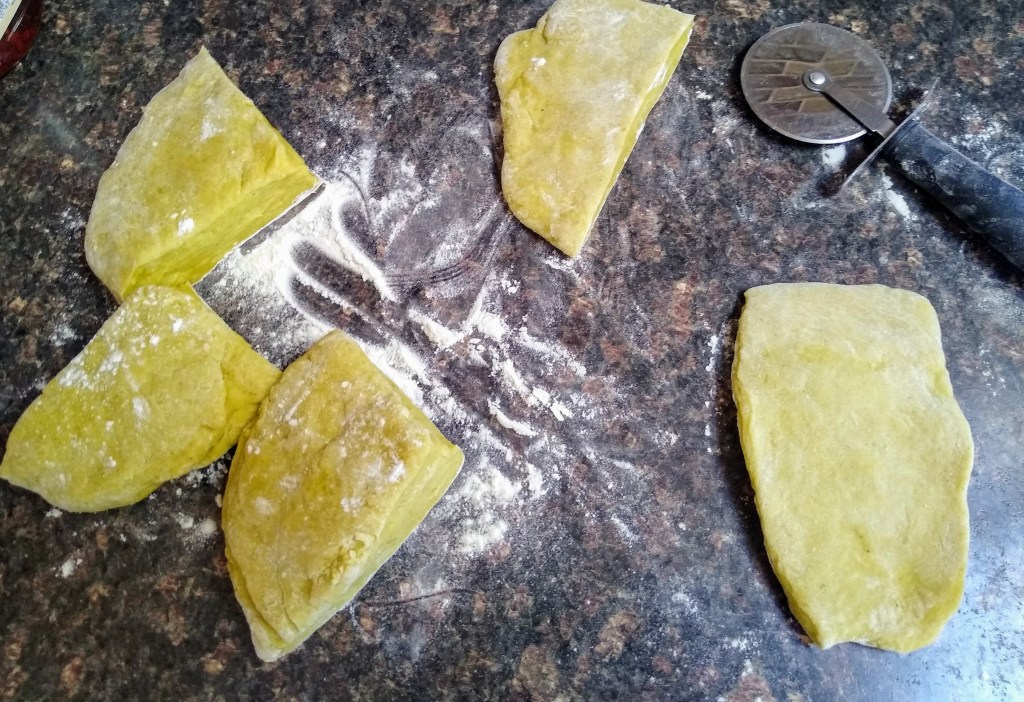
Divide the dough into 8 pieces. Working with one portion at a time, press the portion flat enough to fit into the widest roller setting. On mine it’s 7. It’s easy enough to do by hand, but you can use a rolling pin if you want. Run it through the roller, fold it in half, run it through again, fold and run it through a third time. During all the folding and rolling, you’ll want to keep your counter floured so you can keep the dough from getting sticky.
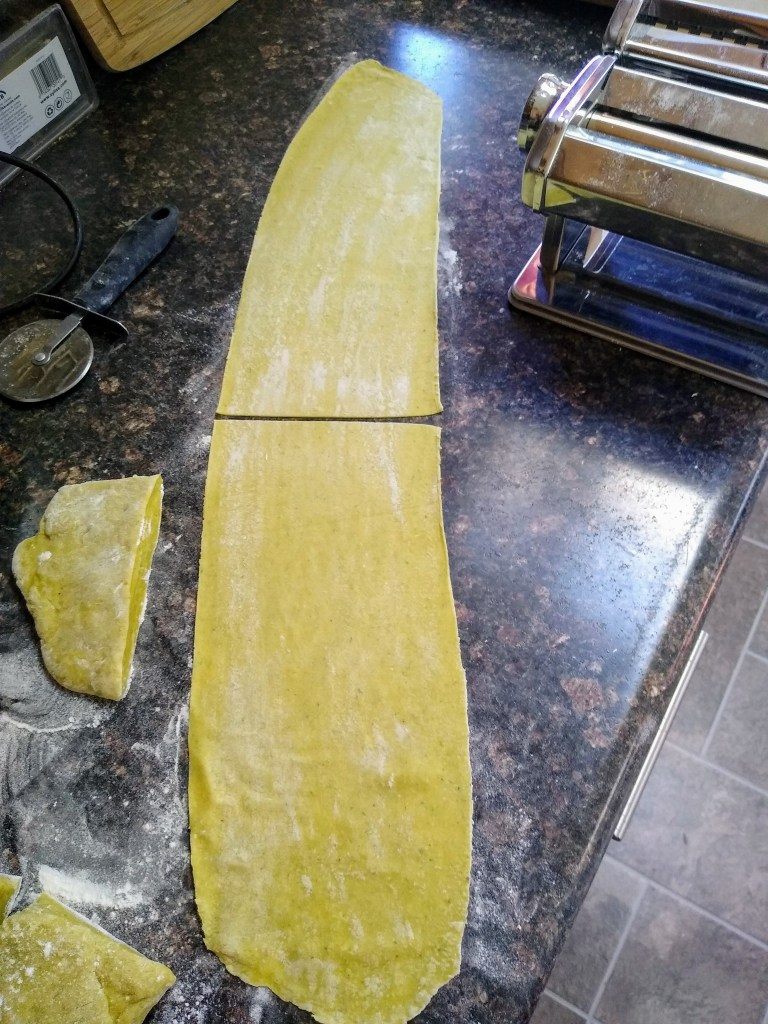
After you’ve run it through three times at the widest setting, move down a couple of notches – to 5 for me. Run it through once and move down a couple more notches, to 3. Now, if I’m doing angel hair, I stop at 3. For fettuccine, I go one more round at 2. This is what it looks like at that point, so I cut it in half so the noodles aren’t too long.
Now you put it through the cutting side.
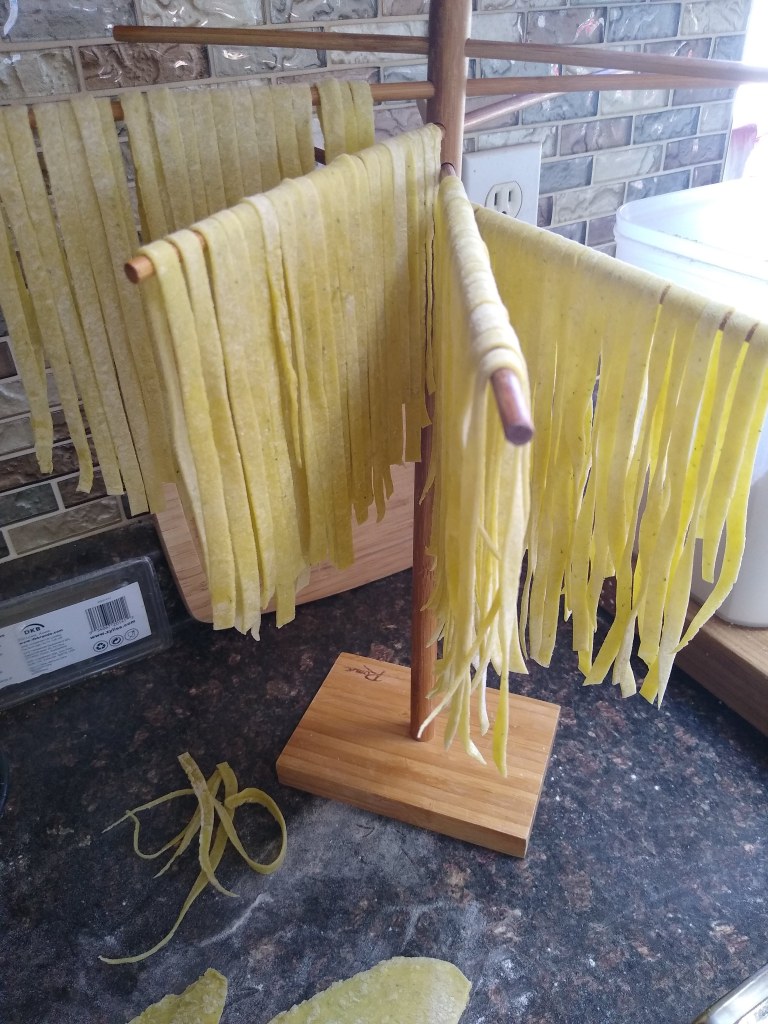
As you get them cut, hang them to dry overnight. I bought a couple of pasta drying racks, but you can also use a coat hanger or spread them on a dishtowel.
You can cook it at this point. Otherwise, after it’s dry, put it into plastic baggies and refrigerate if you’re going to eat it within a few days, or freeze for later use.
When cooking, keep in mind that it won’t take as long as store-bought. I’d start checking it at 5 minutes.
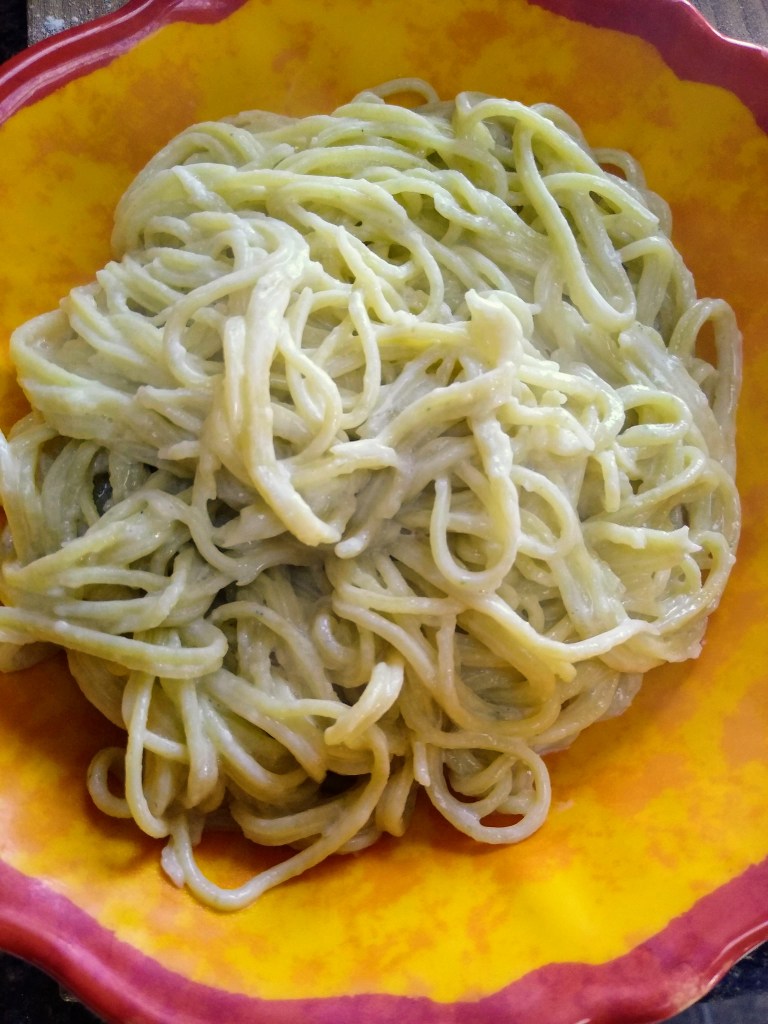
I couldn’t resist. I made some immediately for dinner. I made the garlic basil angel hair and after draining, I made a quick sauce of butter, half and half, and Parmesan. It was perfect, especially paired with a Chardonnay.
Let me know how if you try this recipe and how it tuns out, and what varieties you try!
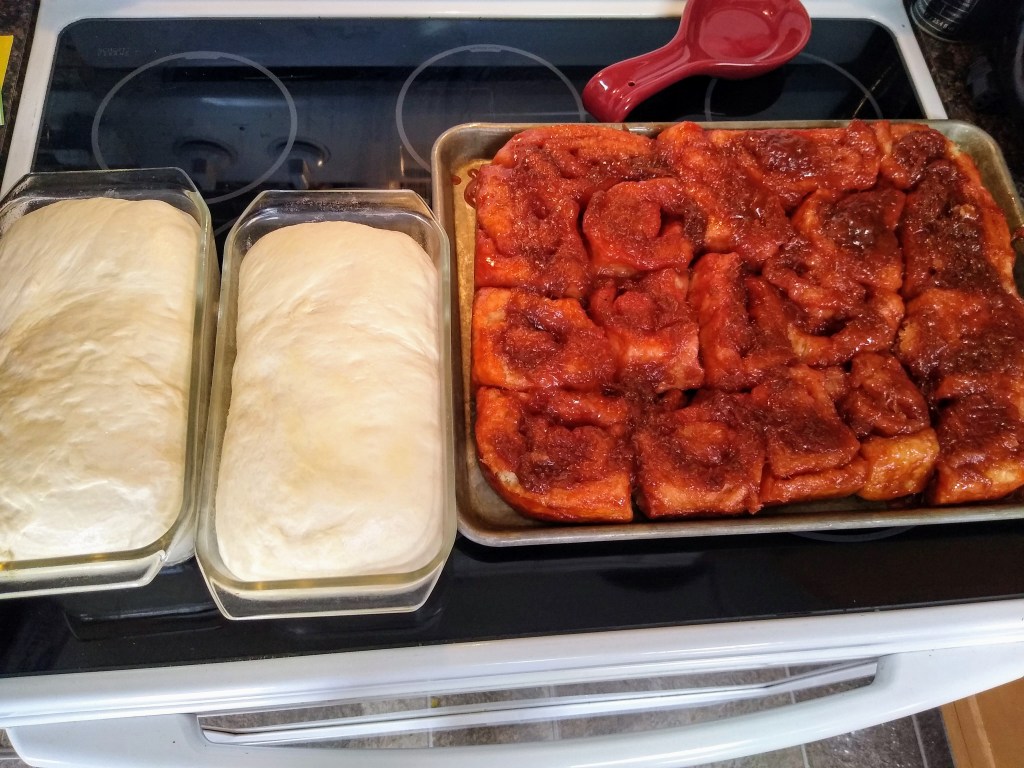
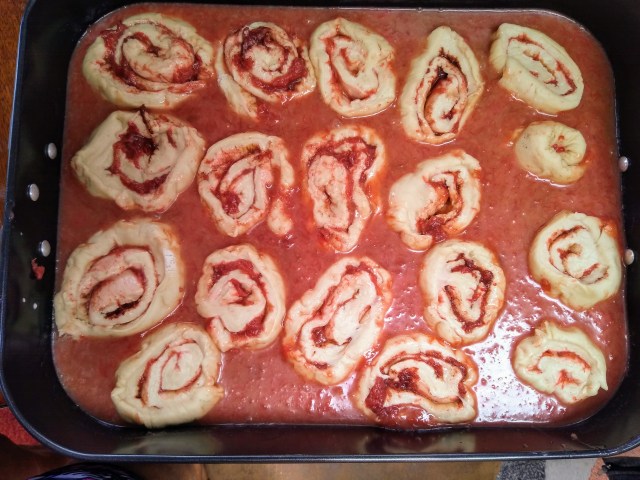
Rhubarb caramel rolls done and bread ready to go in
I recently saw on a Facebook discussion group that a local restaurant is serving rhubarb caramel rolls. That got the wheels turning. 🙂 I read through a few recipe suggestions about how to make the rhubarb sauce and how to integrate it into a caramel roll recipe and then commenced winging it as I usually do. Pinterest is my best friend on days like this.
I have kind of a like/hate relationship with rhubarb. For most of my life I hated it and have now gotten to the point where I like it – if it’s tempered with strawberries, or at least strawberry flavor. In my opinion, it’s just too tart to be palatable unless it’s in a recipe loaded with sugar, which I’m also not fond of in large quantities. In the case of this recipe, the tartness of the rhubarb is mellowed by the caramel, and I make the rhubarb sauce with strawberry jello – a win win for me. These rolls still have a tartness to them, so I pointed out a few places where more sugar can be added.
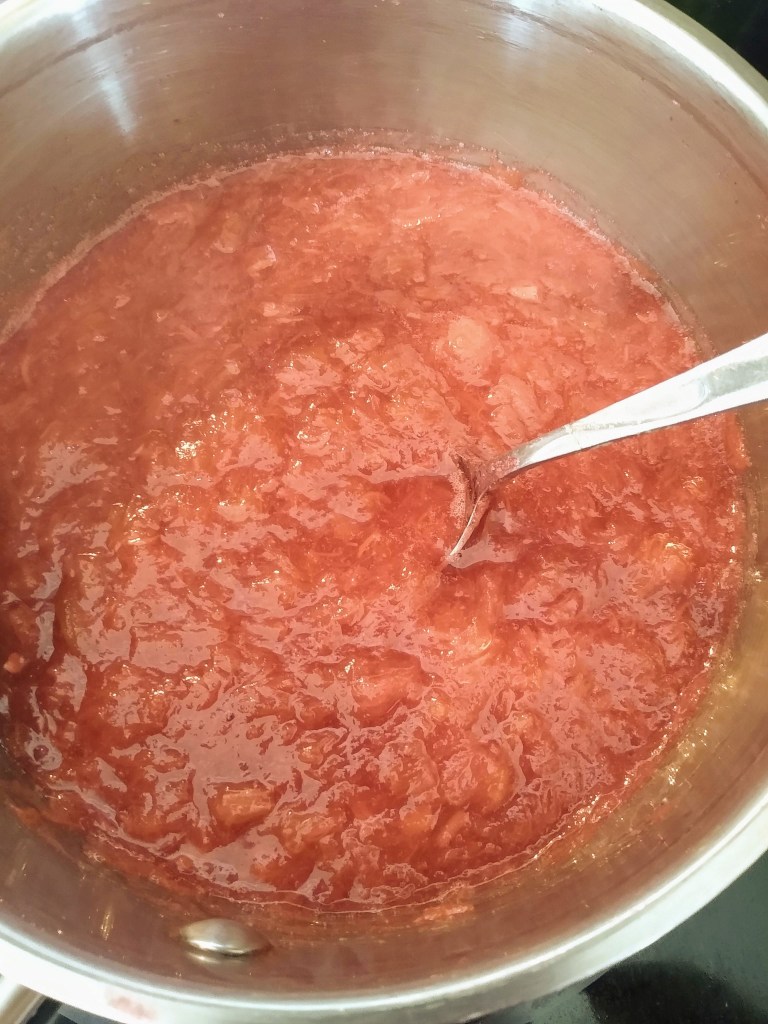
Let’s start with the sauce:
6 cups chopped rhubarb
2 Tbs. water
1/4 cup honey
1 box strawberry jello
Cook the rhubarb, water, and honey until the rhubarb is thoroughly cooked, about 10 minutes, stirring often. Stir in the packet of jello mix and cook about 5 more minutes.
Note: this makes a pretty tart sauce, even considering that Jello also has a lot of sugar. Feel free to add more sugar or honey if you like it sweeter. Some recipes use as much as a cup of sugar. What you don’t use for the rolls is excellent on ice cream or even spread on toast. It will thicken more as it cools.
For the caramel rolls, I used the dough recipe for North Dakota Caramel Rolls. You can find it here
1 pkg rapid rise active dry yeast (I buy it in bulk, so I used a Tbs.)
1/2 cup warm water
1/2 cup shortening (I never have shortening in my house, so I subbed melted butter)
1/2 cup granulated sugar
2 cups buttermilk
6 cups bread flour (I used AP)
2 tsp salt
2 tsp baking powder
1/4 tsp baking soda
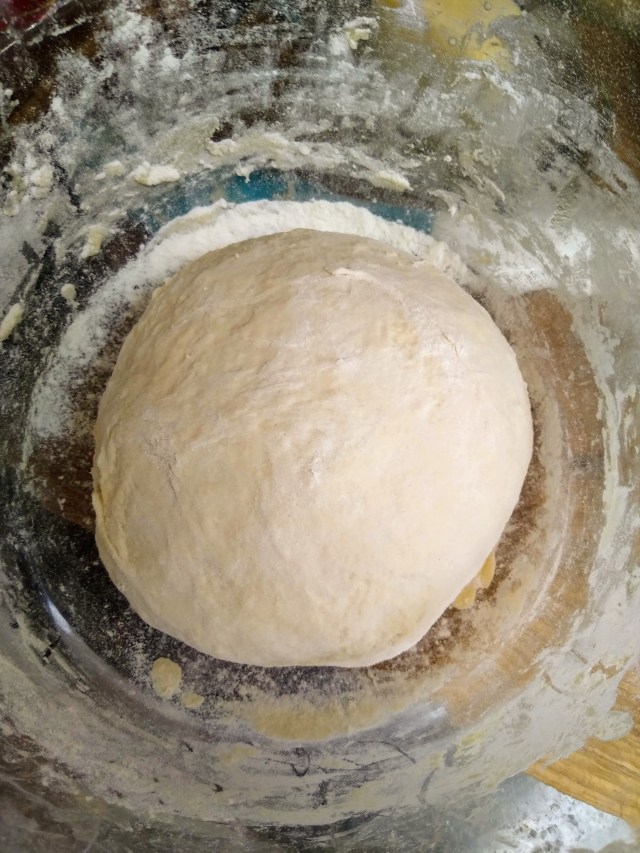
Dissolve the yeast in the warm water and let sit for about 10 minutes until foamy. Mix the dry ingredients in a separate bowl. Add the sugar, melted butter, and buttermilk to the yeast and water. Mix in half of the flour mixture thoroughly, then add the rest a cup or so at a time. Add more flour as needed until it makes a soft, but not sticky, dough. You can do the mixing by hand or using a stand mixer with dough hooks. Knead for 5-10 minutes by hand or with the mixer. Let the dough rest while you make the caramel sauce.
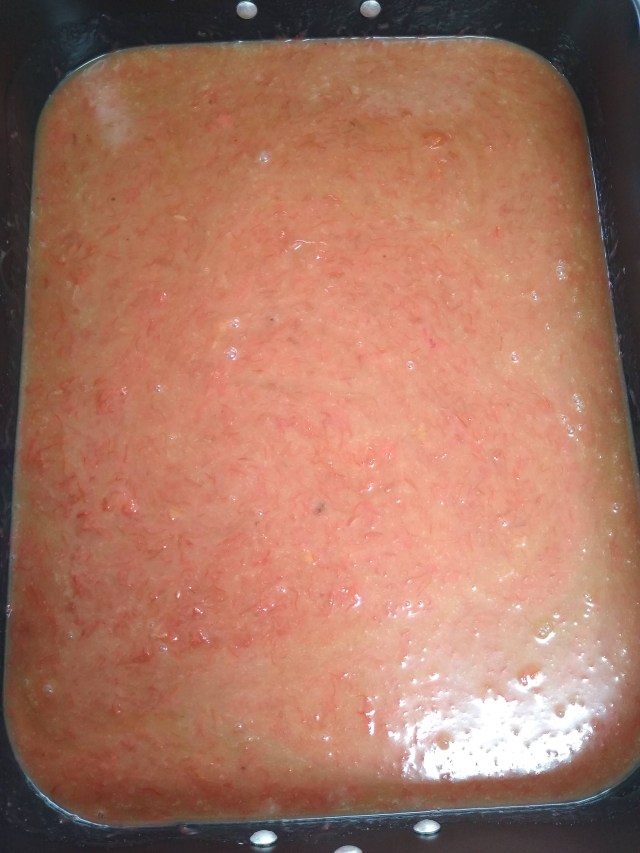
My normal caramel sauce is just a 3:2 ratio of brown sugar to cream mixed in the bottom of the pan. This time I had a quart of whey caramel in the fridge so I used it. What is whey caramel you ask? It is the delicious result of cooking down the whey that drains from making homemade Greek yogurt or cottage cheese and adding sugar and butter. Here is the recipe. It’s also a great ice cream topping.
I warmed the caramel a little to make it more pourable (I think I just made up that word), and mixed it in the bottom of a large (12 1/2 x 16 1/2 in.) roasting pan with two heaping cups of the rhubarb sauce.
Rhubarb caramel sauce
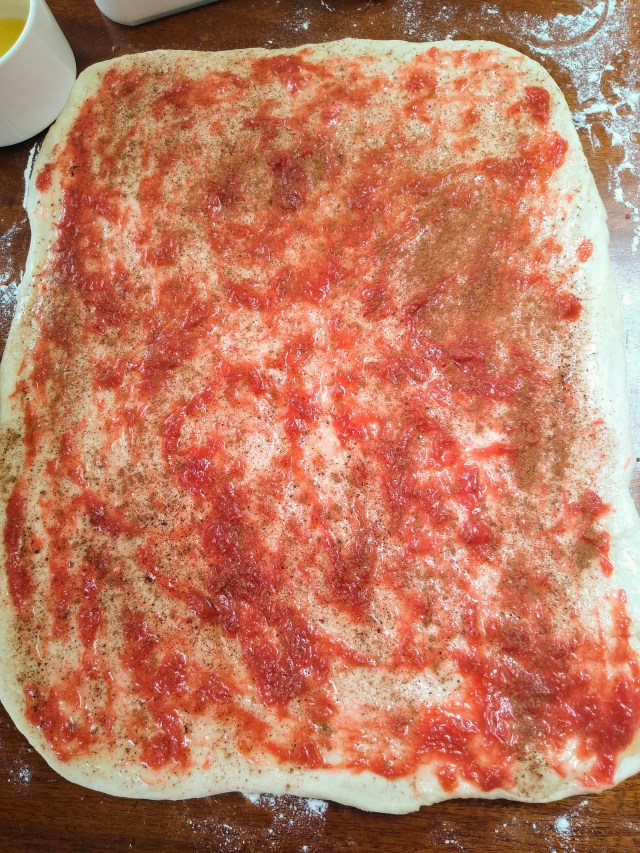
Roll out the dough into about a 12×18 rectangle, spread with melted butter, then with about a cup of the rhubarb sauce, and sprinkle with cinnamon. Note: Here is another point in the recipe you could add more sugar by sprinkling a cinnamon/sugar mixture, rather than just cinnamon.
Roll up the dough, slice into one-inch pieces and place in the rhubarb caramel sauce. Cover with a dishtowel and put somewhere warm and draft-free for up to two hours.
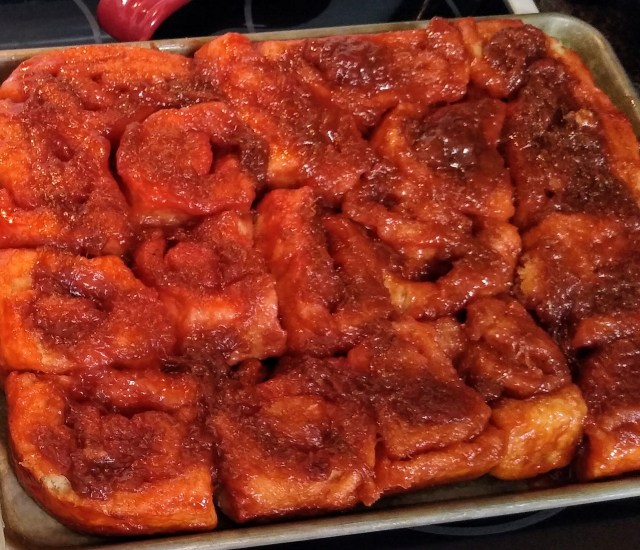
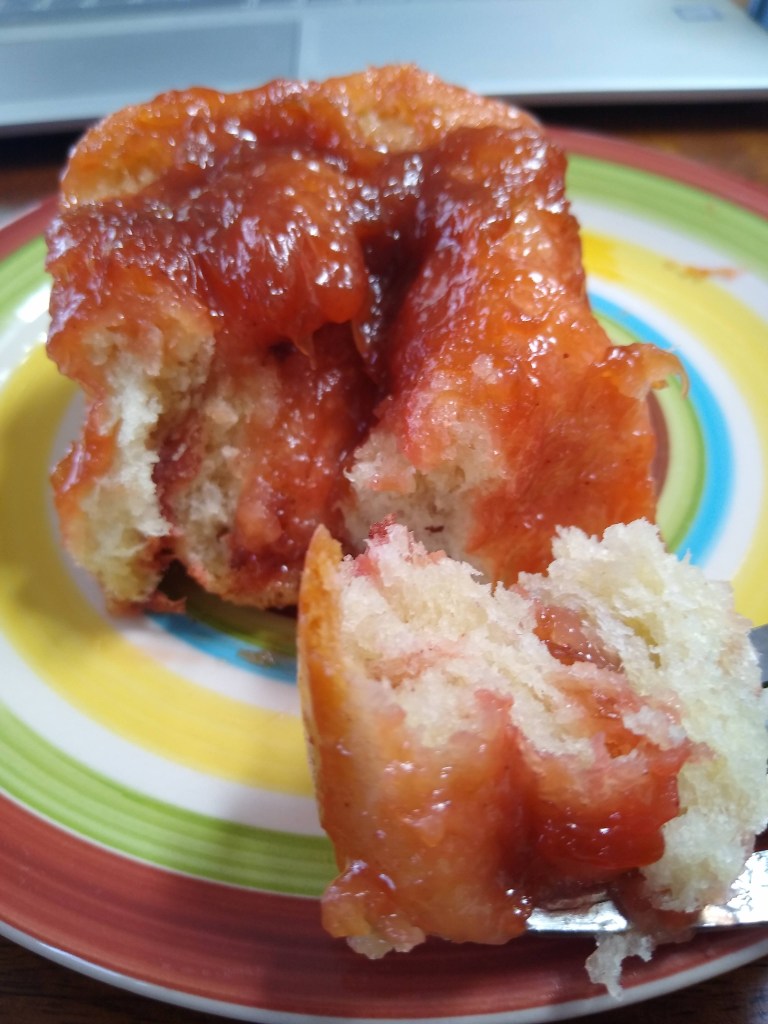
Bake at 375 for 35 minutes. Remove from the oven and carefully flip over onto a cookie sheet, scraping out all the caramel sauce and spreading on top of the rolls.
Enjoy warm from the oven!
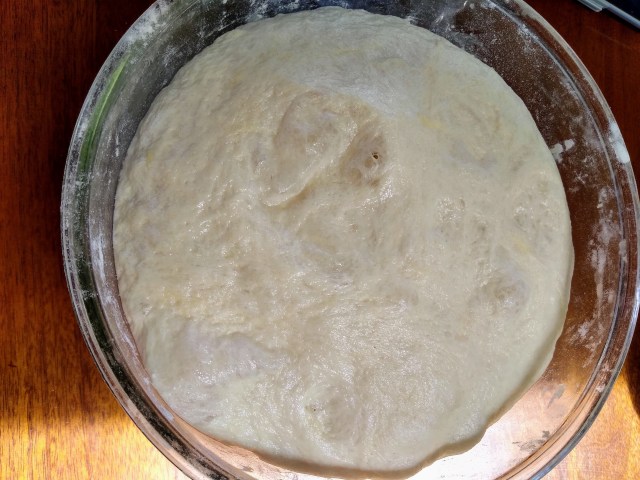
While the rolls were rising I decided to use the time productively and bake bread as well. Thanks to the pandemic, I could not find flour or yeast in stores in Arizona, even up until mid-May, unless I got up at the crack of dawn, waited in line, and did this repeatedly, hoping to get lucky (my, how the meaning of that phrase has changed!). I decided to avoid that hassle and elevated my grandma street cred by using Amazon Prime to purchase a 50 lb. bag of flour and a pound of yeast. I froze the flour in one gallon ziplock bags and brought a few of them back to ND with me, along with a pint jar of yeast. I still had a jar of yeast in the refrigerator from last summer that had expired a couple of months ago. I didn’t want to chance making bread with it, so I dissolved some of that in a bowl of water and did another bowl with my new stuff to compare. They both got nice and bubbly, so I figured I may as well bake something with the extra batch.
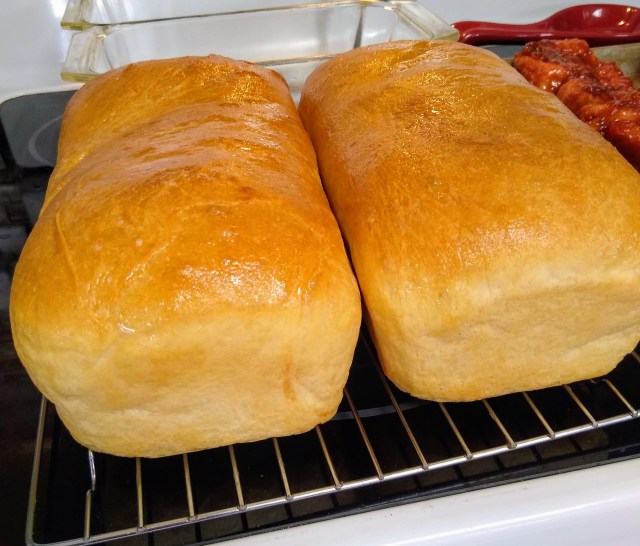
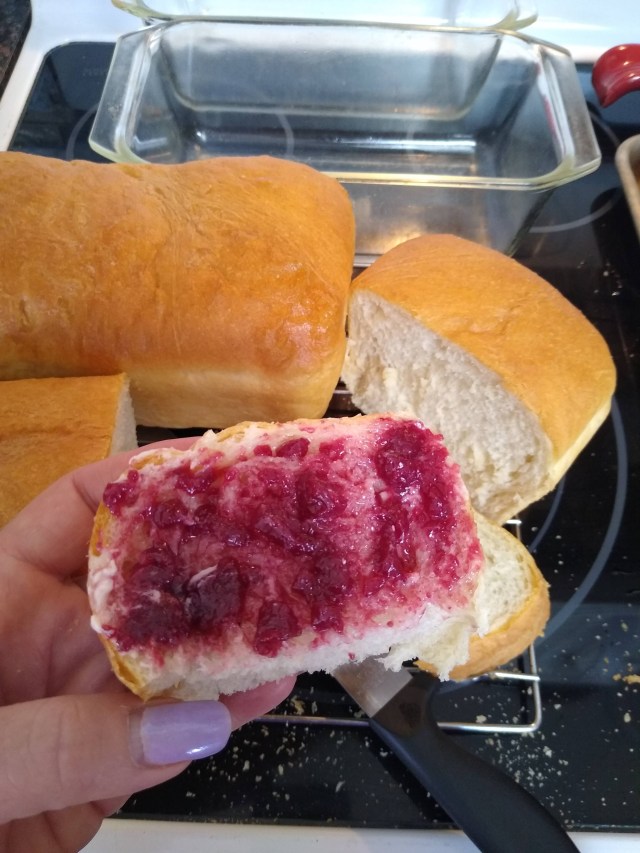
I used this recipe from Plated Cravings, and again, where it calls for 2 1/4 tsp yeast, which is a packet, I uses a Tbs. It turned out fabulous! It makes two loaves, one to devour right away with homemade chokecherry jelly and one to share or freeze. With no preservatives, this bread does not stay fresh long. If you freeze it, wrap it tightly with Saran Wrap and then put it in a ziplock freezer bag. When you thaw and warm it slightly, it will be just as good as freshly baked.
Borscht and Beet Leaf Wrapped Dumplings with Creamy Dill Sauce
Fall in ND means it’s time to harvest the last of the garden vegetables. While tomatoes are usually my bumper crop, this year it was my beets and cabbage. An unusually wet summer caused all kinds of issues with my tomatoes, so I’m thankful I still have salsa, pasta sauce, tomato basil soup, Bloody Mary mix, chili, and even ketchup canned from last year.
My cabbage heads are huge, and I think every beet seed I planted grew, so this year I need to get creative with those two vegetables. I love beets in pretty much any way, shape, or form, but if I do anything with them other than make borscht, I am eating them by myself. 🙂 Unless of course my food purist of a husband discovers a new recipe in the Green Sheet (our local farm news publication – my ND and SD friends know exactly what I’m talking about). Recipes in the Green Sheet are often brought to my attention; whereas, I could present him with the identical recipe from Pinterest and be met with skepticism.
This week his discovery was a borscht recipe which included chopped beet leaves because “they are supposed to be really good for you” (his words, not the recipe publisher). The day he wants to try a new food, ESPECIALLY beet greens, ESPECIALLY because it is good for him, is the day I get to cooking IMMEDIATELY – before he can change his mind.
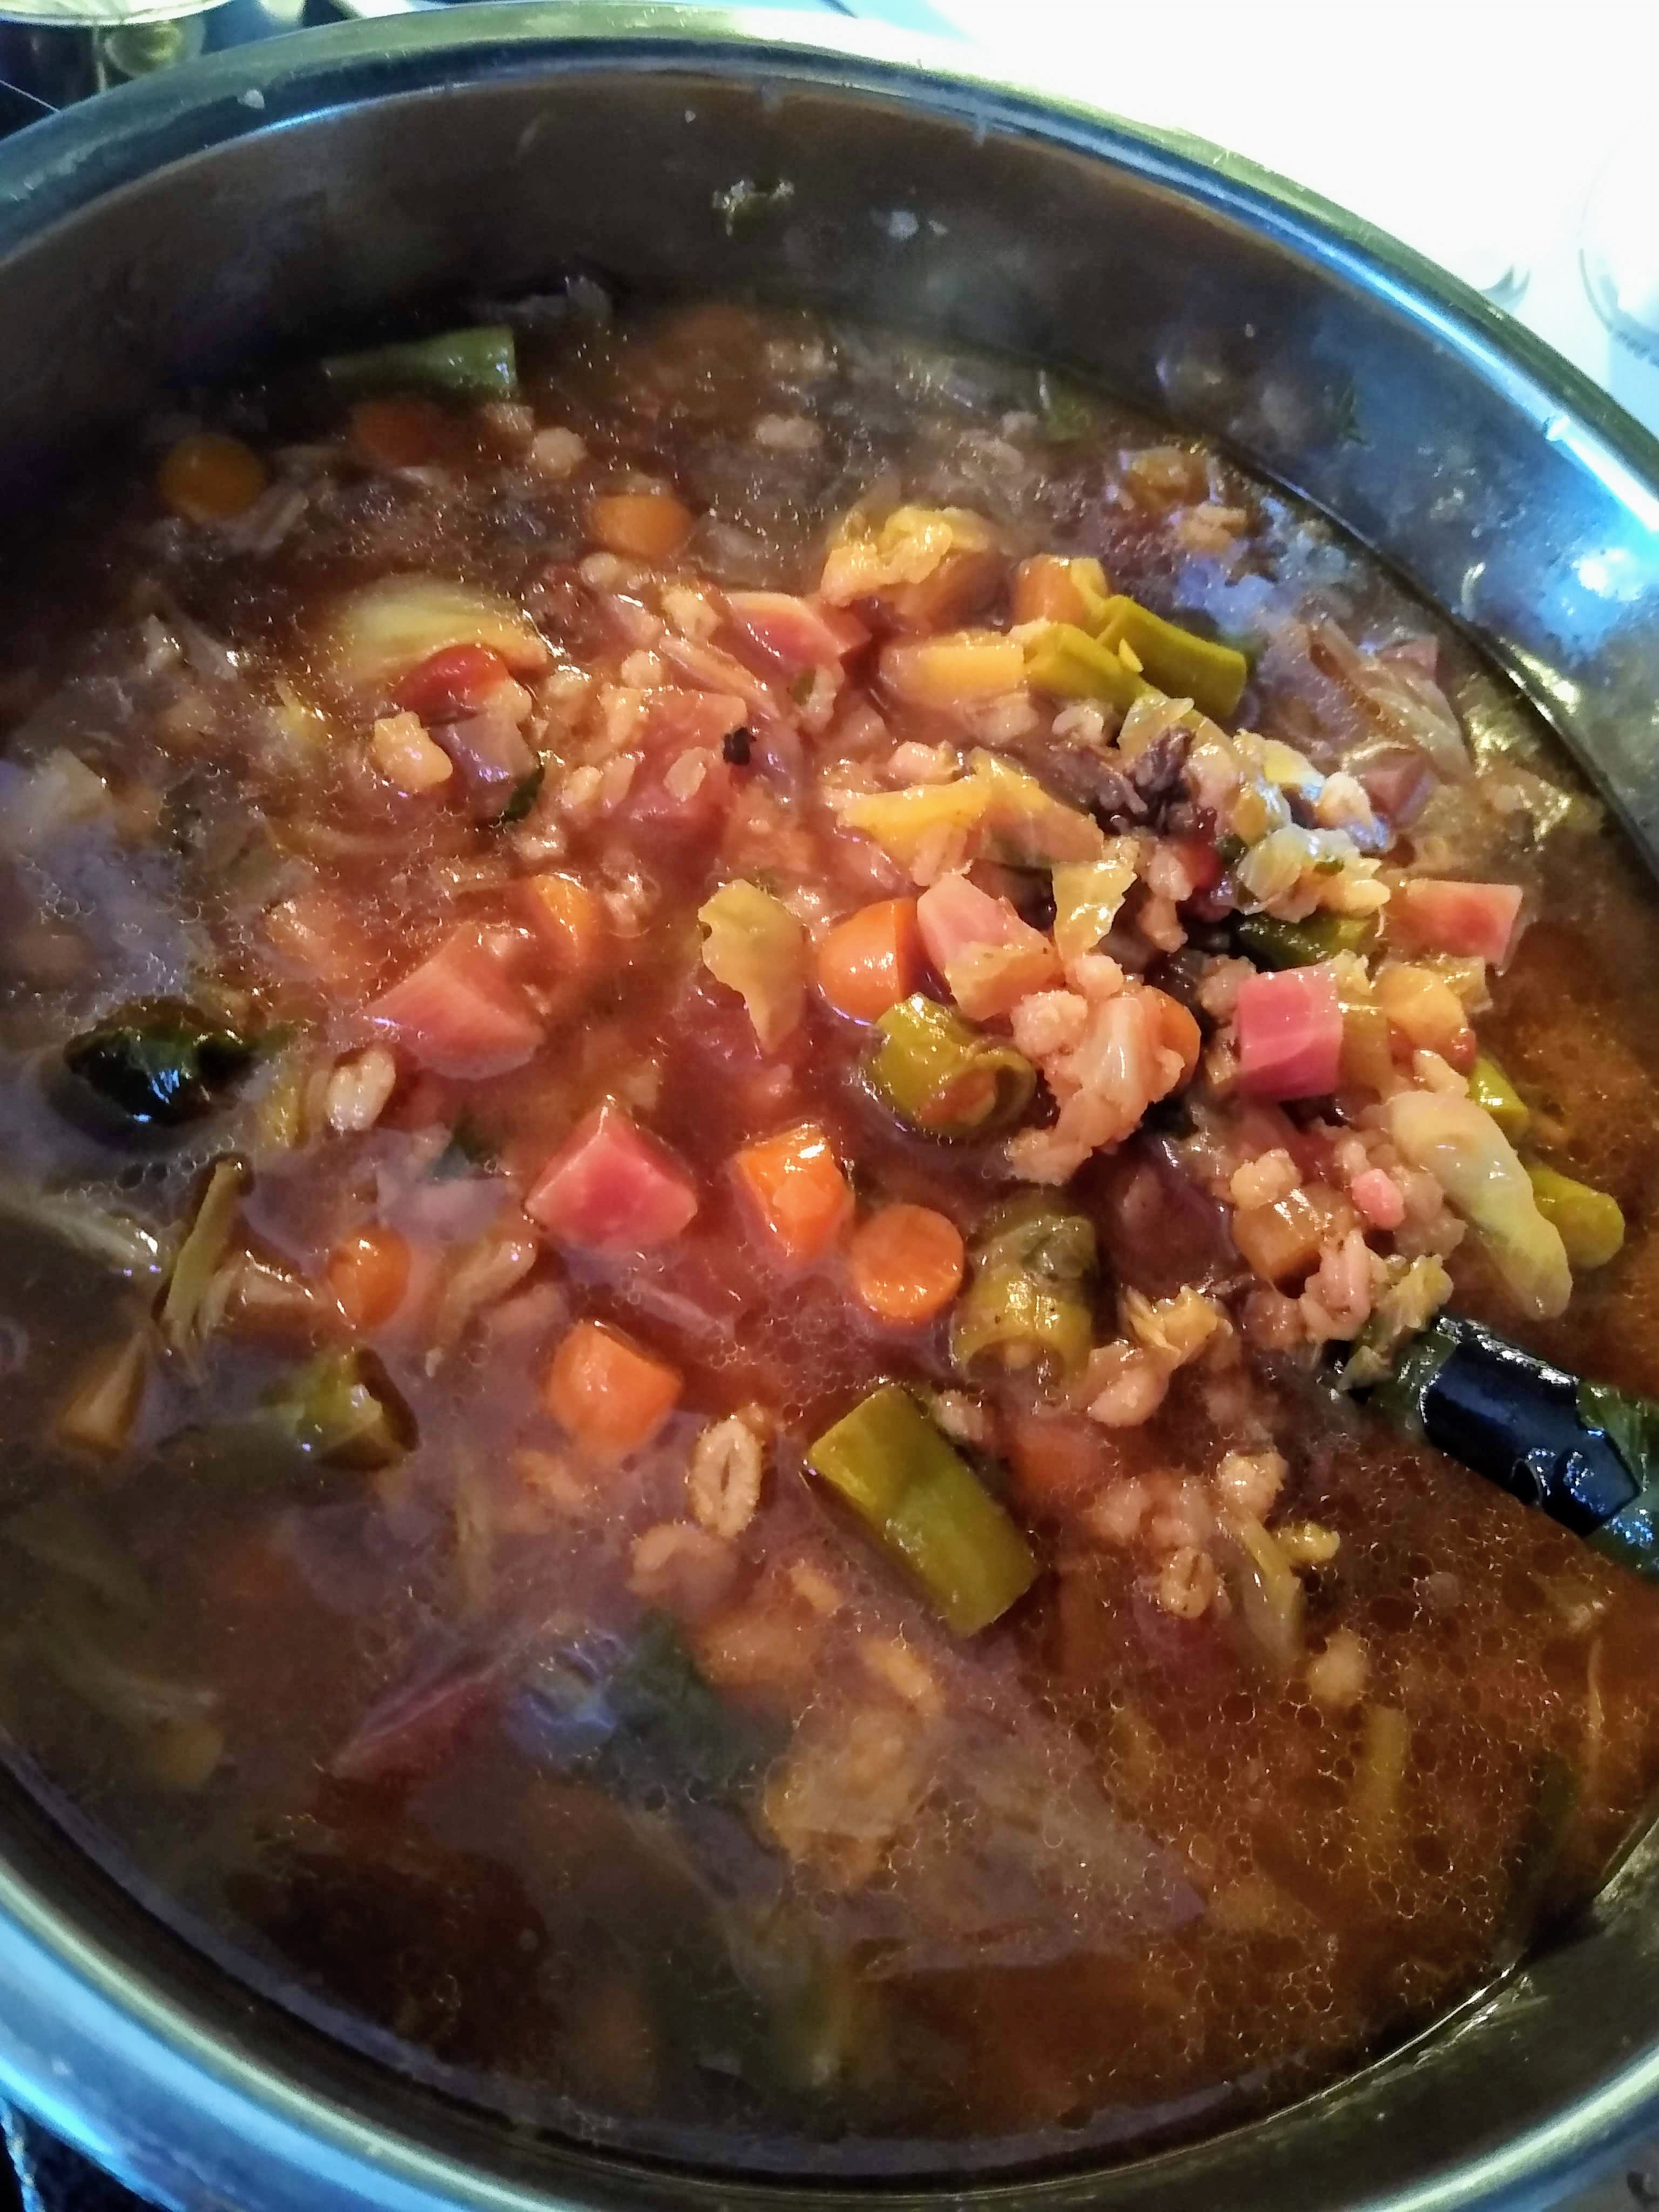
Everyone has a different borscht recipe, but if they are true to Russian/Ukranian tradition they pretty much all contain beets and cabbage, potatoes, and beef. I used my normal recipe rather than the one from the Green Sheet and then added chopped beet greens. Here it is – modernized to be made in an Instant Pot because that is where I make all my soups. It’s so much faster. Note: Measurements are approximate – I don’t measure. I eyeball it.
Beef soup bone or short ribs
1 can diced tomatoes
1 large chopped onion
2 cups chopped celery
1 cup barley
soup ball or tea ball with 1 Tbs. pickling spice, 3 bay leaves, and 3 crushed cloves of garlic
1 Tbs pepper
1/4 c salt
Put these ingredients with enough water to cover in the instant pot and set for 45 minutes. At the end of the time let the pressure release on its own for 10 minutes or so and then quick release if you want. Pull the meat out and let it cool a bit while you add the veggies. Then chop it up and throw it back in the soup. For the veggies:
3-4 large chopped carrots
2-3 cups chopped green beans
2-3 cups chopped beets
2-3 cups chopped beet greens
4 cups chopped cabbage
2 large diced potatoes
a small handful of finely chopped fresh dill weed
You will need to add some more liquid as well, so either add a couple of cups of chicken broth or water. If you use water, add a heaping spoon full of chicken bullion – the paste-like kind that comes in a jar. Don’t go past the max fill line in the instant pot. You can always add more liquid later if it’s too thick. You should definitely be using an 8-qt. pot. Set the Instant Pot for another 10 minutes. Slow release for a bit and then quick release. Dinner is served! We add a dash of cream when serving.
Note: If you are making this in a traditional stock pot, cook the first stage until the meat is soft and the second stage until the veggies are done.
Note: We both liked the addition of the chopped beet greens. With all the veggie flavors already in the soup, it didn’t change the flavor much, but I would say it added a little depth to it.
Beets Part 2
When the hubby mentioned beet leaves, I remembered seeing a recipe in a Facebook group about dumplings wrapped in beet leaves. I thought it would be the perfect accompaniment for borscht. I checked Pinterest and found this recipe for Ukrainian Beet Leaf Rolls with Creamy Dill Sauce
A little explanation of the “Ukrainian by Osmosis” title: I was raised with Germans from Russia food traditions. This means that my ancestors were German, but their migration to the US was by way of about a 100 year stay in the part of Russia that is now the Ukraine. Borscht is also very much a Russian/Ukranian tradition.
Almost every culture has some type of dumpling – dough of some type, sometimes stuffed, basically cooked by steaming. In German (at least the South Central ND dialect I learned to speak growing up) they are called Dampfnoodla which literally means “steam noodles.” The dumplings in this recipe are baked in the oven, but steamed in a sense by the moisture of their beet leaf wrapping and the fact that they are covered tightly while baking, keeping the steam in. The next time I make these, I will also add some water to the bottom of the pan, as I thought these could have been a little more moist.
Because of the time frame I was working with that day, I used my own dough recipe and modified it to include the eggs but skip a step in the dough rising process compared to the above recipe. I mixed the dough in one step, let it rise an hour, punched it down and added flour as needed so I could work with it, formed and wrapped the dumplings, let them rise a second time, and then baked them.
My dough recipe:
1 Tbsp. dry yeast
1 1/2 c. warm water
1 Tbs. sugar
2 tsp salt
2 room-temperature eggs beaten
1 Tbs. melted butter
3 c. flour
Mix the yeast, sugar, and water and let set for about 10 minutes until bubbly. Mix in the rest of the ingredients. The flour measurement is approximate. Add and mix a cup at a time for the first two cups and then less at a time until it forms a soft dough that holds together. I use my stand mixer with the dough hooks. Some people mix with a spoon and then by hand. Do what works for you. Cover the bowl with a damp towel and put somewhere warm for about an hour until doubled in size. In cool weather I preheat the oven to about 125, then turn it off and put the dough in. In AZ I can just set it on my outdoor island for a good part of the year.
It definitely more than doubled in size!
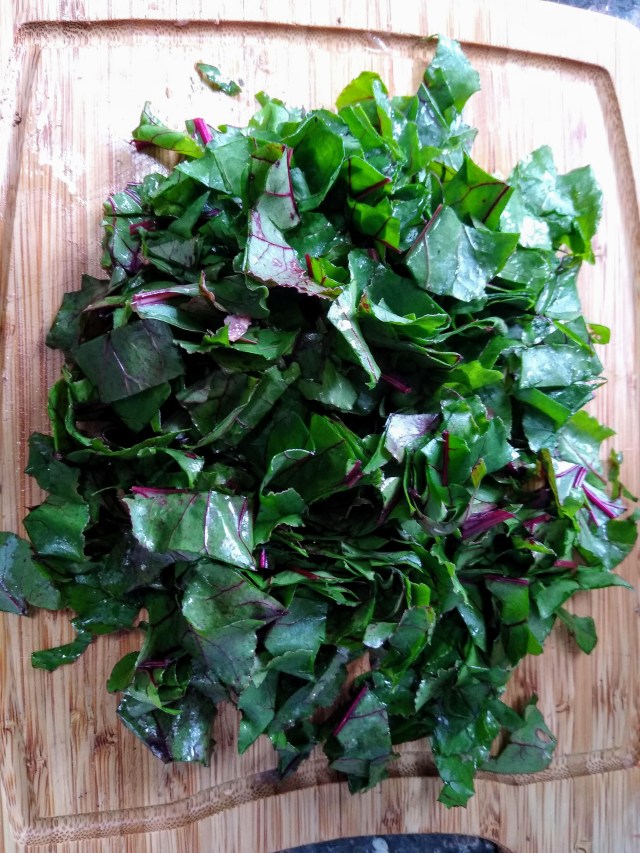
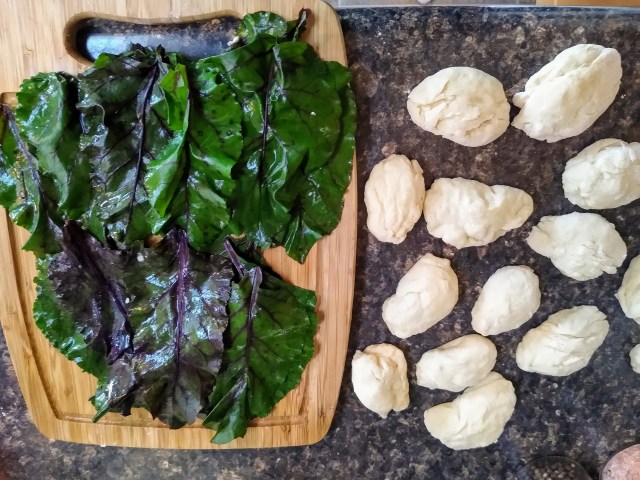
While the dough is rising I prep and blanch the beet leaves. I wash them and cut the stems off and then dip them in boiling water for about 30 seconds, and then plunge into ice water. Drain them and lay them out to get ready for the dumplings.
Blanching the beet leaves
When the dough has doubled in size, punch it down and knead it for a minute or so, adding flour to prevent it from sticking to your hands. Separate into 24 pieces, a bit bigger than a golf ball and roll into an oval shape. Roll them loosely inside the beet leaves. Remember, they need some room to rise.
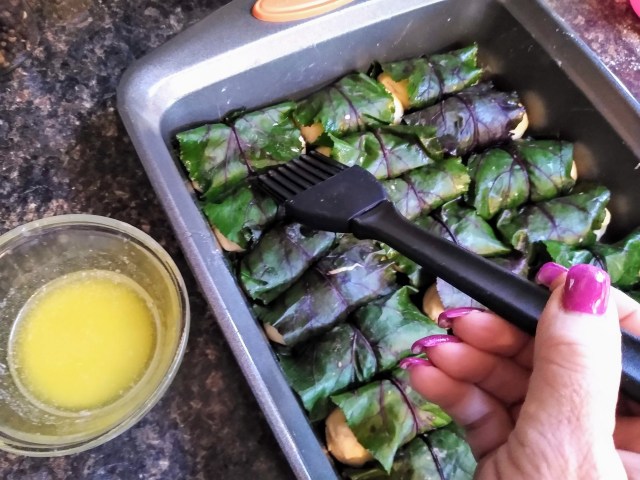
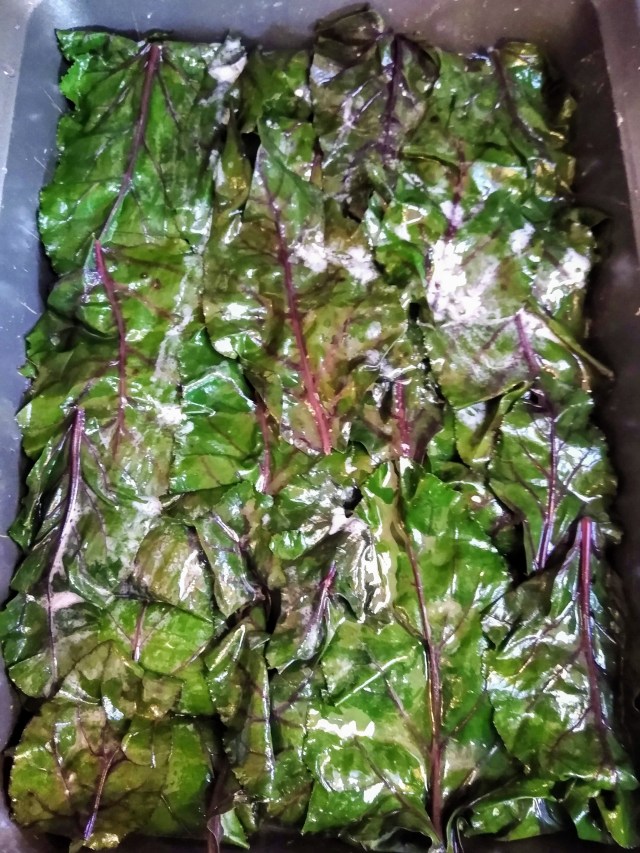
Melt a couple of Tbs butter in the pan while you’re preheating the oven for the second rising. Place a layer of leaves in the bottom of the pan and lay the wrapped dumplings on top. Leave some room in between. (I should have left more). Brush them with melted butter, add another layer of leaves and more melted butter. This last layer can also be added after rising and before baking. Cover with the damp towel and put back in the warm place for about an hour to rise again.
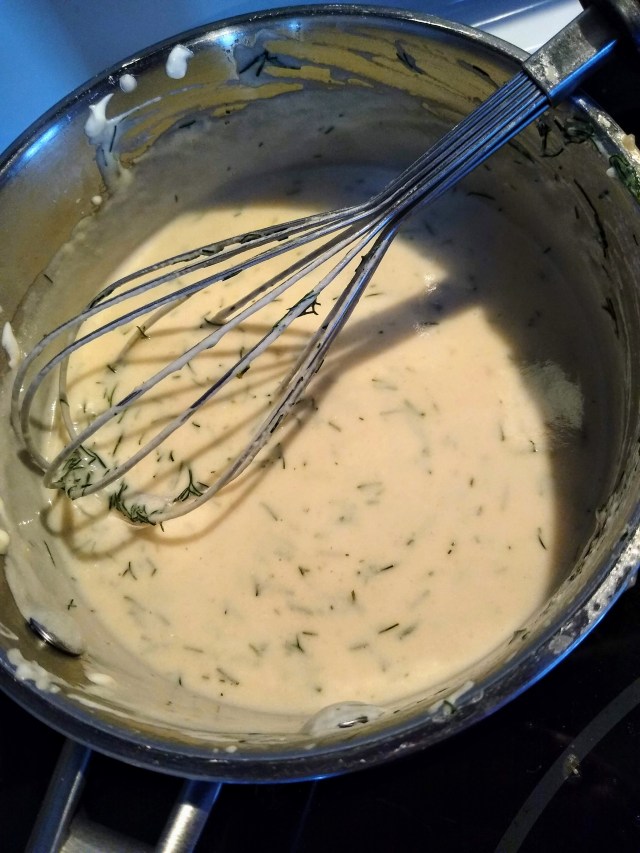
Remove the pan from the oven and preheat it to 350. Cover the pan tightly with foil and bake for 45 minutes. While they are baking, make the dill sauce. Make a roux with 2 Tbs. each butter and flour. Slowly add 1 c. chicken broth while whisking. Bring to simmering. Put the 3/4 c sour cream in a bowl and temper it with a little bit of the broth. Add it back into the thickened broth, turn the heat to low and stir in 3 Tbs. chopped fresh dill weed and salt and pepper to taste. Keep warm until serving.
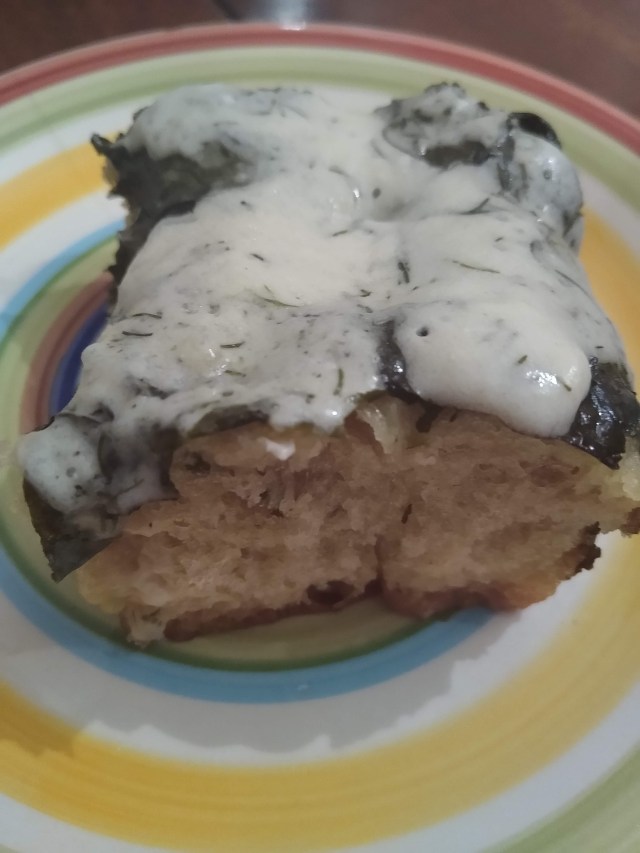
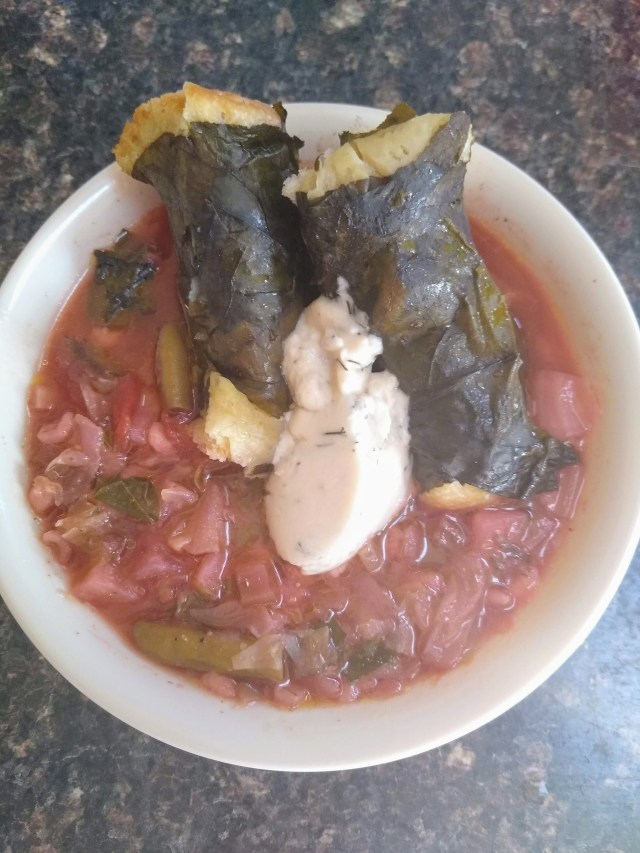
You can have just the dumplings with the dill sauce, or add a dollop of the dill sauce to your borscht and then eat the dumplings like you would a crusty bread with soup. Either way is delicious!
You can’t go wrong with borscht, sour cream, dill, and bread!
Cabbage Part 2: Sauerkraut
So, the borscht used up one small head of cabbage. What do I do with the other ones? I freeze a few whole, wrapped in saran wrap and then foil. When I want to make pigs in the blanket (hamburger-rice dressing wrapped in cabbage leaves, and baked in a tomato sauce), I take it out to thaw and the leaves are nice and soft without the mess of boiling the cabbage. That still leaves me with three heads to ferment for sauerkraut.
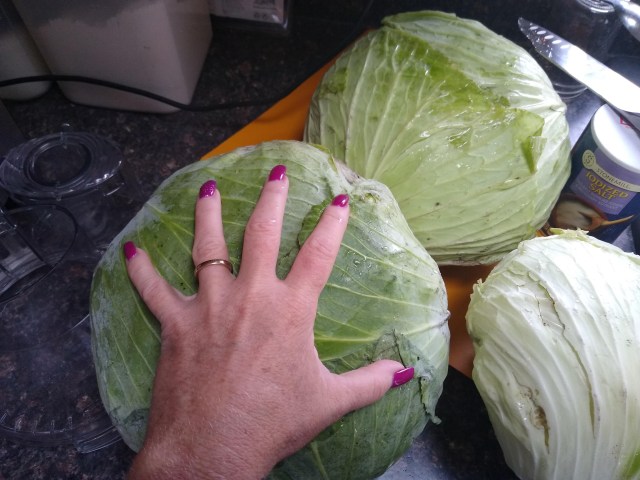
I do not have small hands. These heads are huge!
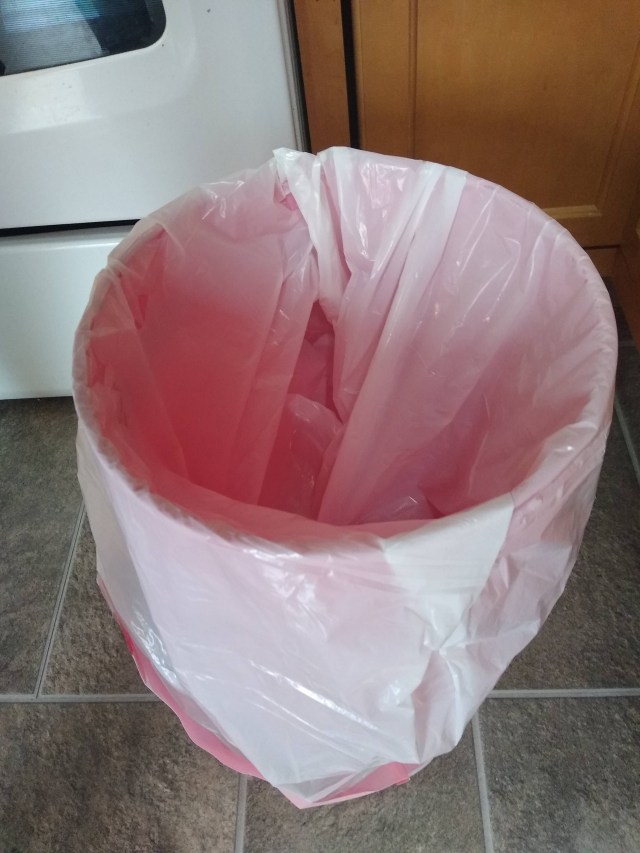
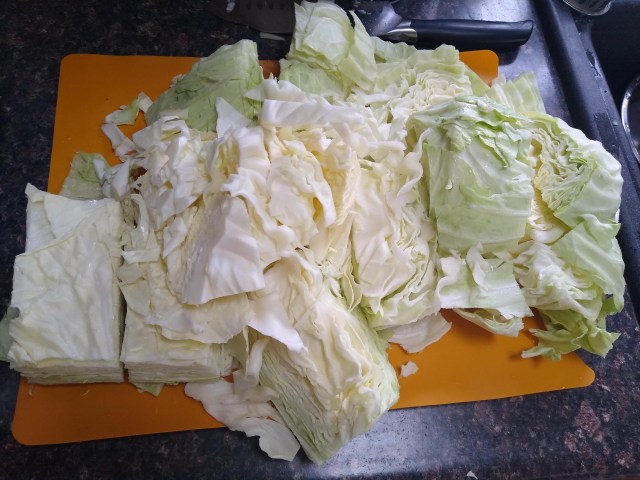
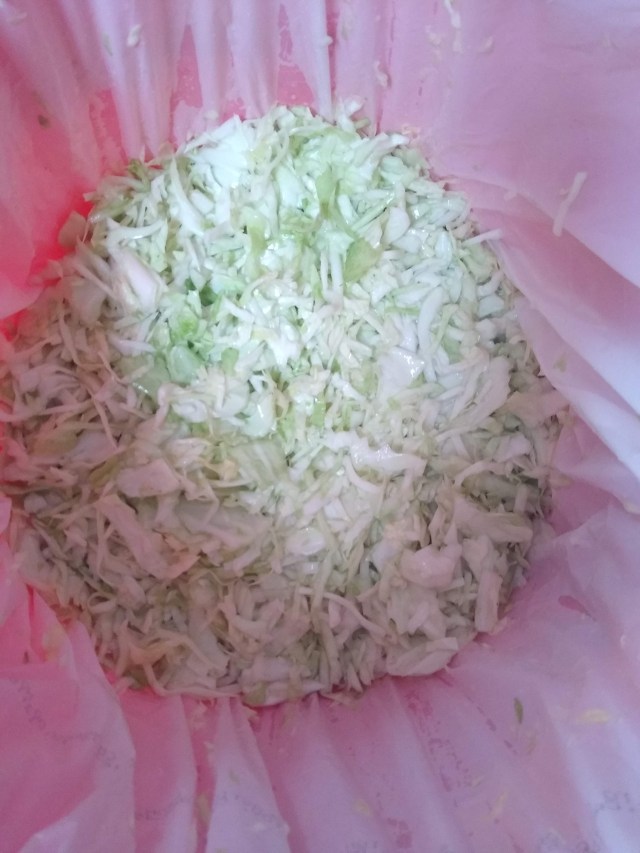
Sauerkraut is so good and good for you. It has all the helpful bacteria for gut health – which gets killed when canning it. Homemade sauerkraut is so much better than store-bought and it is literally 2 ingredients – cabbage and salt. You can let it ferment in a jar or a crock or a food-safe plastic bucket. I use a plastic bucket lined with a plastic garbage bag. Make sure it is unscented! I use the slicing blade on my food processor because the shredding blade makes it too fine. I use 1/4 cup of salt to a head of cabbage. Shred one head of cabbage and put it in the bucket, add the salt, knead it in by hand until you can feel it start to release the juices and repeat with other heads. That’s it!
The only thing you have to do now is weight it down to keep it in its own juices and have patience. I used a plate with weights in a gallon bag. The key is for it to be able to breathe, so you can’t cover it with an airtight lid. I just cover with a dishtowel. Put it somewhere where the temp will hold steady within 5 degrees of 70 and it won’t be disturbed for at least three and up to six weeks. If you lift the dish towel and peek in between and see a little mold or scum on top, just scoop it off. When it’s done fermenting, you can put it in jars in the fridge for at least 6 months and possible longer. If you want to keep it longer than 6 months, I would recommend canning it. It will taste just as good and still be healthy, but won’t have the gut-healthy bacteria because the heat of cooking will kill it. Water bath can for 30 minutes for raw-pack quart jars.
Enjoy! Let me know how these recipes work out for you or if you have questions!
Yesterday was probably one of the most enjoyable Labor Day Weekend Sundays I can remember – and it did not involve a lake or river, packing a cooler or camping. It also came together the way it did quite by accident.
I was sitting on my patio Saturday morning, kinda feeling sorry for myself because I wanted to be back home in North Dakota with my family and friends, going to a local Woodstock party and a hometown wedding and likely the river. I scrolled through my phone looking for something to do here in AZ. I know you’ll be shocked, but I googled “wine tasting nearby.” 🙂
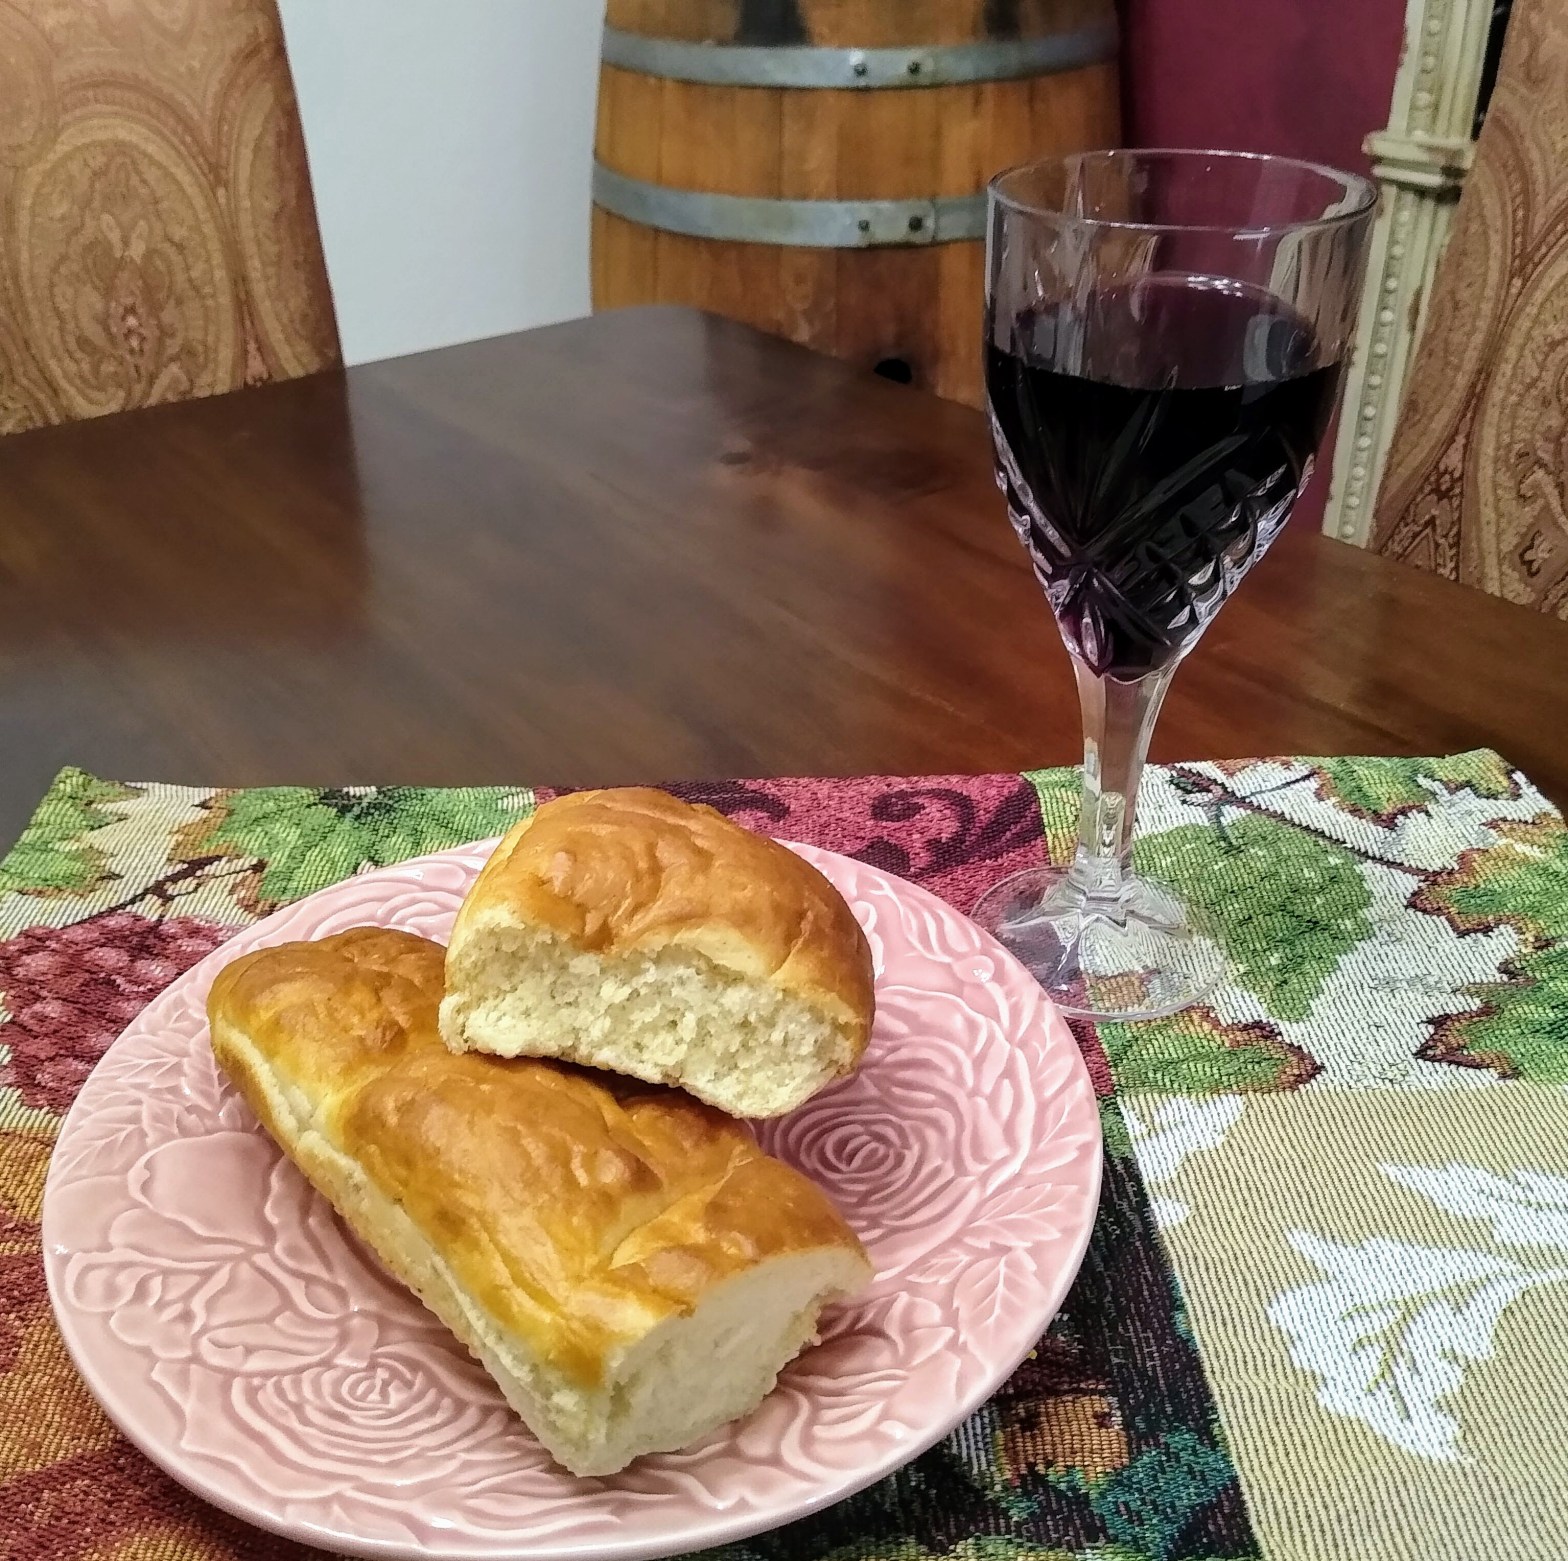
One of the events that came up was a wine tasting/bread making class. My pity party ended then and there. Bread and wine is pretty much a meal for me, and good, fresh homemade bread is unmatched in smell, taste, and texture. Unfortunately, bread making is the weak spot in my culinary skill set. My bread always ends up heavier, more dense than I’d like it to. The class description promised that I would learn to make bread with basic ingredients and no equipment other than a plastic bowl and a fork. I hit PayPal and plunked down my $50 for that afternoon’s 3-hour session.
Shortly after that I received a text message about some technical difficulties in their kitchen and that they would have to cancel the class. 😦 I could either come on Sunday, when they were conducting a vegan food prep/wine tasting, during which I would still be taught to make bread, come back in two weeks for the next bread-making session, or get a refund. Since I had the weekend to myself, and I love trying any kind of new food, I decided to come on Sunday. It was a great decision!
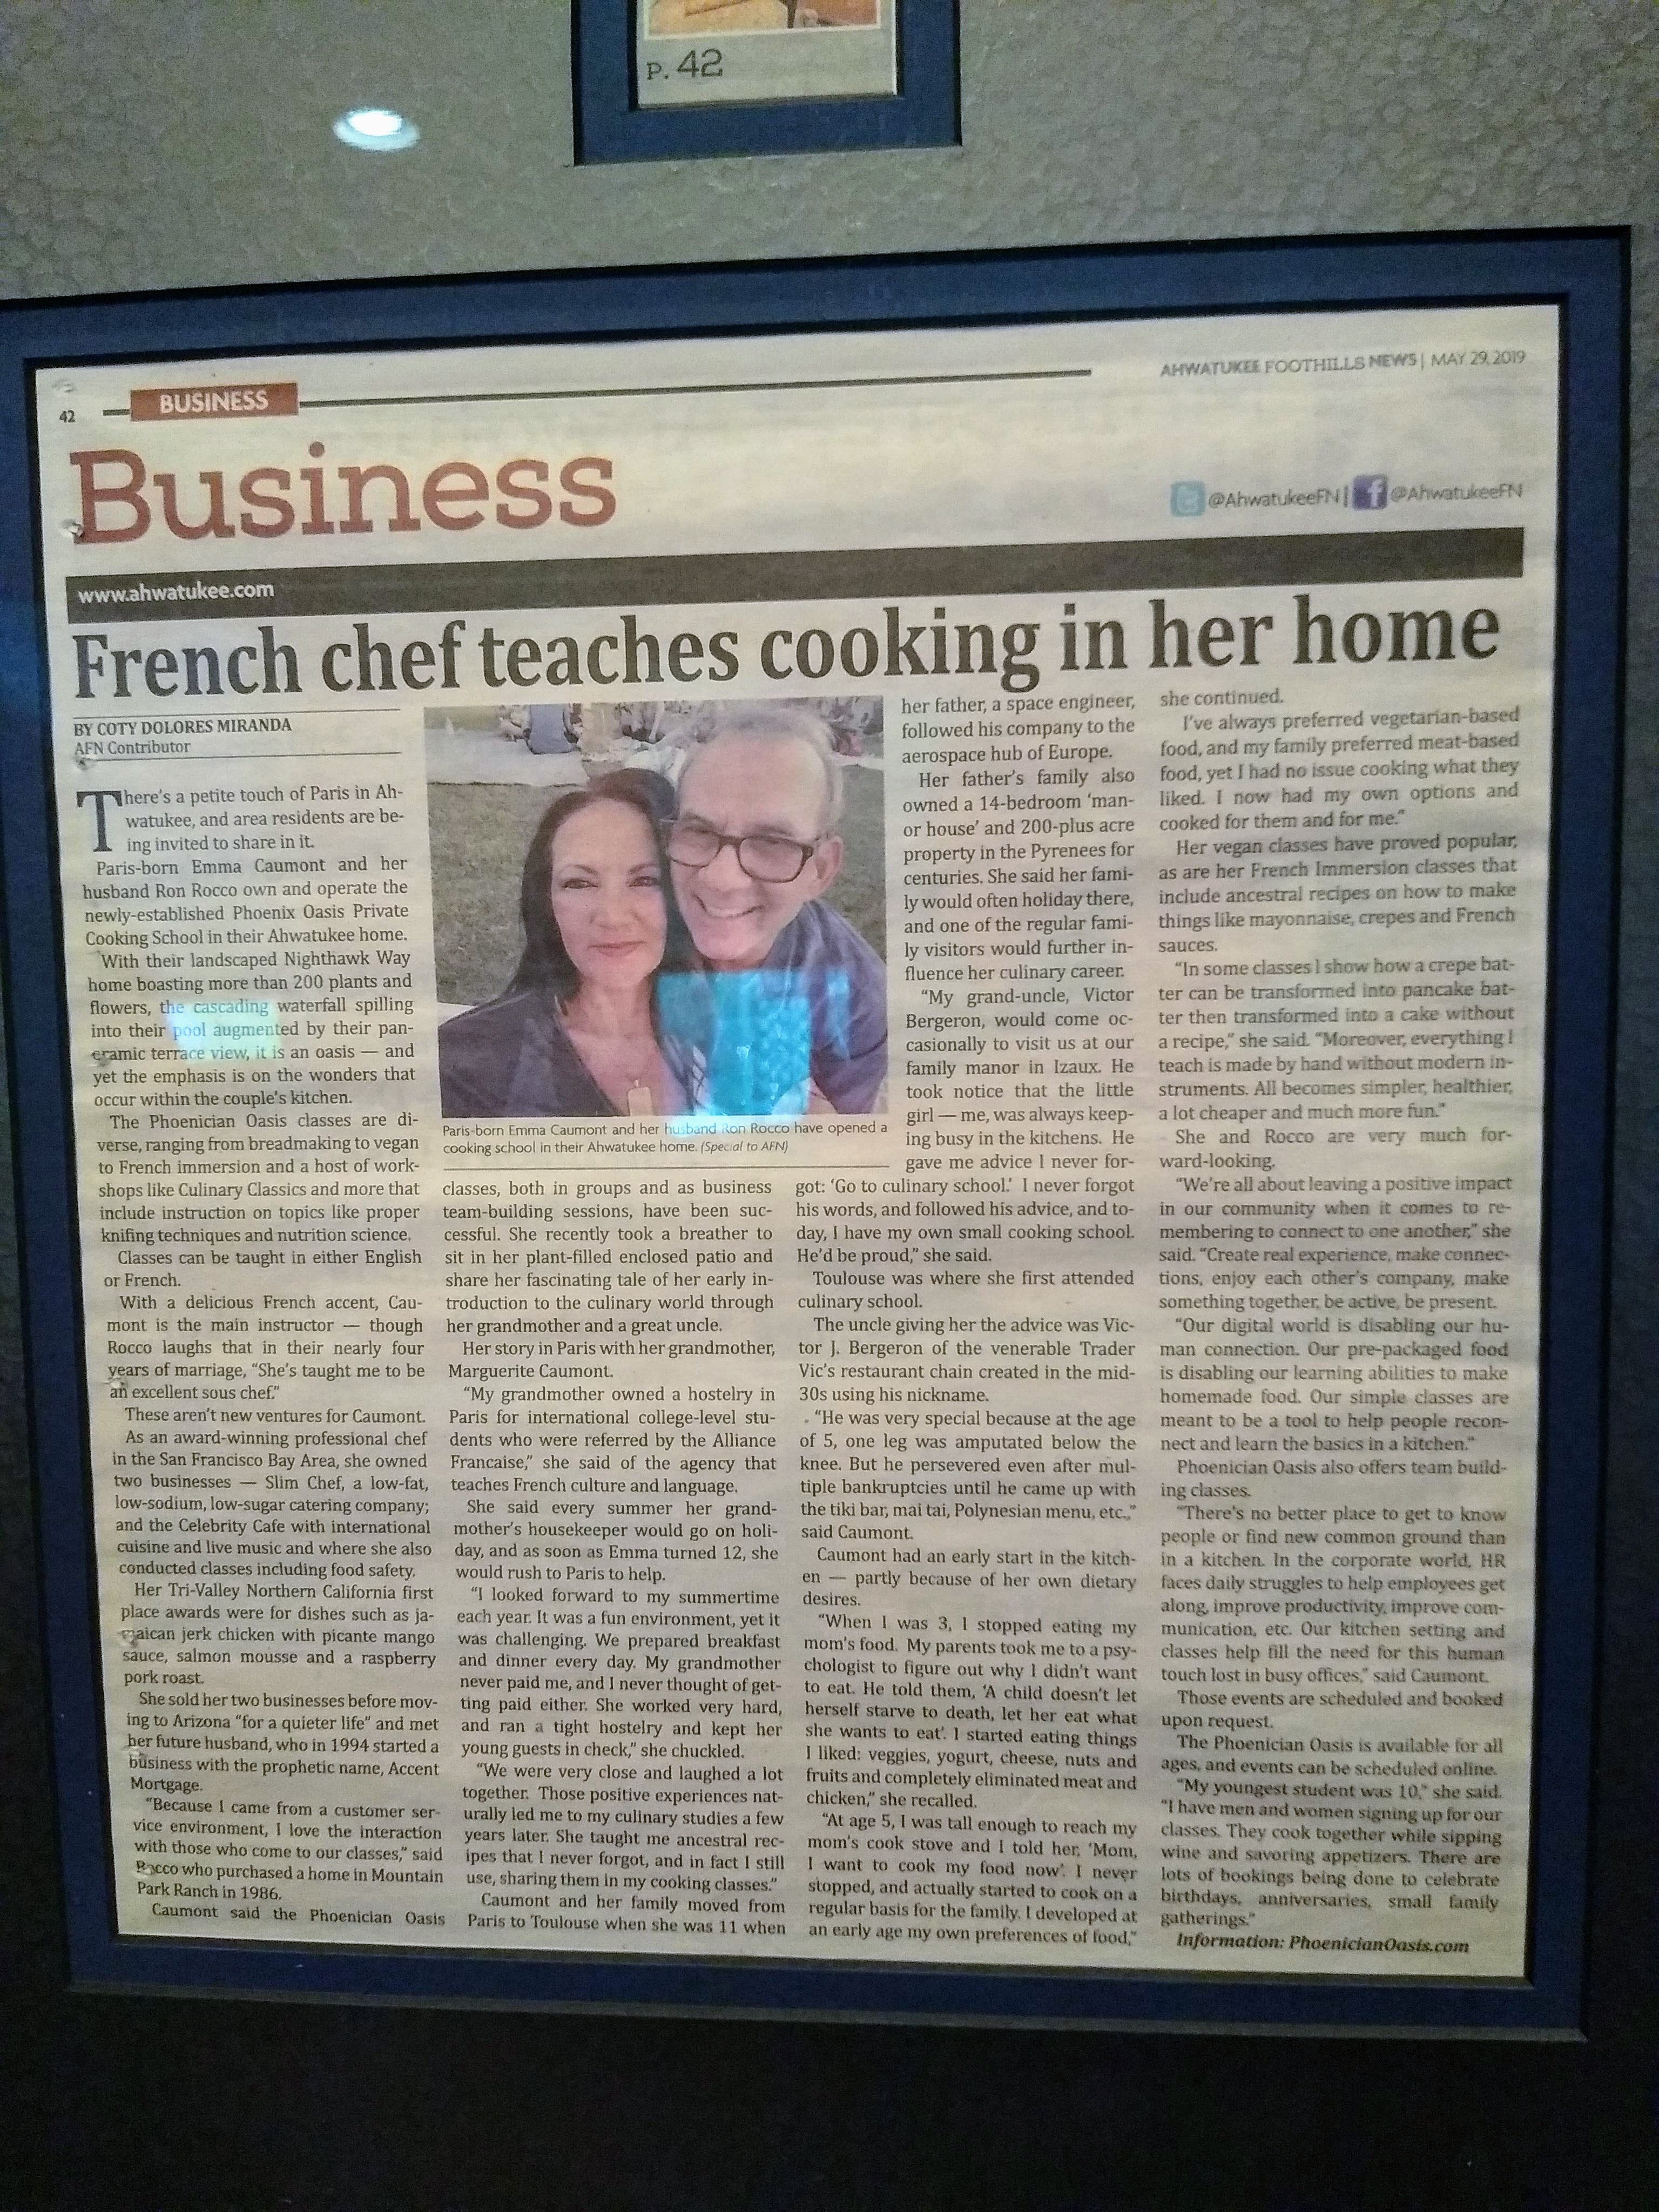
Emma, a French chef and cookbook author, and her husband Ron conduct these cooking classes in their home kitchen for groups of eight people. They are so friendly and welcoming that by the end of the day everyone exchanges hugs and feels like they’ve made new friends. They greet you with “Red, white, or rosé?” These are my kind of people!
The article about them and their business from a local paper.
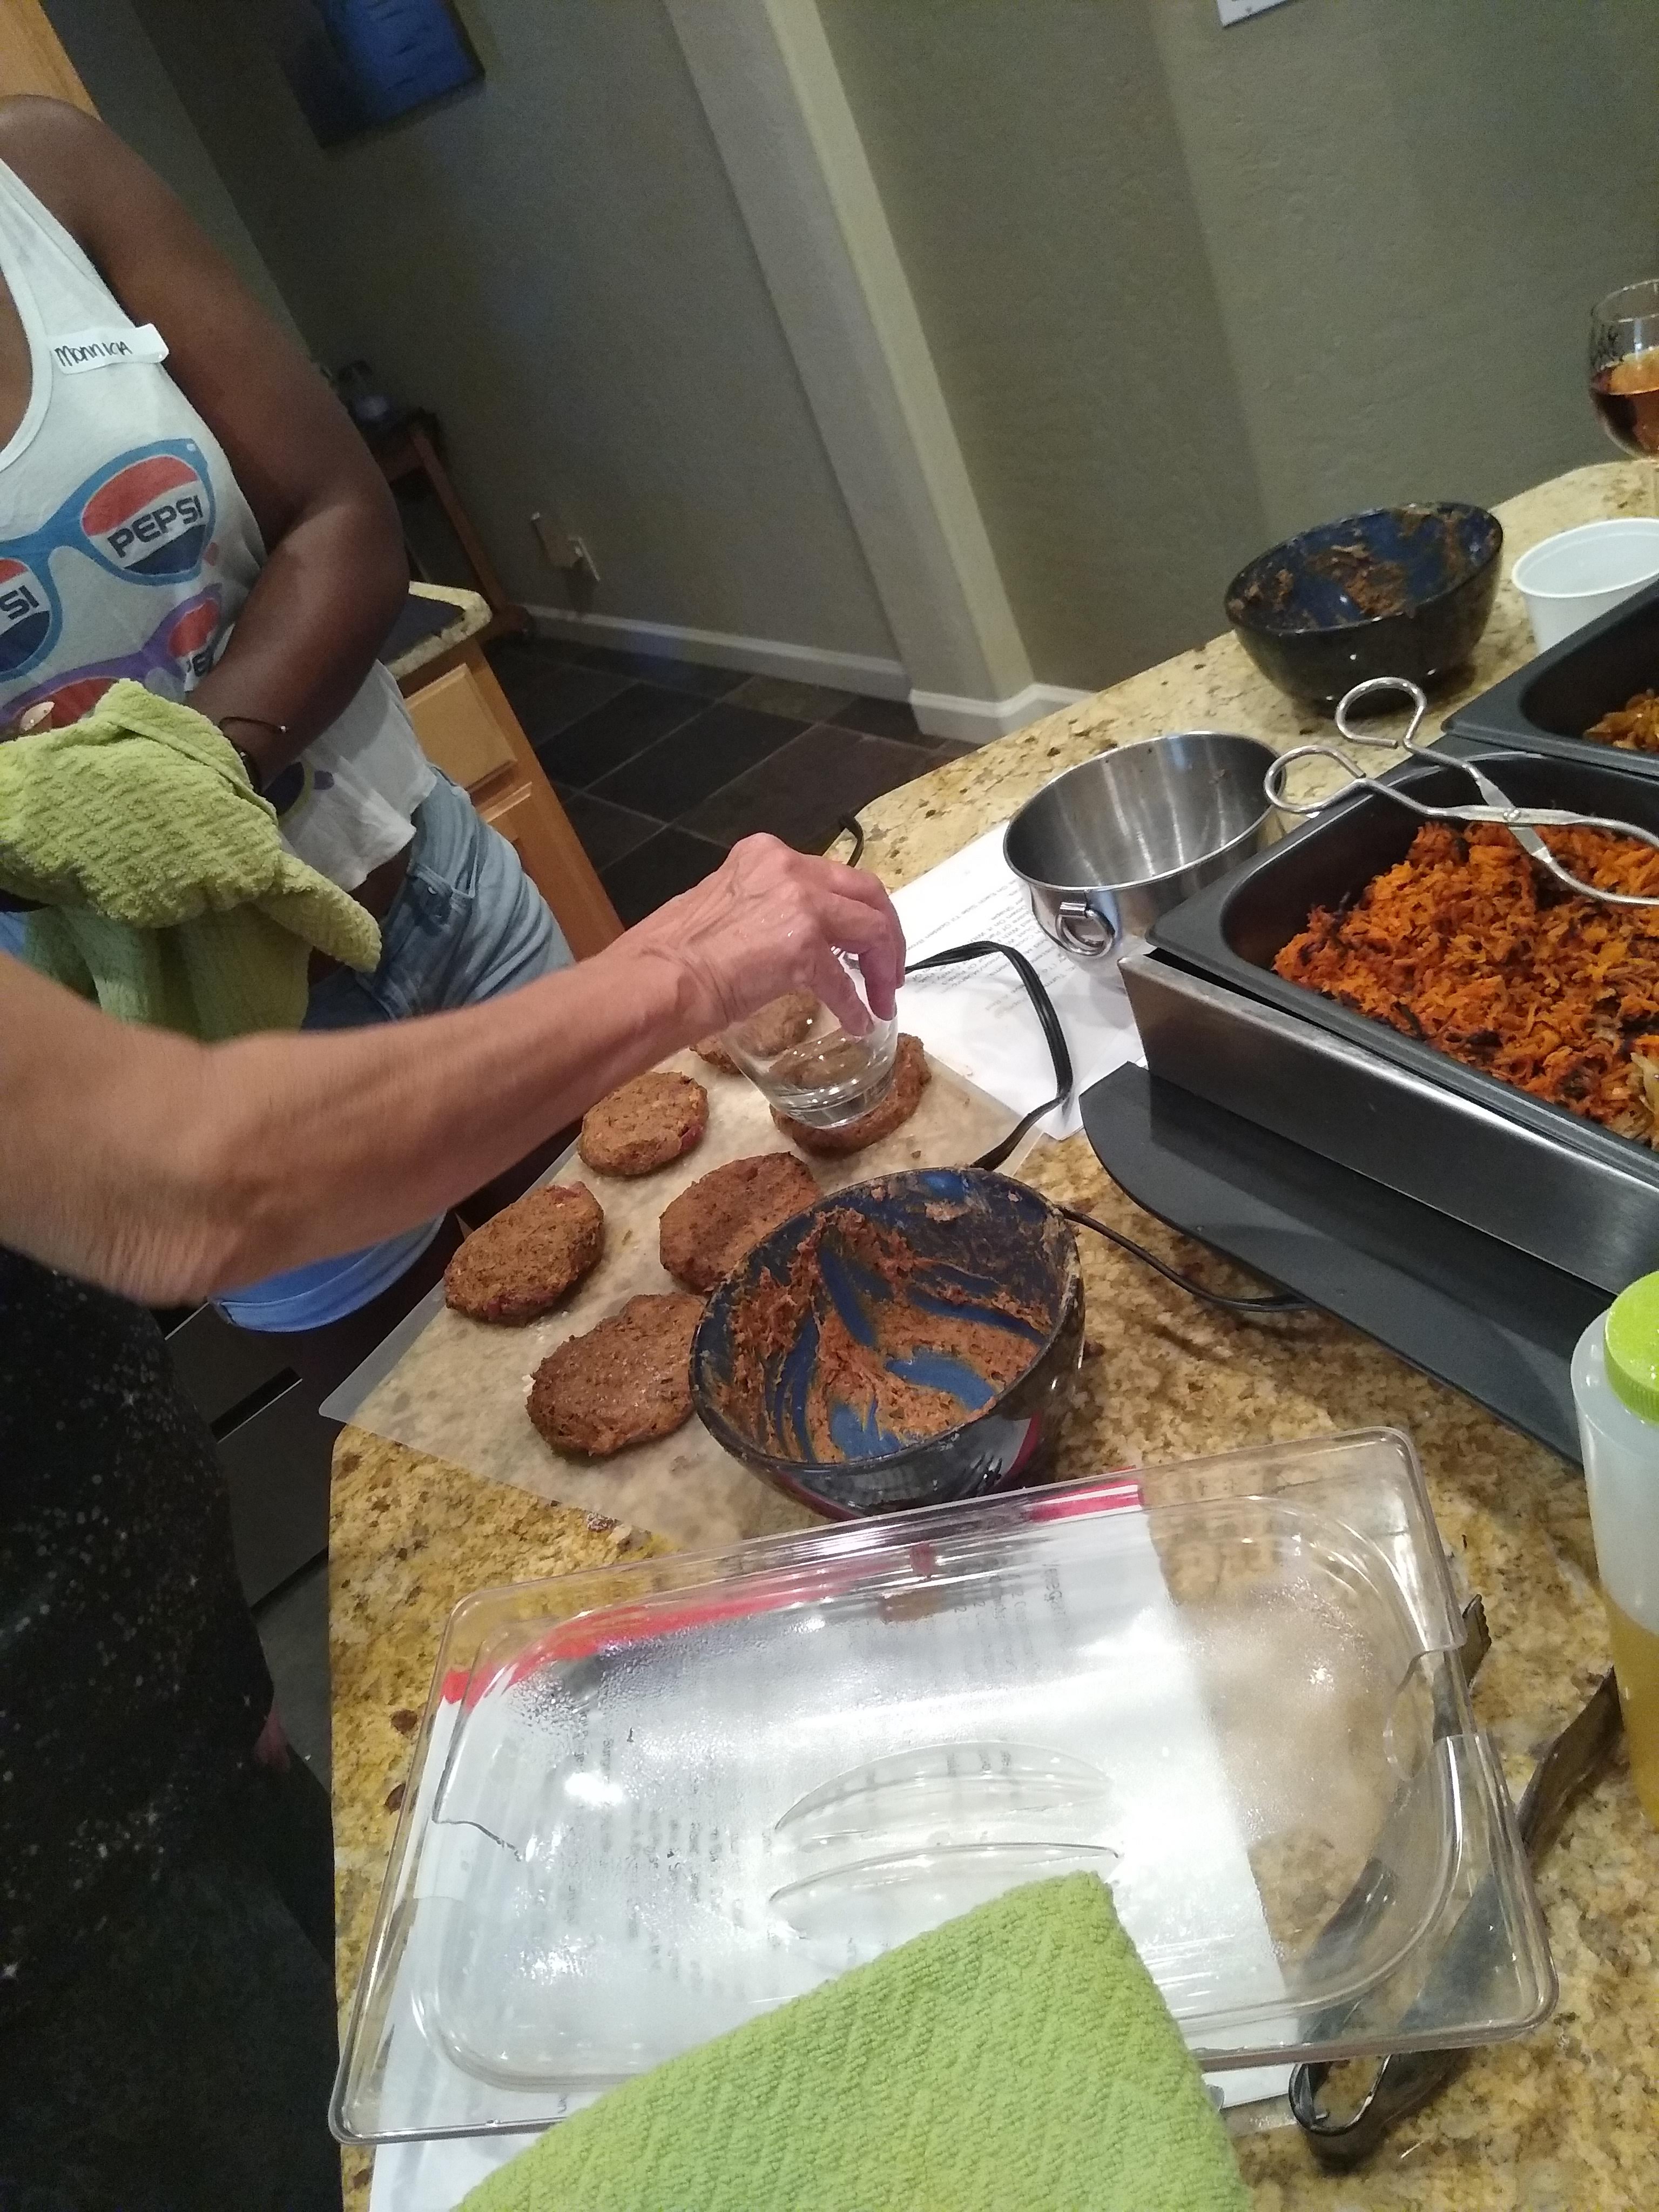
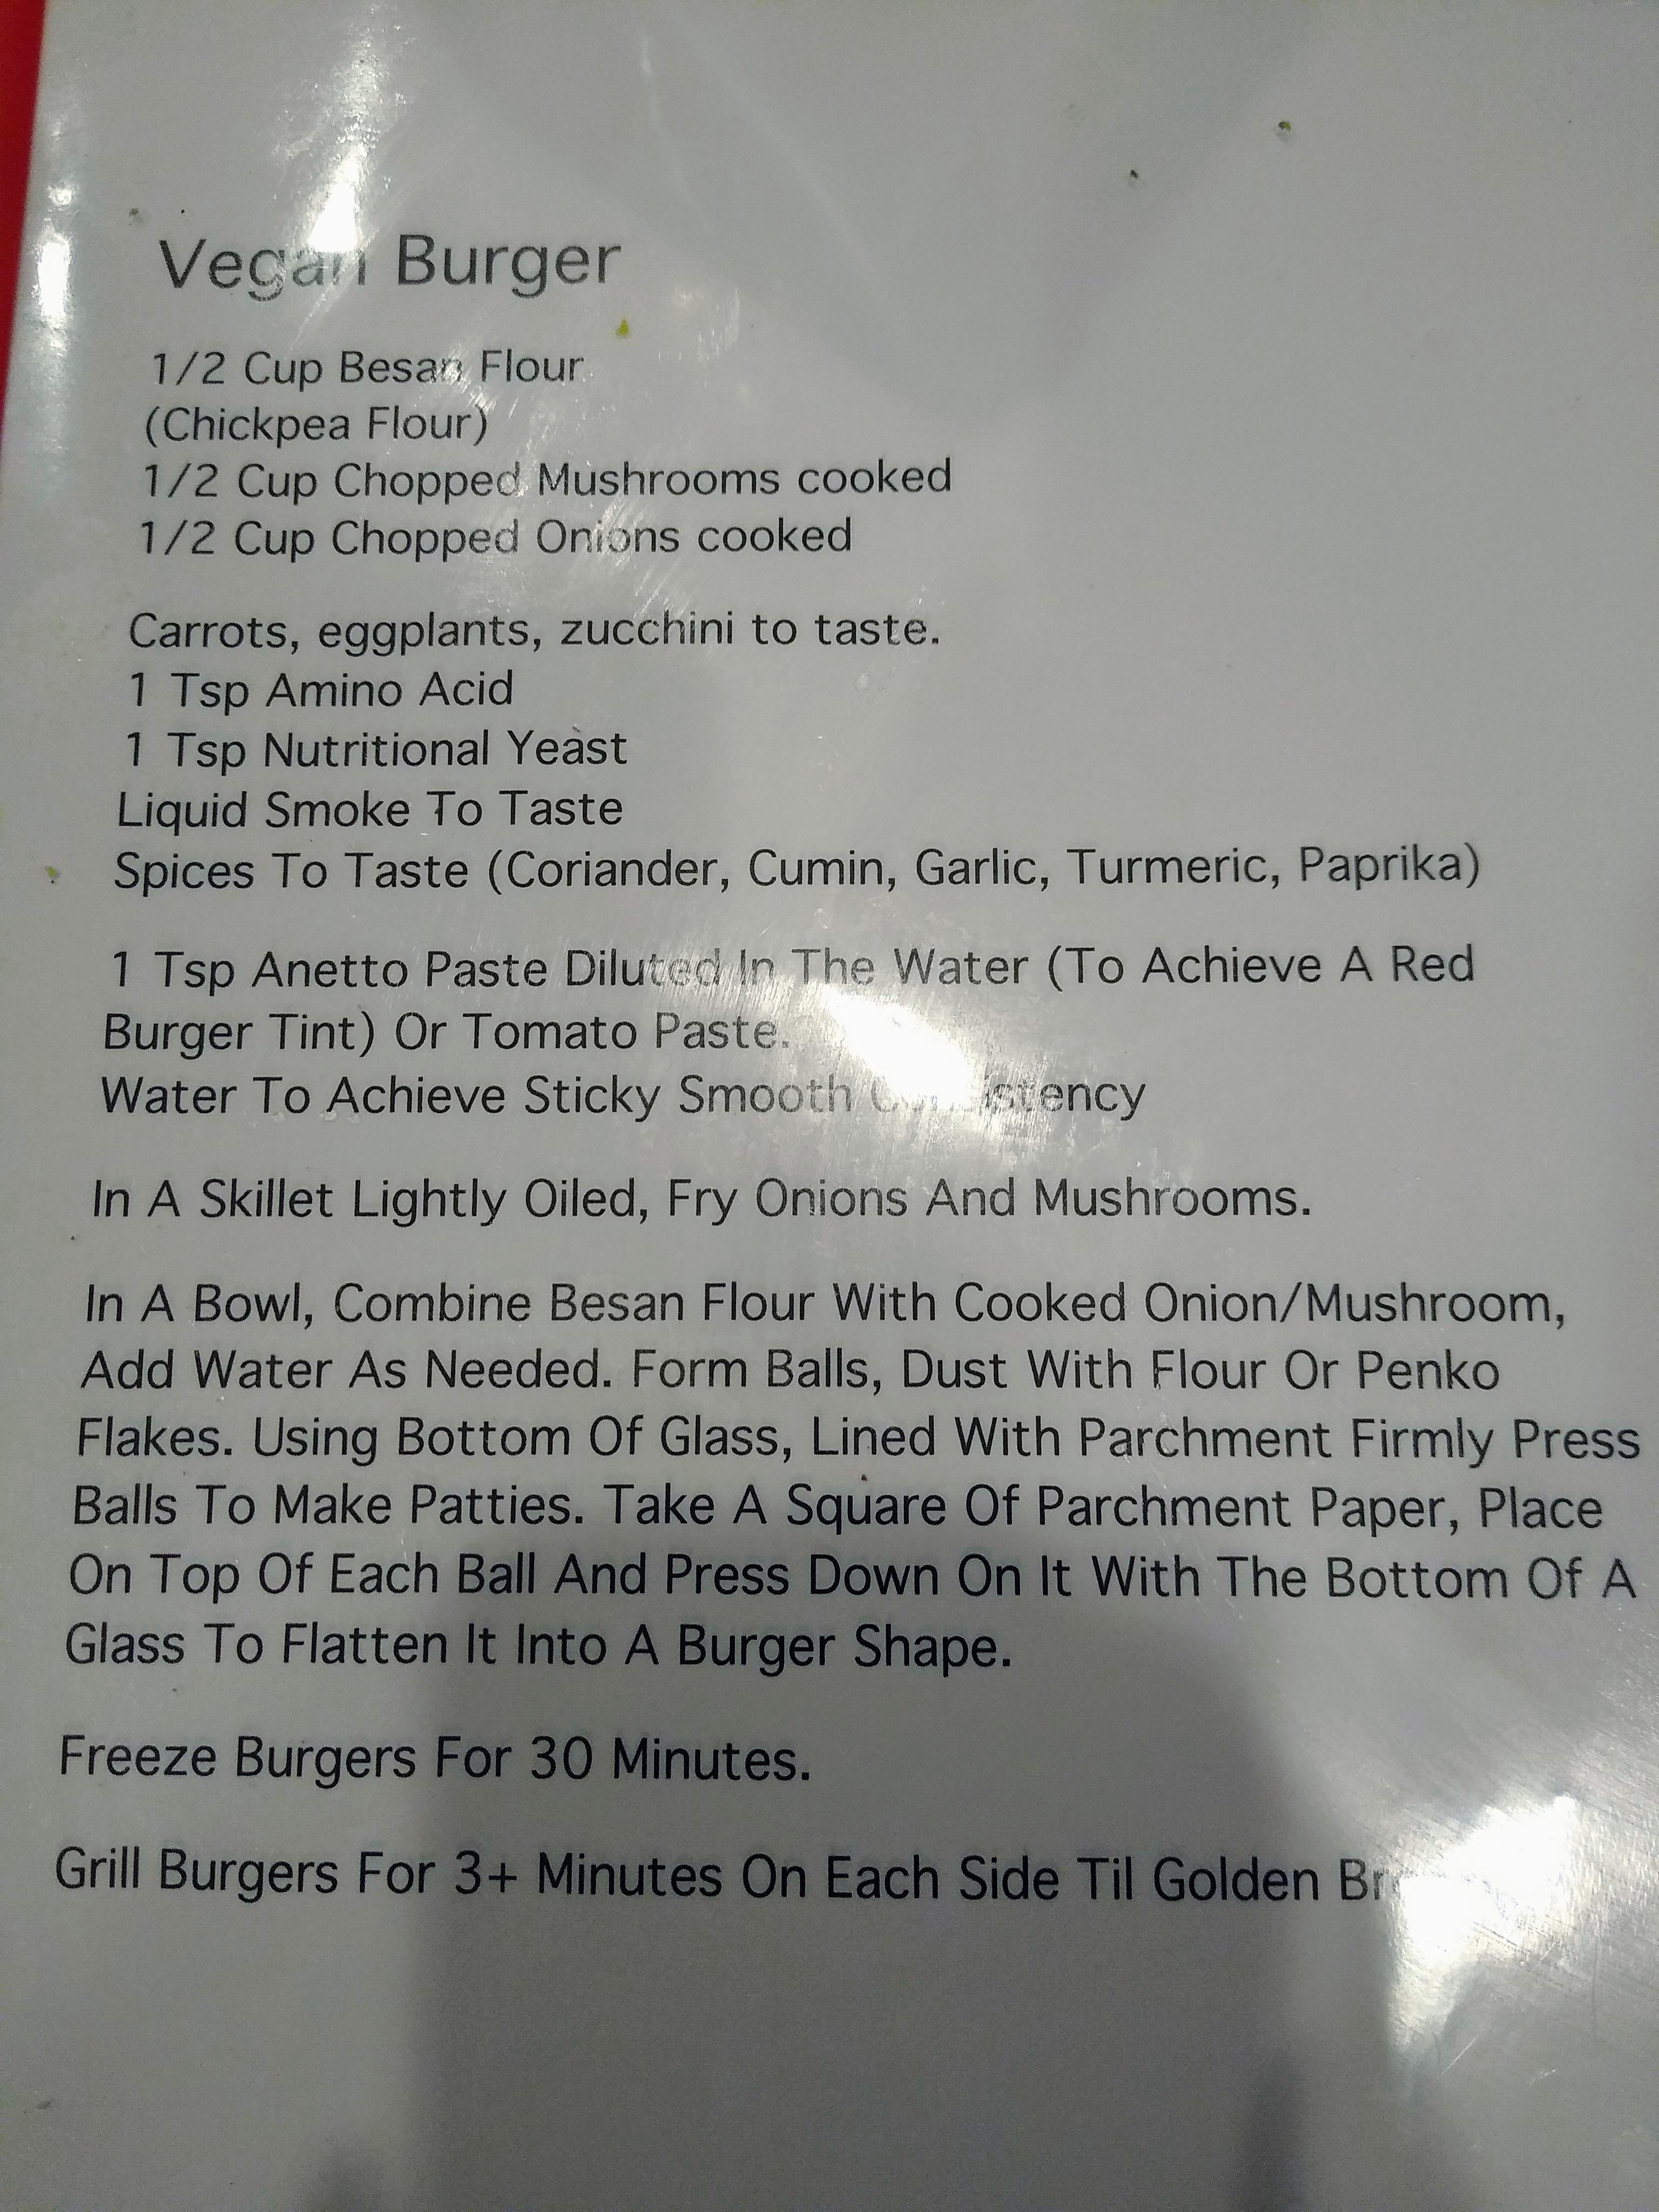
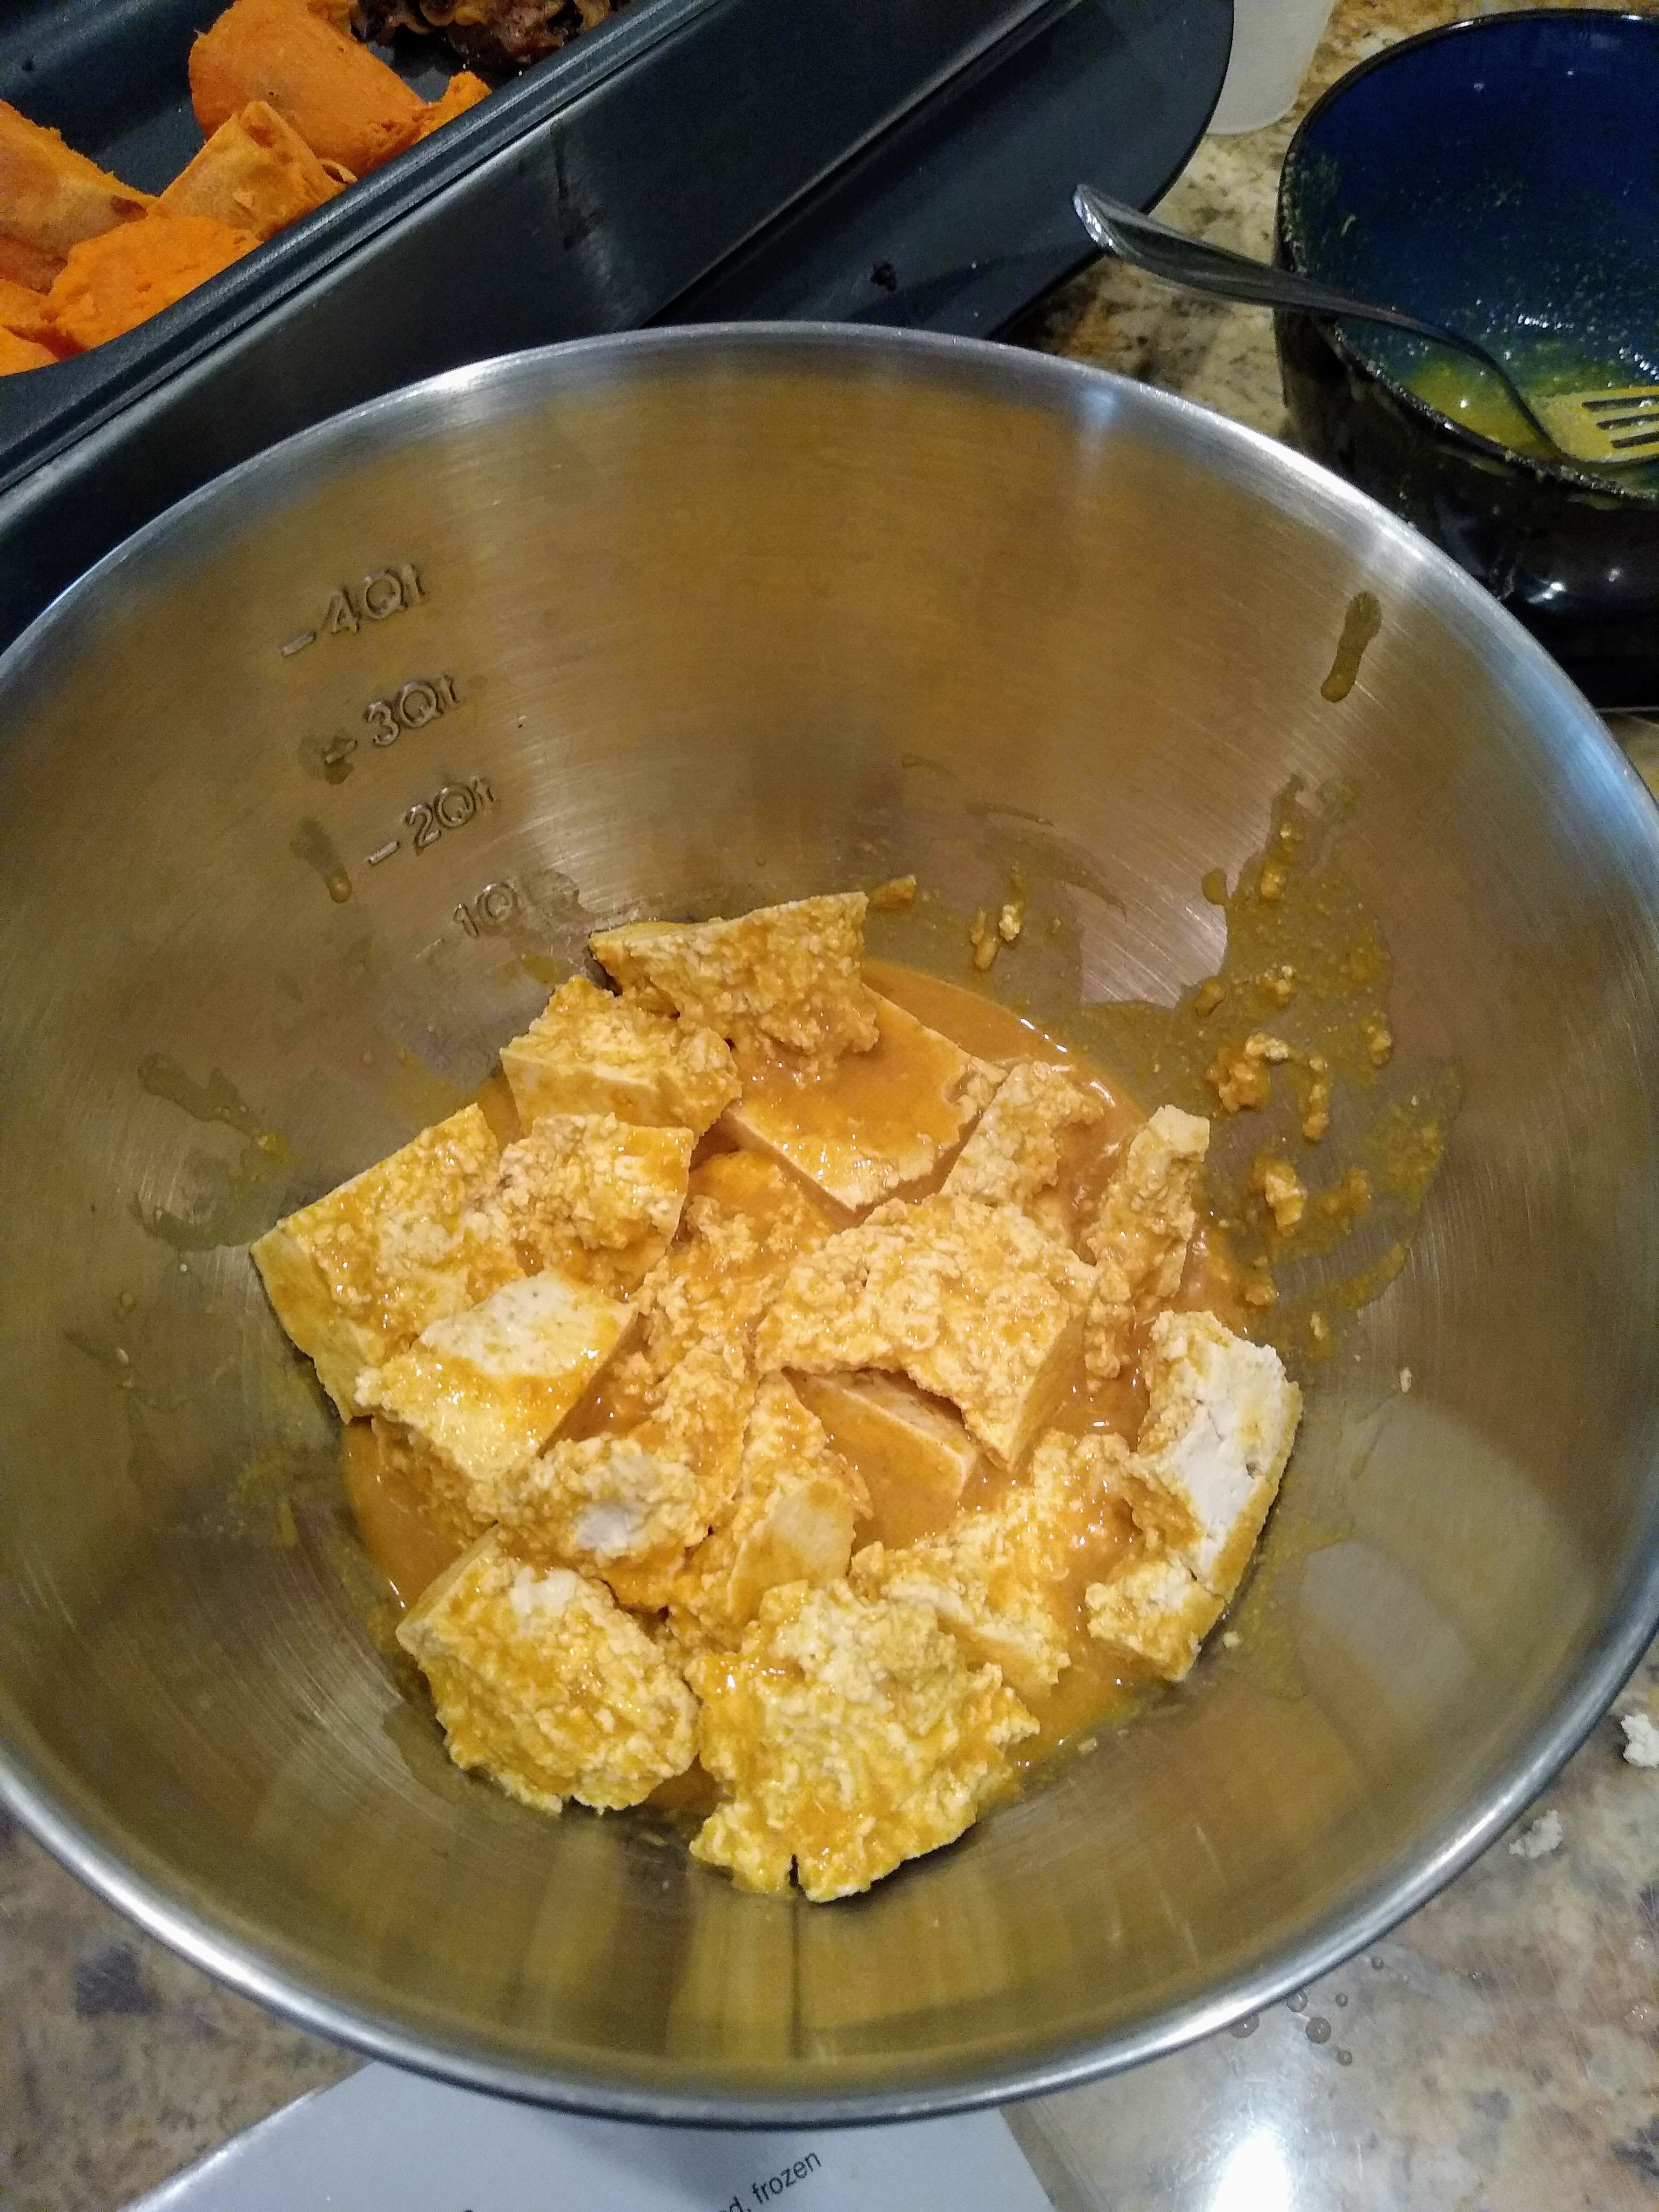
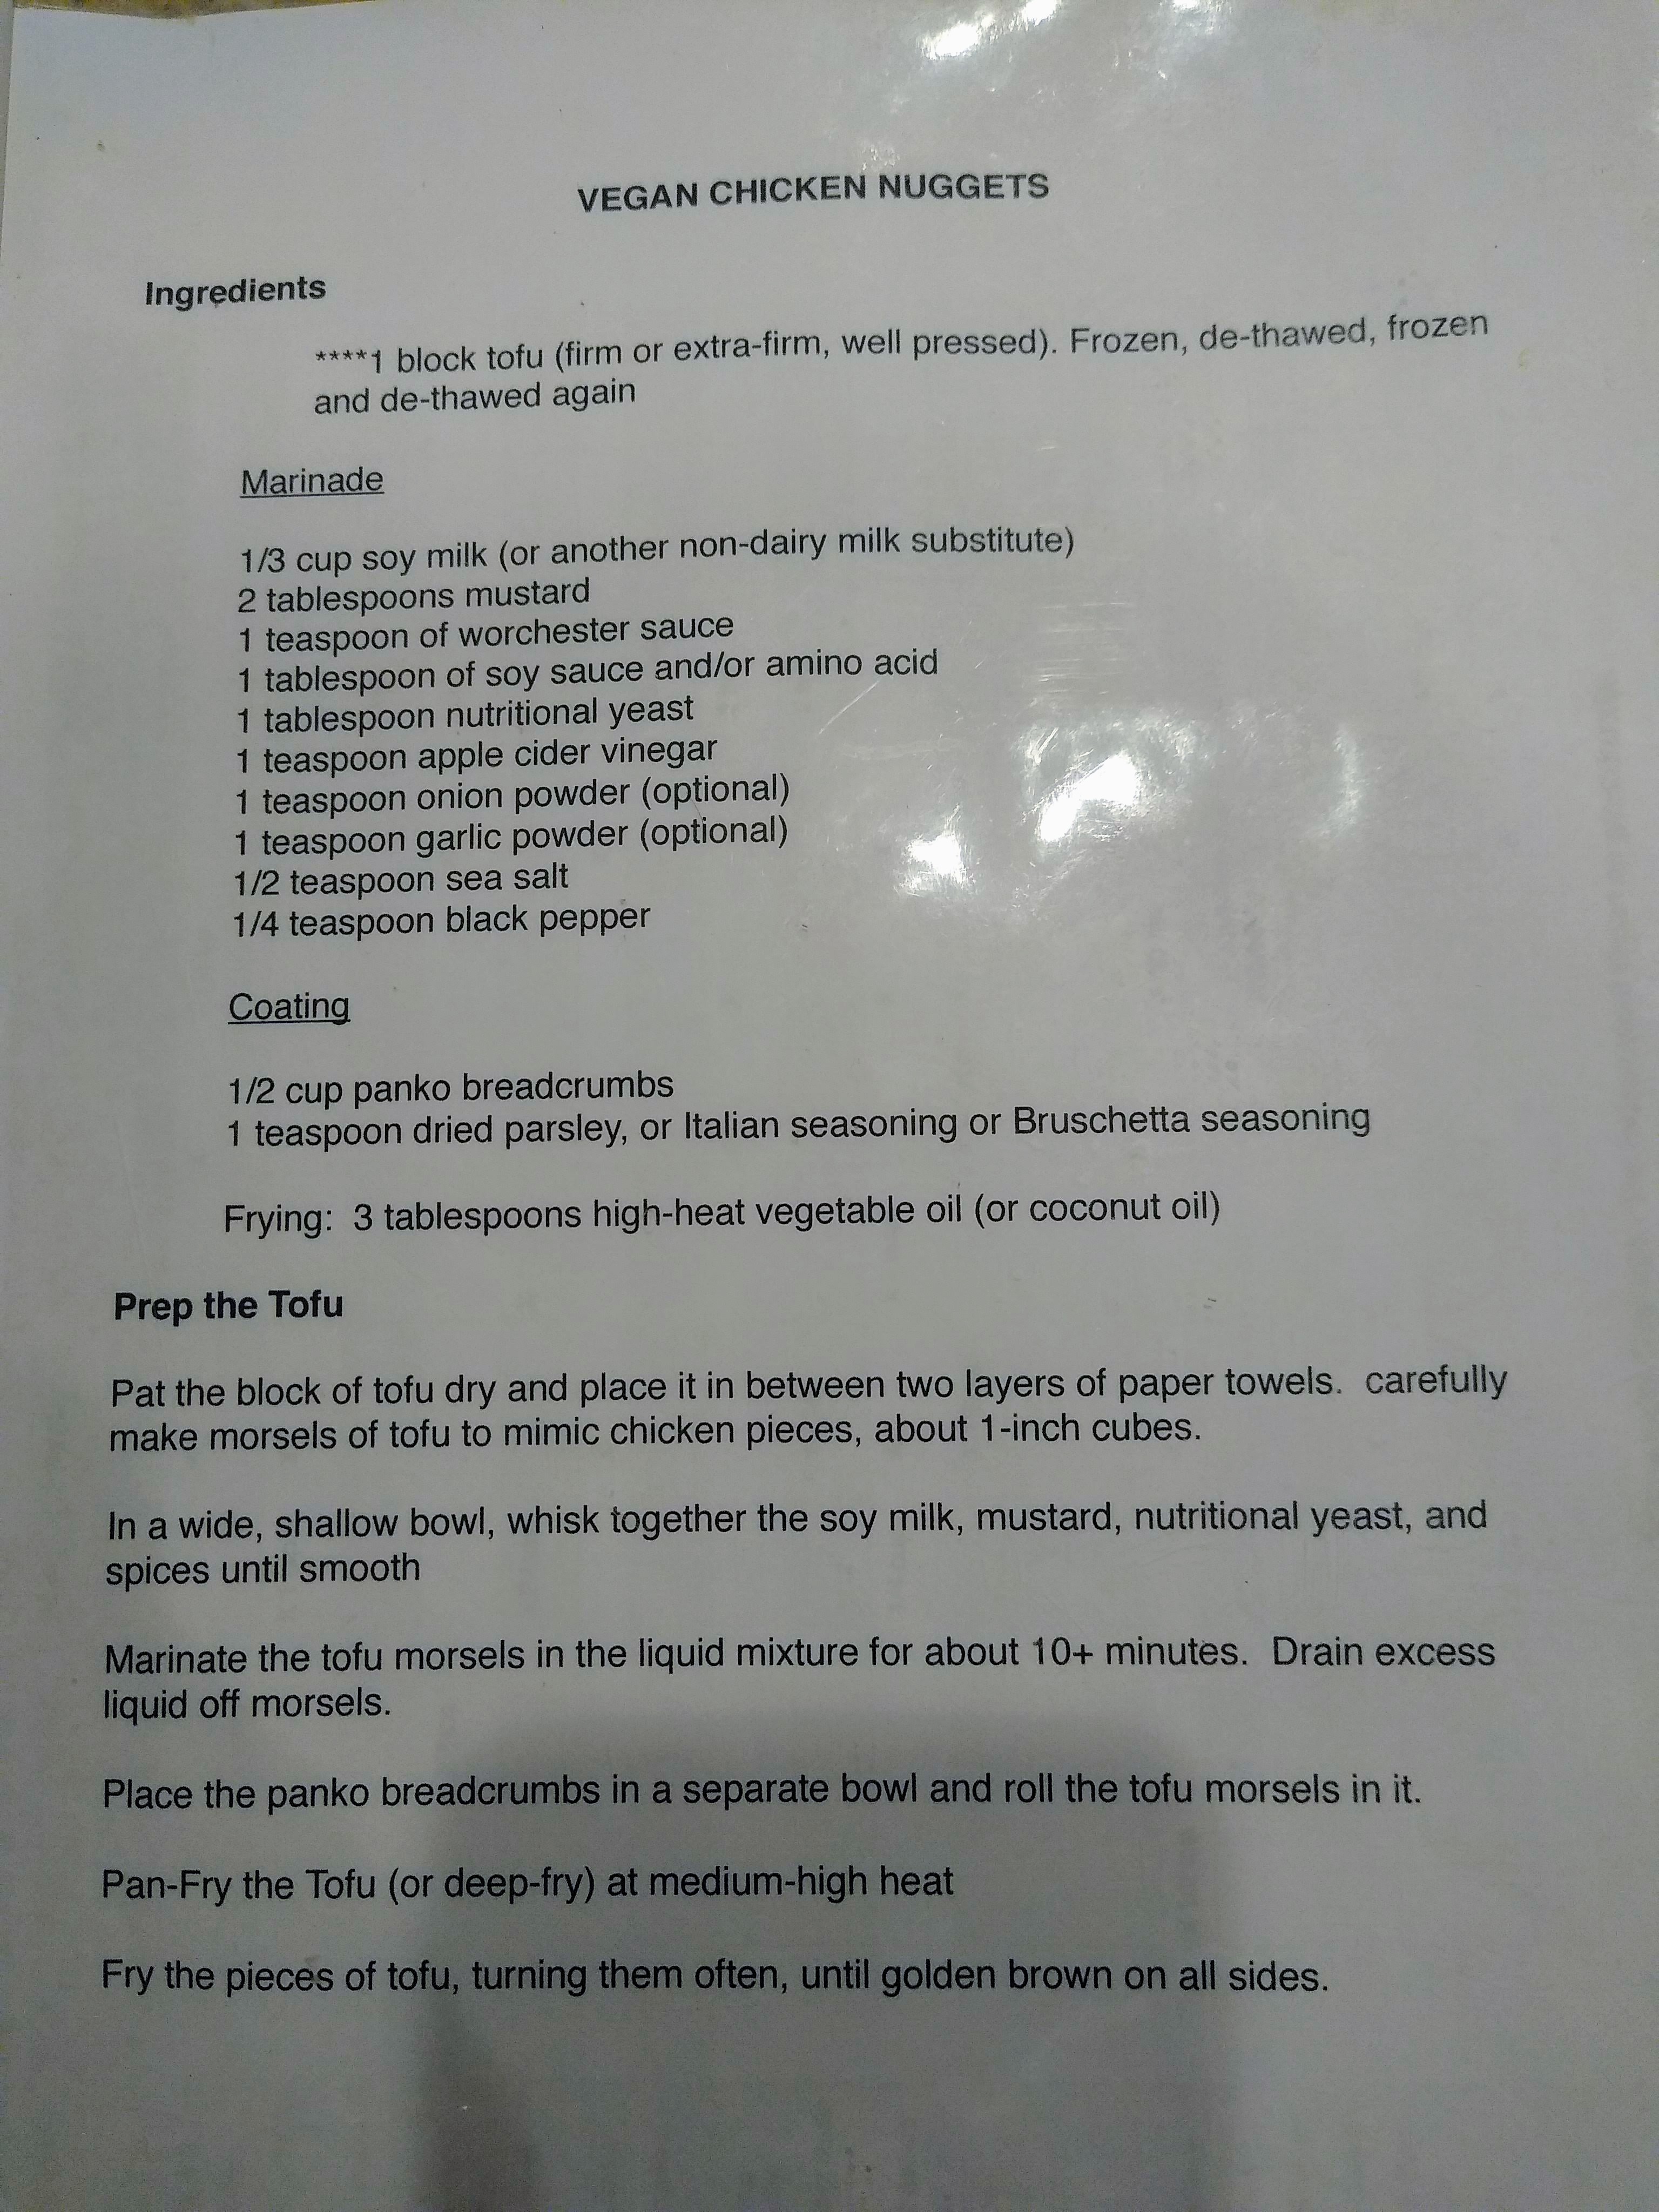
There only ended up being six of us there that day because two had to cancel. There was a couple from California, currently living in Hawaii, three ladies from New York, Texas, and Atlanta, and me. We each chose a type of food to prepare and were assigned a station at the hexagon shaped island or the counter. Two people made vegan burgers, (from fresh ingredients, not the processed, chemical laden patties currently in stores or fast food places) two made vegan “chicken” nuggets, one lady made a vegan chocolate cake and “buttercream” chocolate frosting, and I made bread. Along the way, we also made or were taught how to make faux scrambled eggs with tofu, vegan “pulled pork” from jackfruit, zoodles, cauliflower fried rice, and vegan sausage. Then, we all got to sit and enjoy all the awesome food, while our hosts cleaned up and did dishes. My honest review is that everything was awesome except the tofu nuggets and I think they would have been really good too if they had been cut smaller so they soaked up more marinade and had a higher crunchy surface to tofu middle ratio.
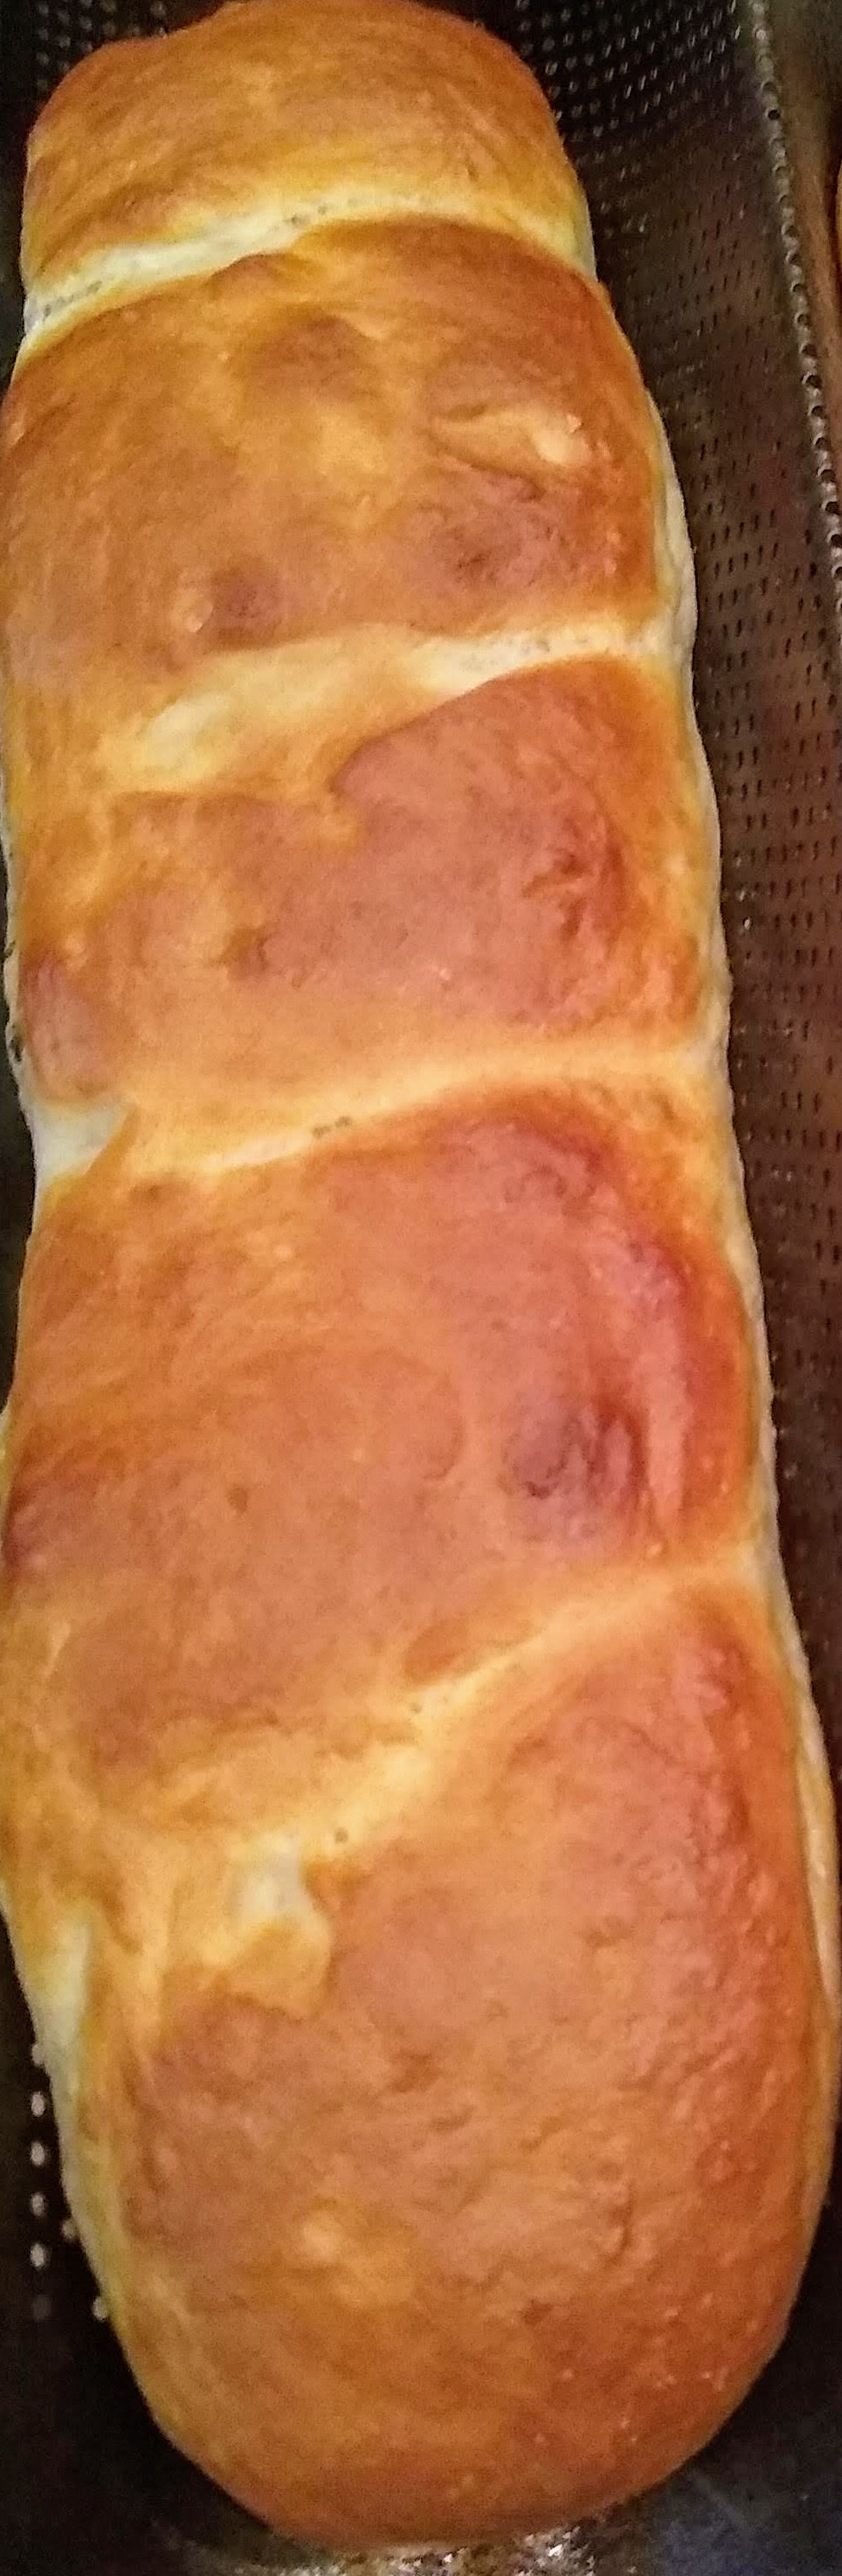
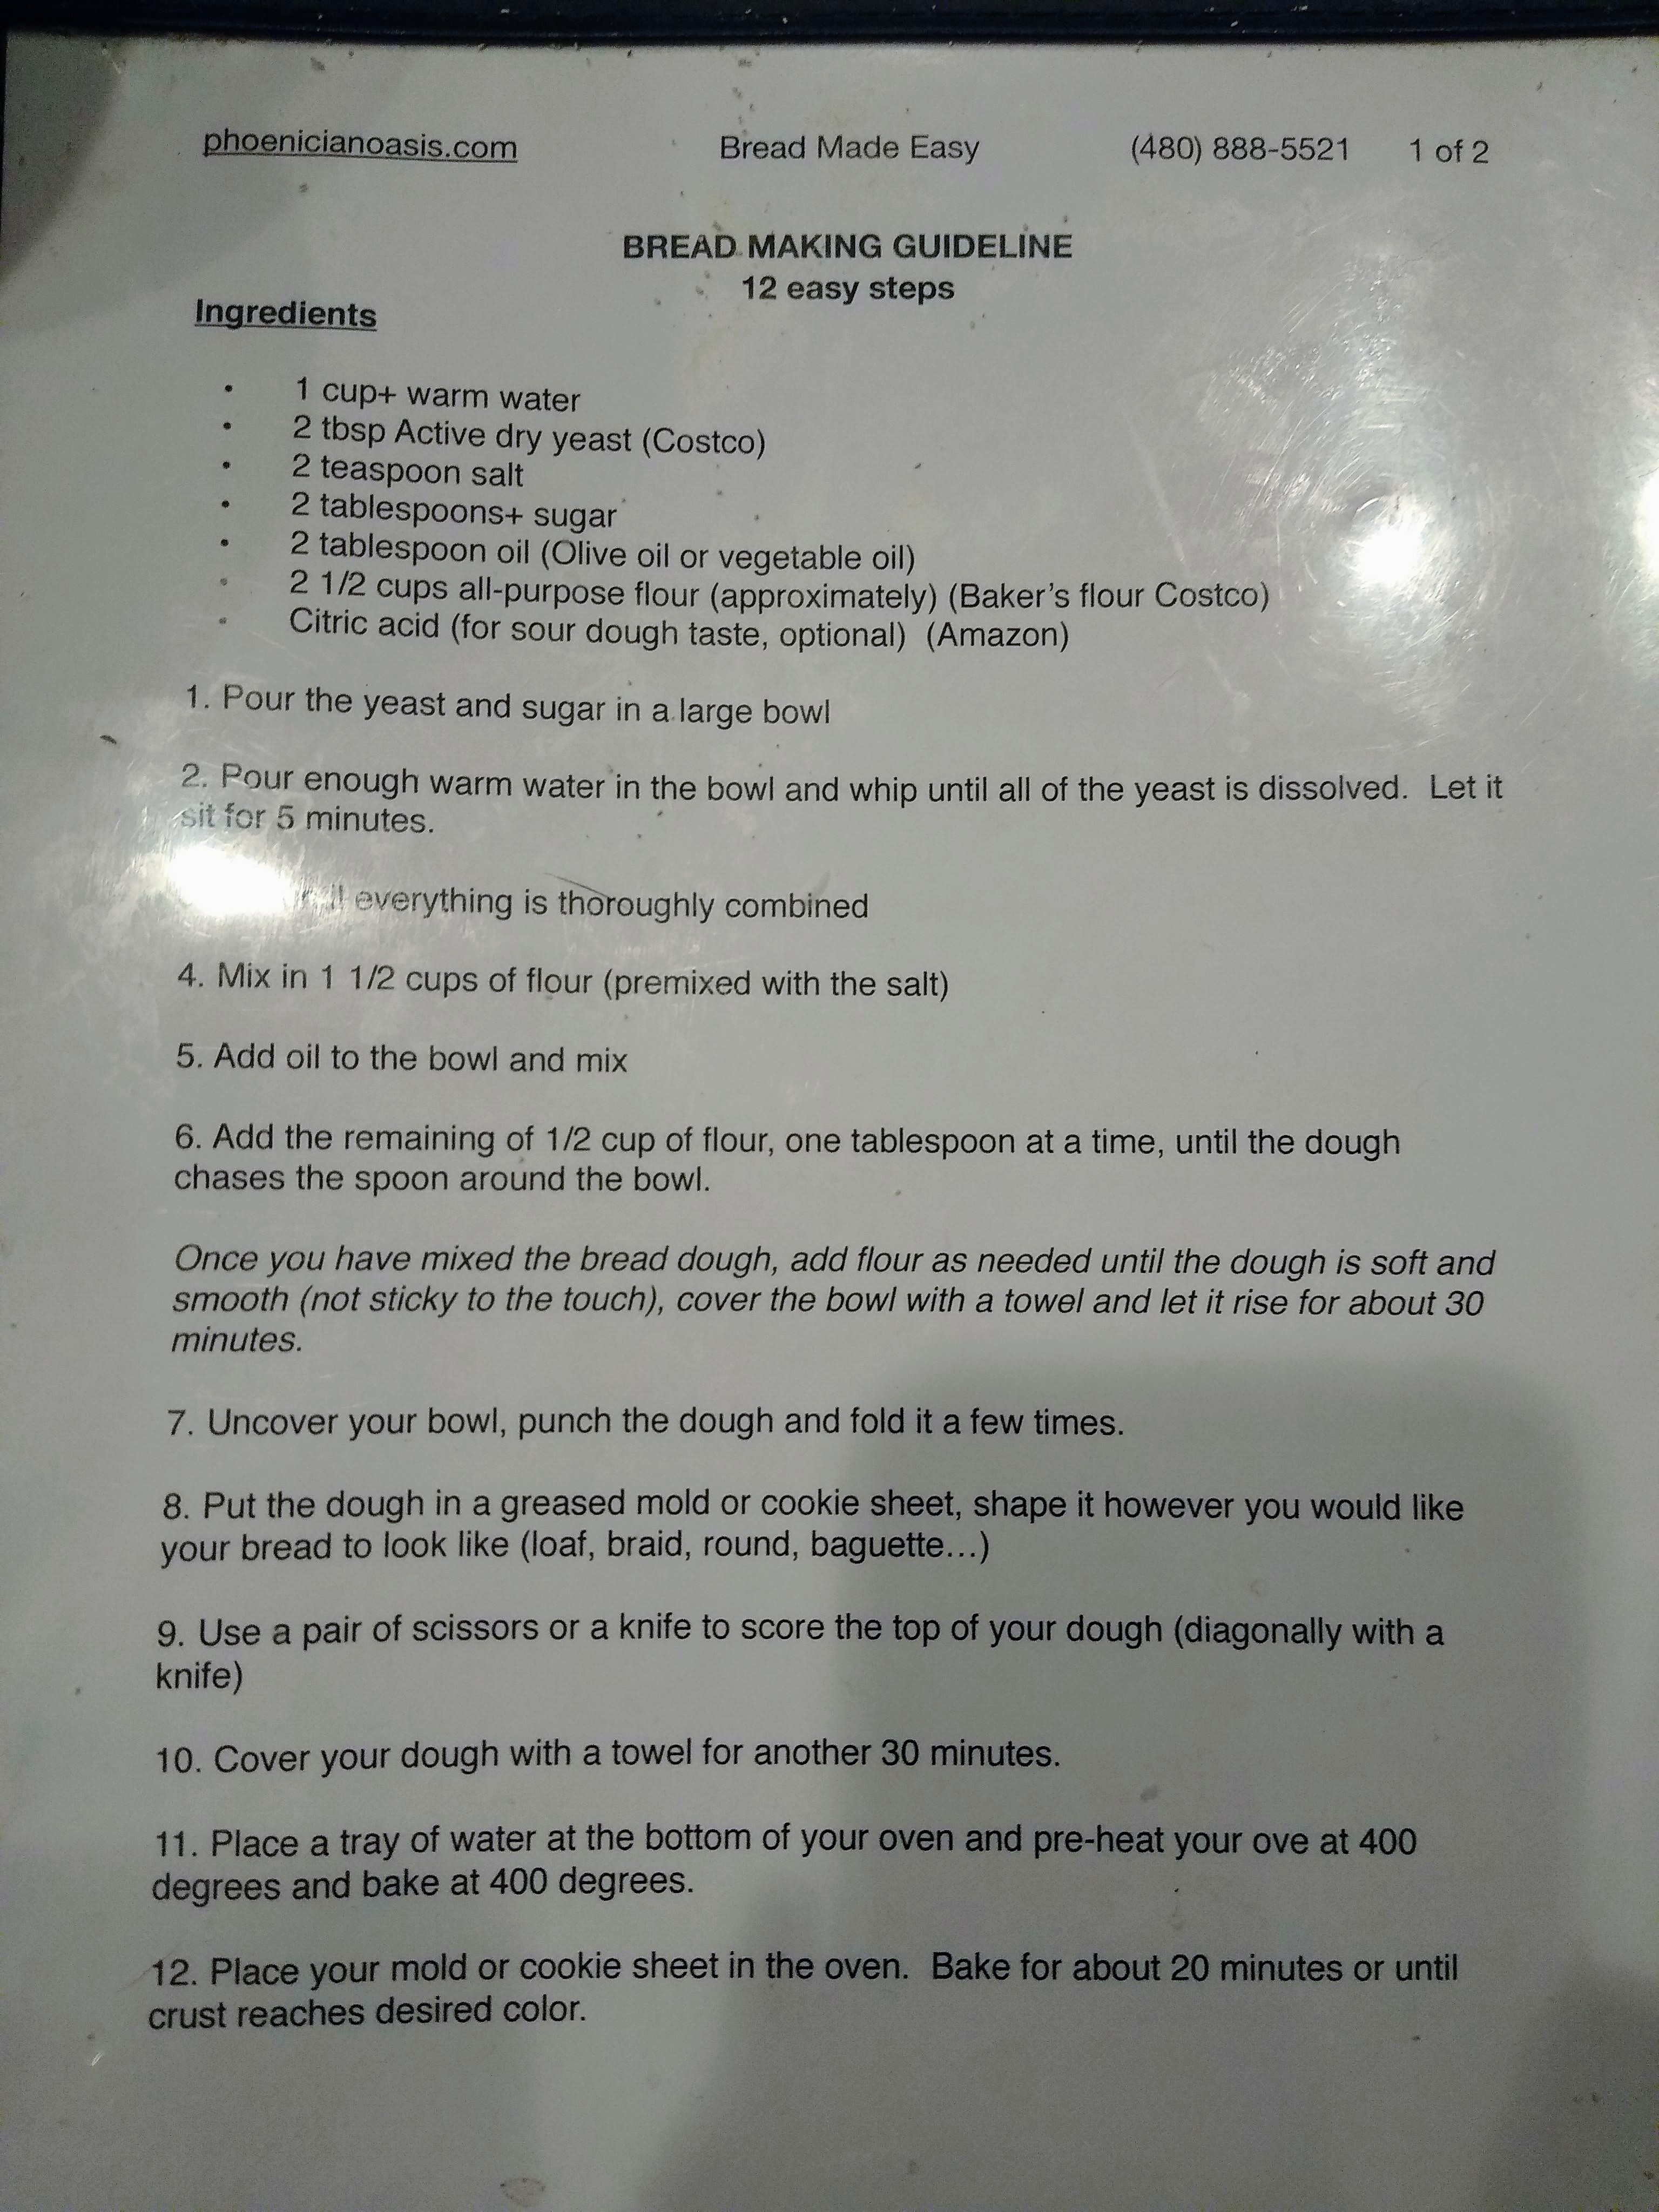
My bread turned out so good!!! It was the lightest bread I have ever made in the shortest time. True to the description, I used nothing but water, yeast, sugar, salt, oil, and flour and a plastic bowl and fork.
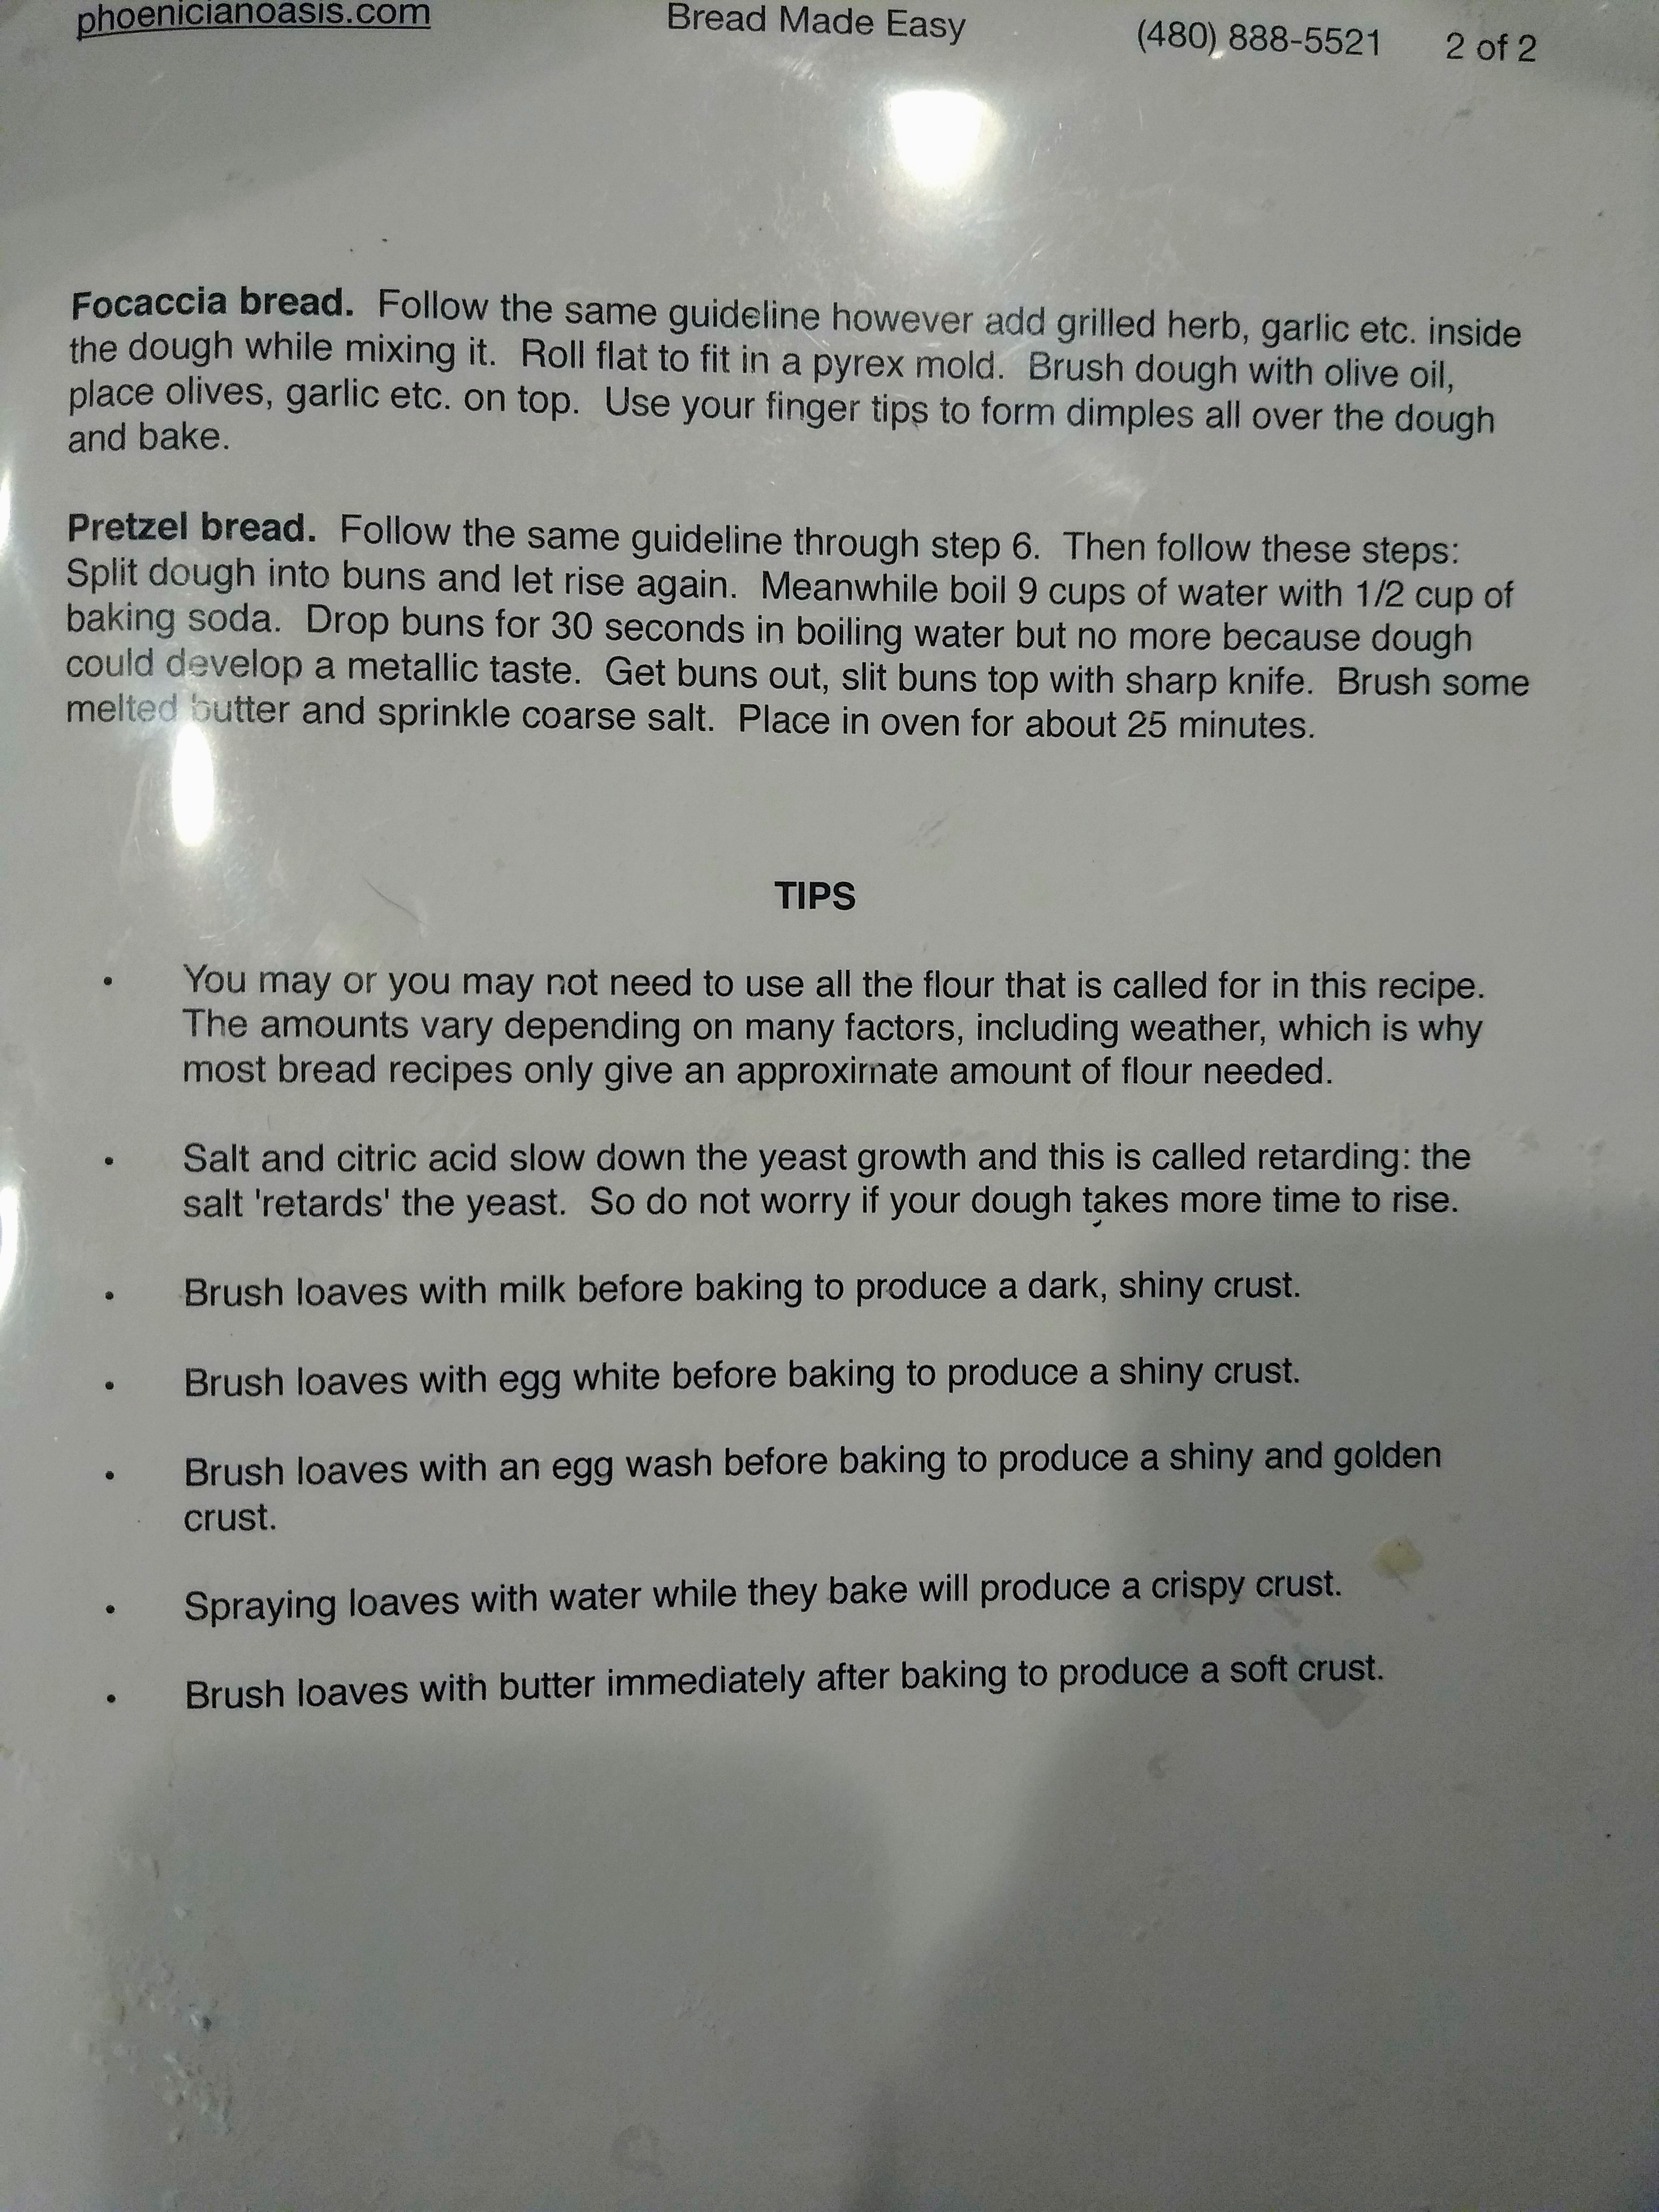
No fancy bread-making equipment here!Doubled in size in under 30 minutesMy “artisinal” loaves, doubled again in size in about 30 more minutesI’m pretty sure I could have eaten most of this right out of the oven without even butter!The recipe and instructions.variations of basic bread recipe
I’ll also post more detailed pics and recipes of the other food.
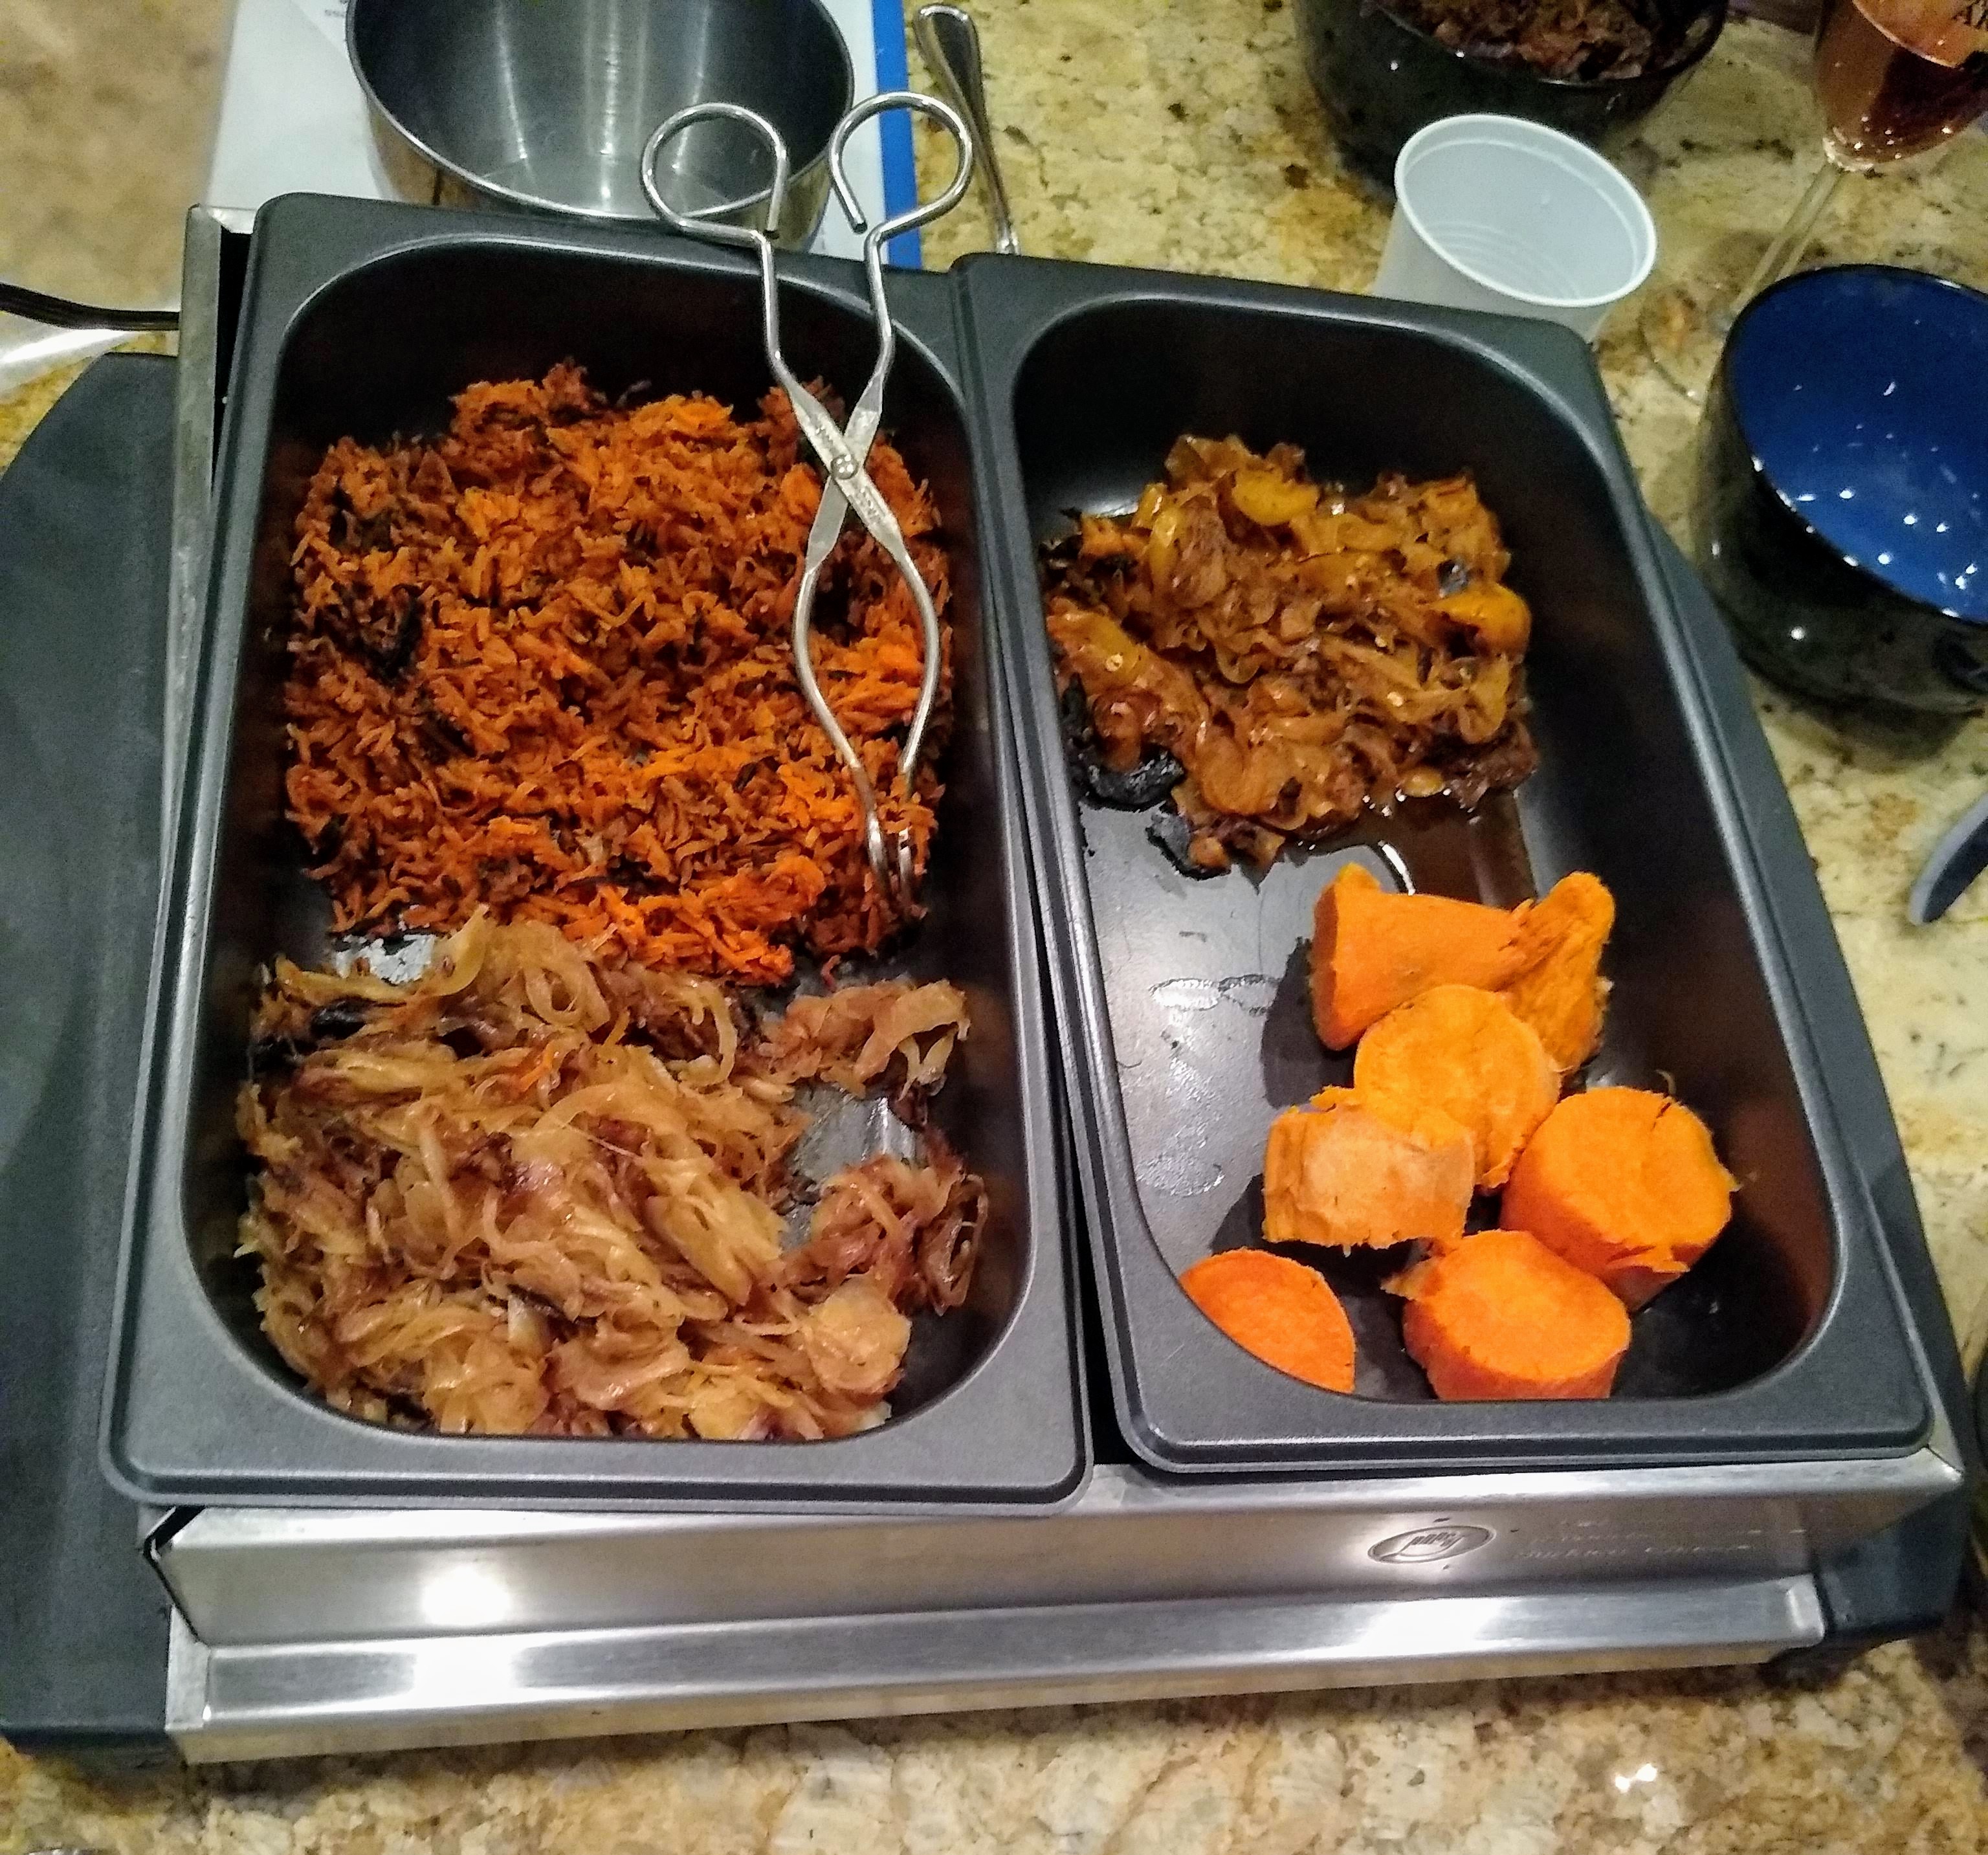
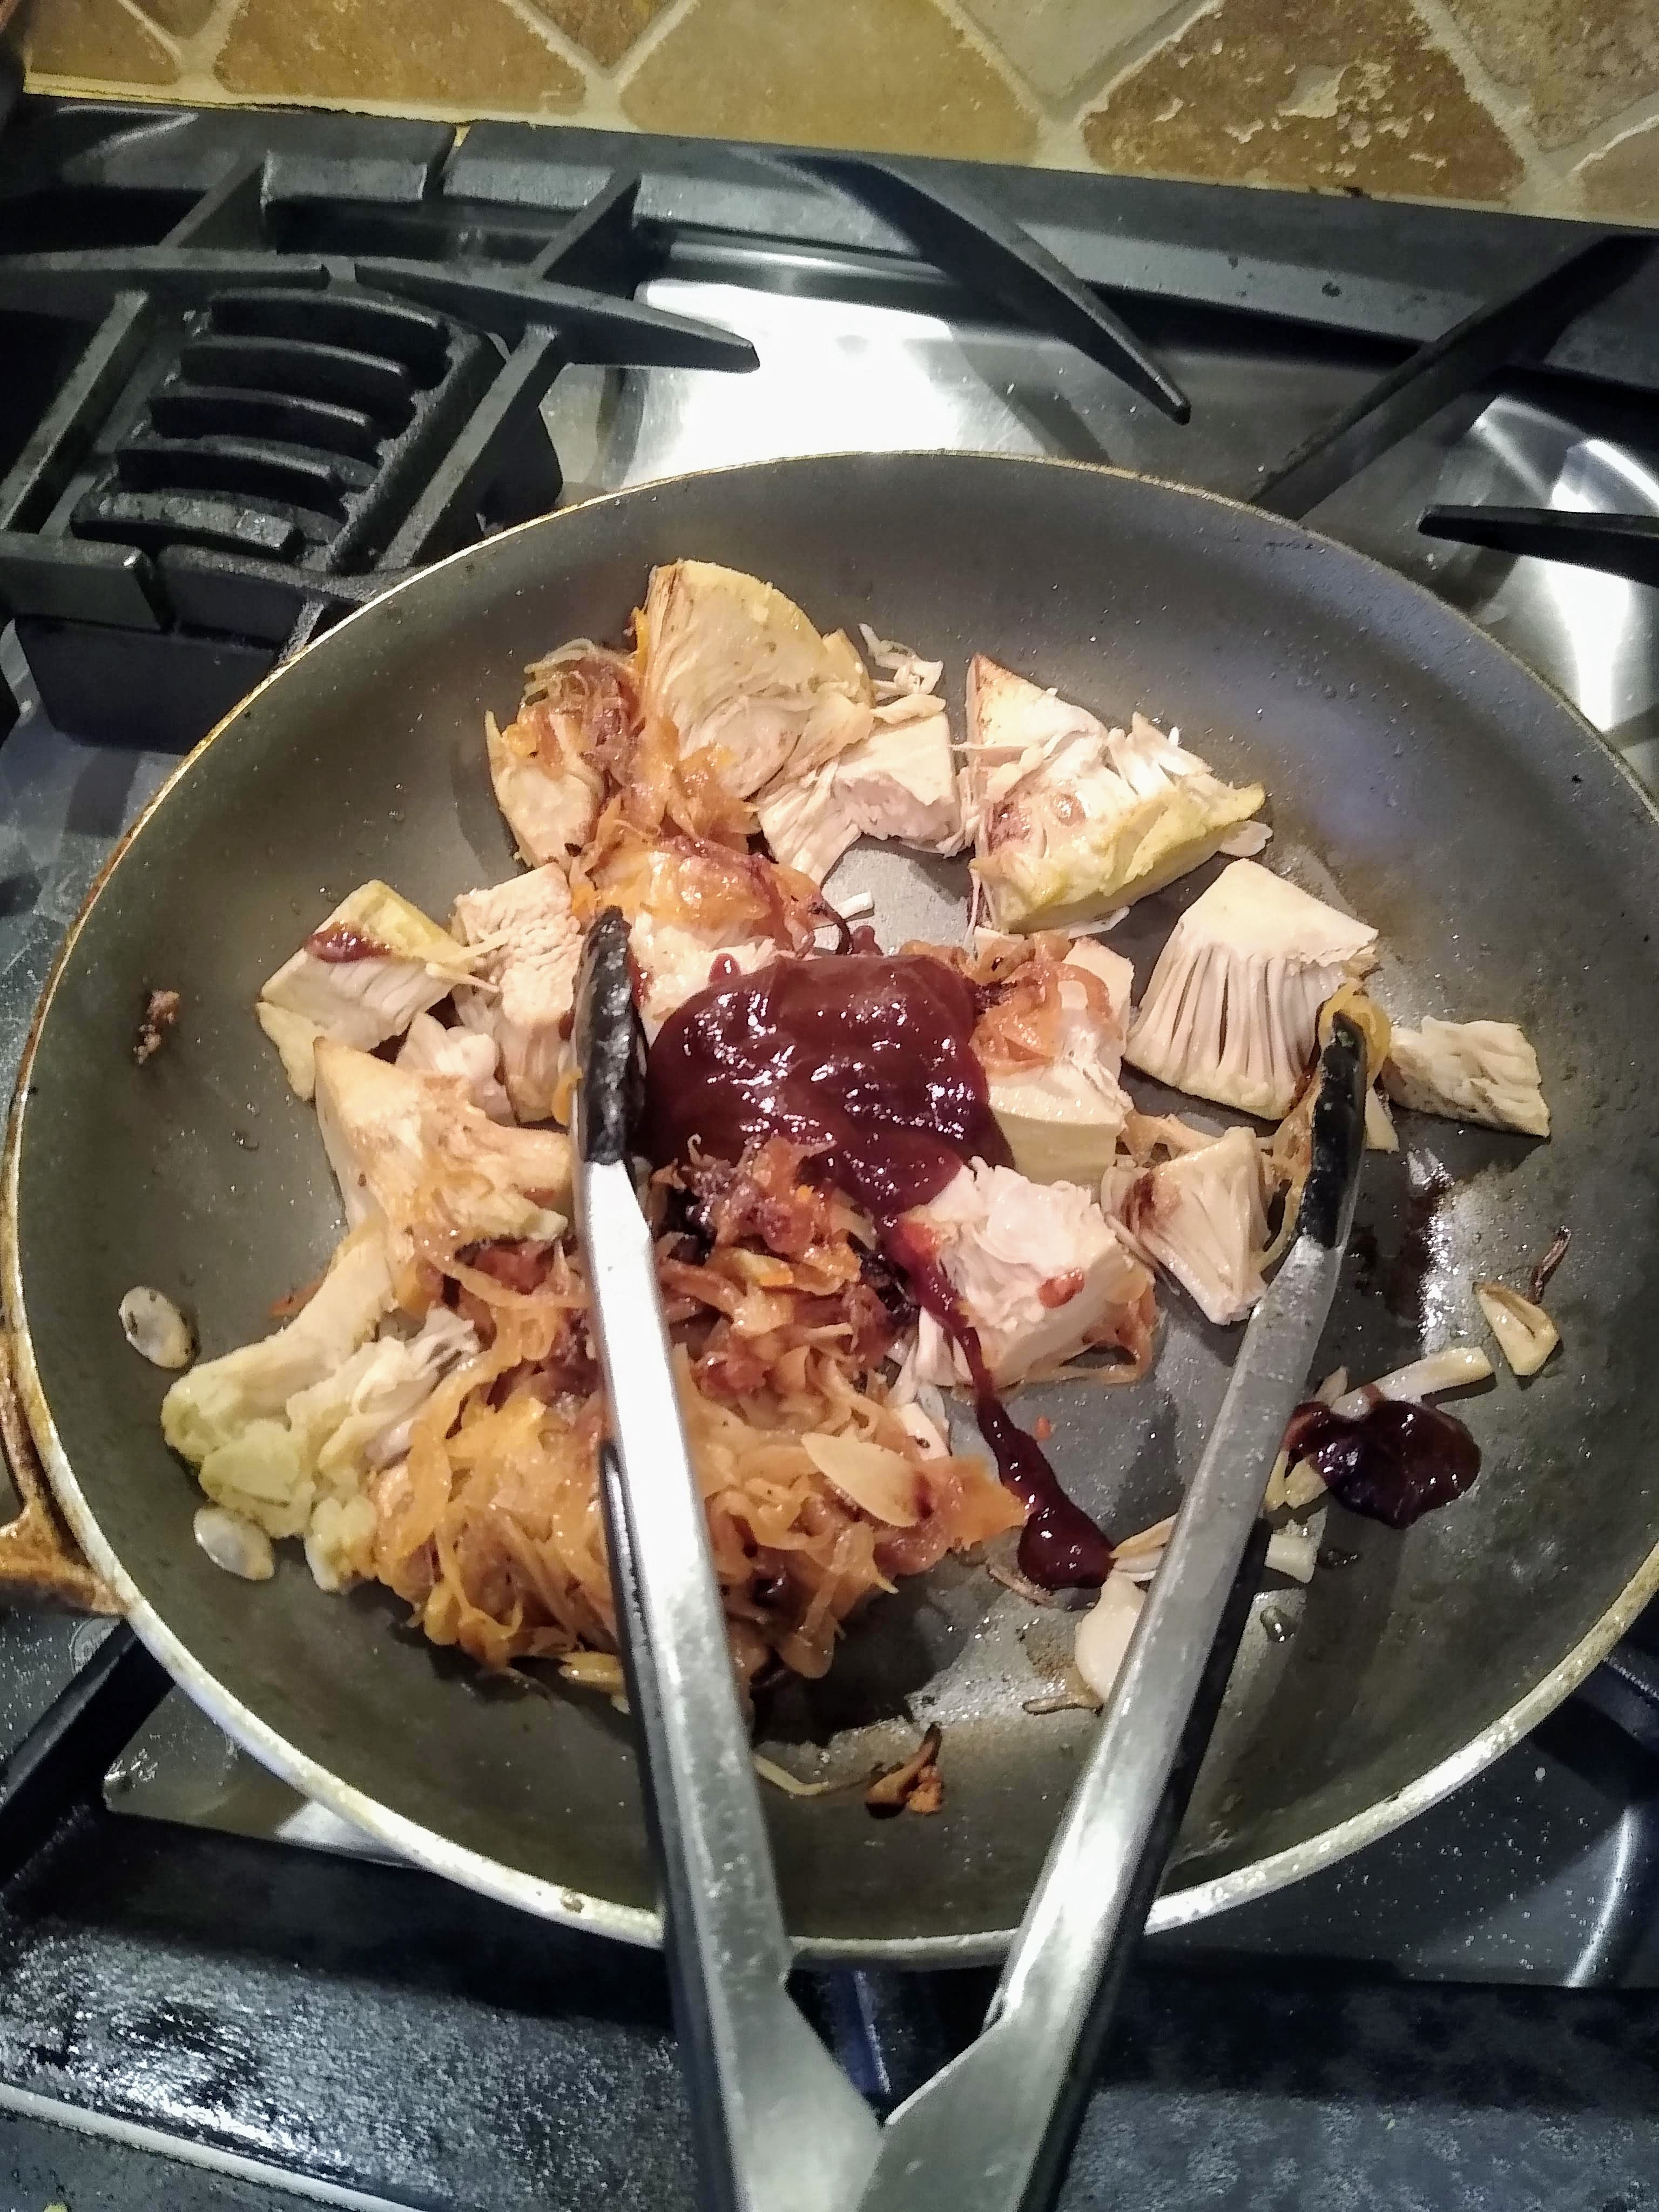
The bulk of the burger ingredients – cooked sweet potatoes, carrots, onions, and yellow bell peppers – yum!shaping the burgers – recipe belowScrambled “eggs” made with crumbled firm tofu, a little turmeric for color, and black salt to give it an egg taste. You can also add a little nutritional yeast to give it a buttery, cheesy flavor.“Pulled pork” made with jackfruit, (she buys it canned to save time and money) caramelized onions, and barbeque saucemarinating the tofu nuggets before rolling them in Panko crumbs and frying them – recipe below
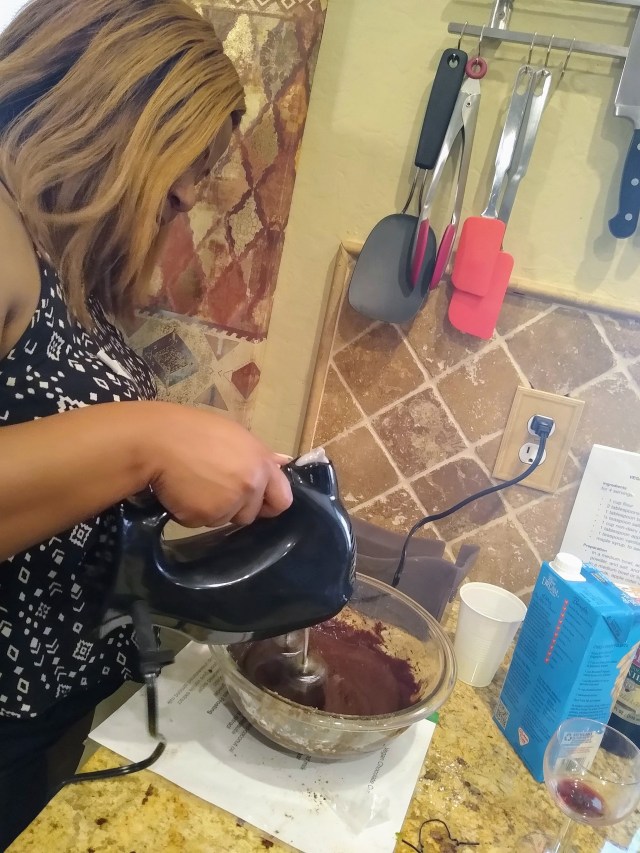
Last but not least, dessert! These cupcakes and the frosting were absolutely heavenly! You will not miss the eggs or butter. I wouldn’t go so far as to call it health food – just healthier . . .
Dinner is served! Quite the spread! On my plate: cauliflower fried rice in the middle, clockwise from the top, tofu “chicken” nuggets, Italian “sausage,” “pulled pork,” zoodles, half of a vegan burger, bread, and kale chips.
I love this spice rack!!Thank you again Emma and Ron at the Phoenician Oasis! I will be back!
I love to try new foods, new recipes, new drinks, etc. My husband, unlike me, does not think “interesting” should be an adjective used to describe food or beer, and he pretty much hates wine altogether. So, while I’ll miss him dearly when I’m in AZ and he’s still farming in ND, until the weather is about 40 degrees cooler in both states, I get to try all kinds of “interesting” food and beverage adventures.
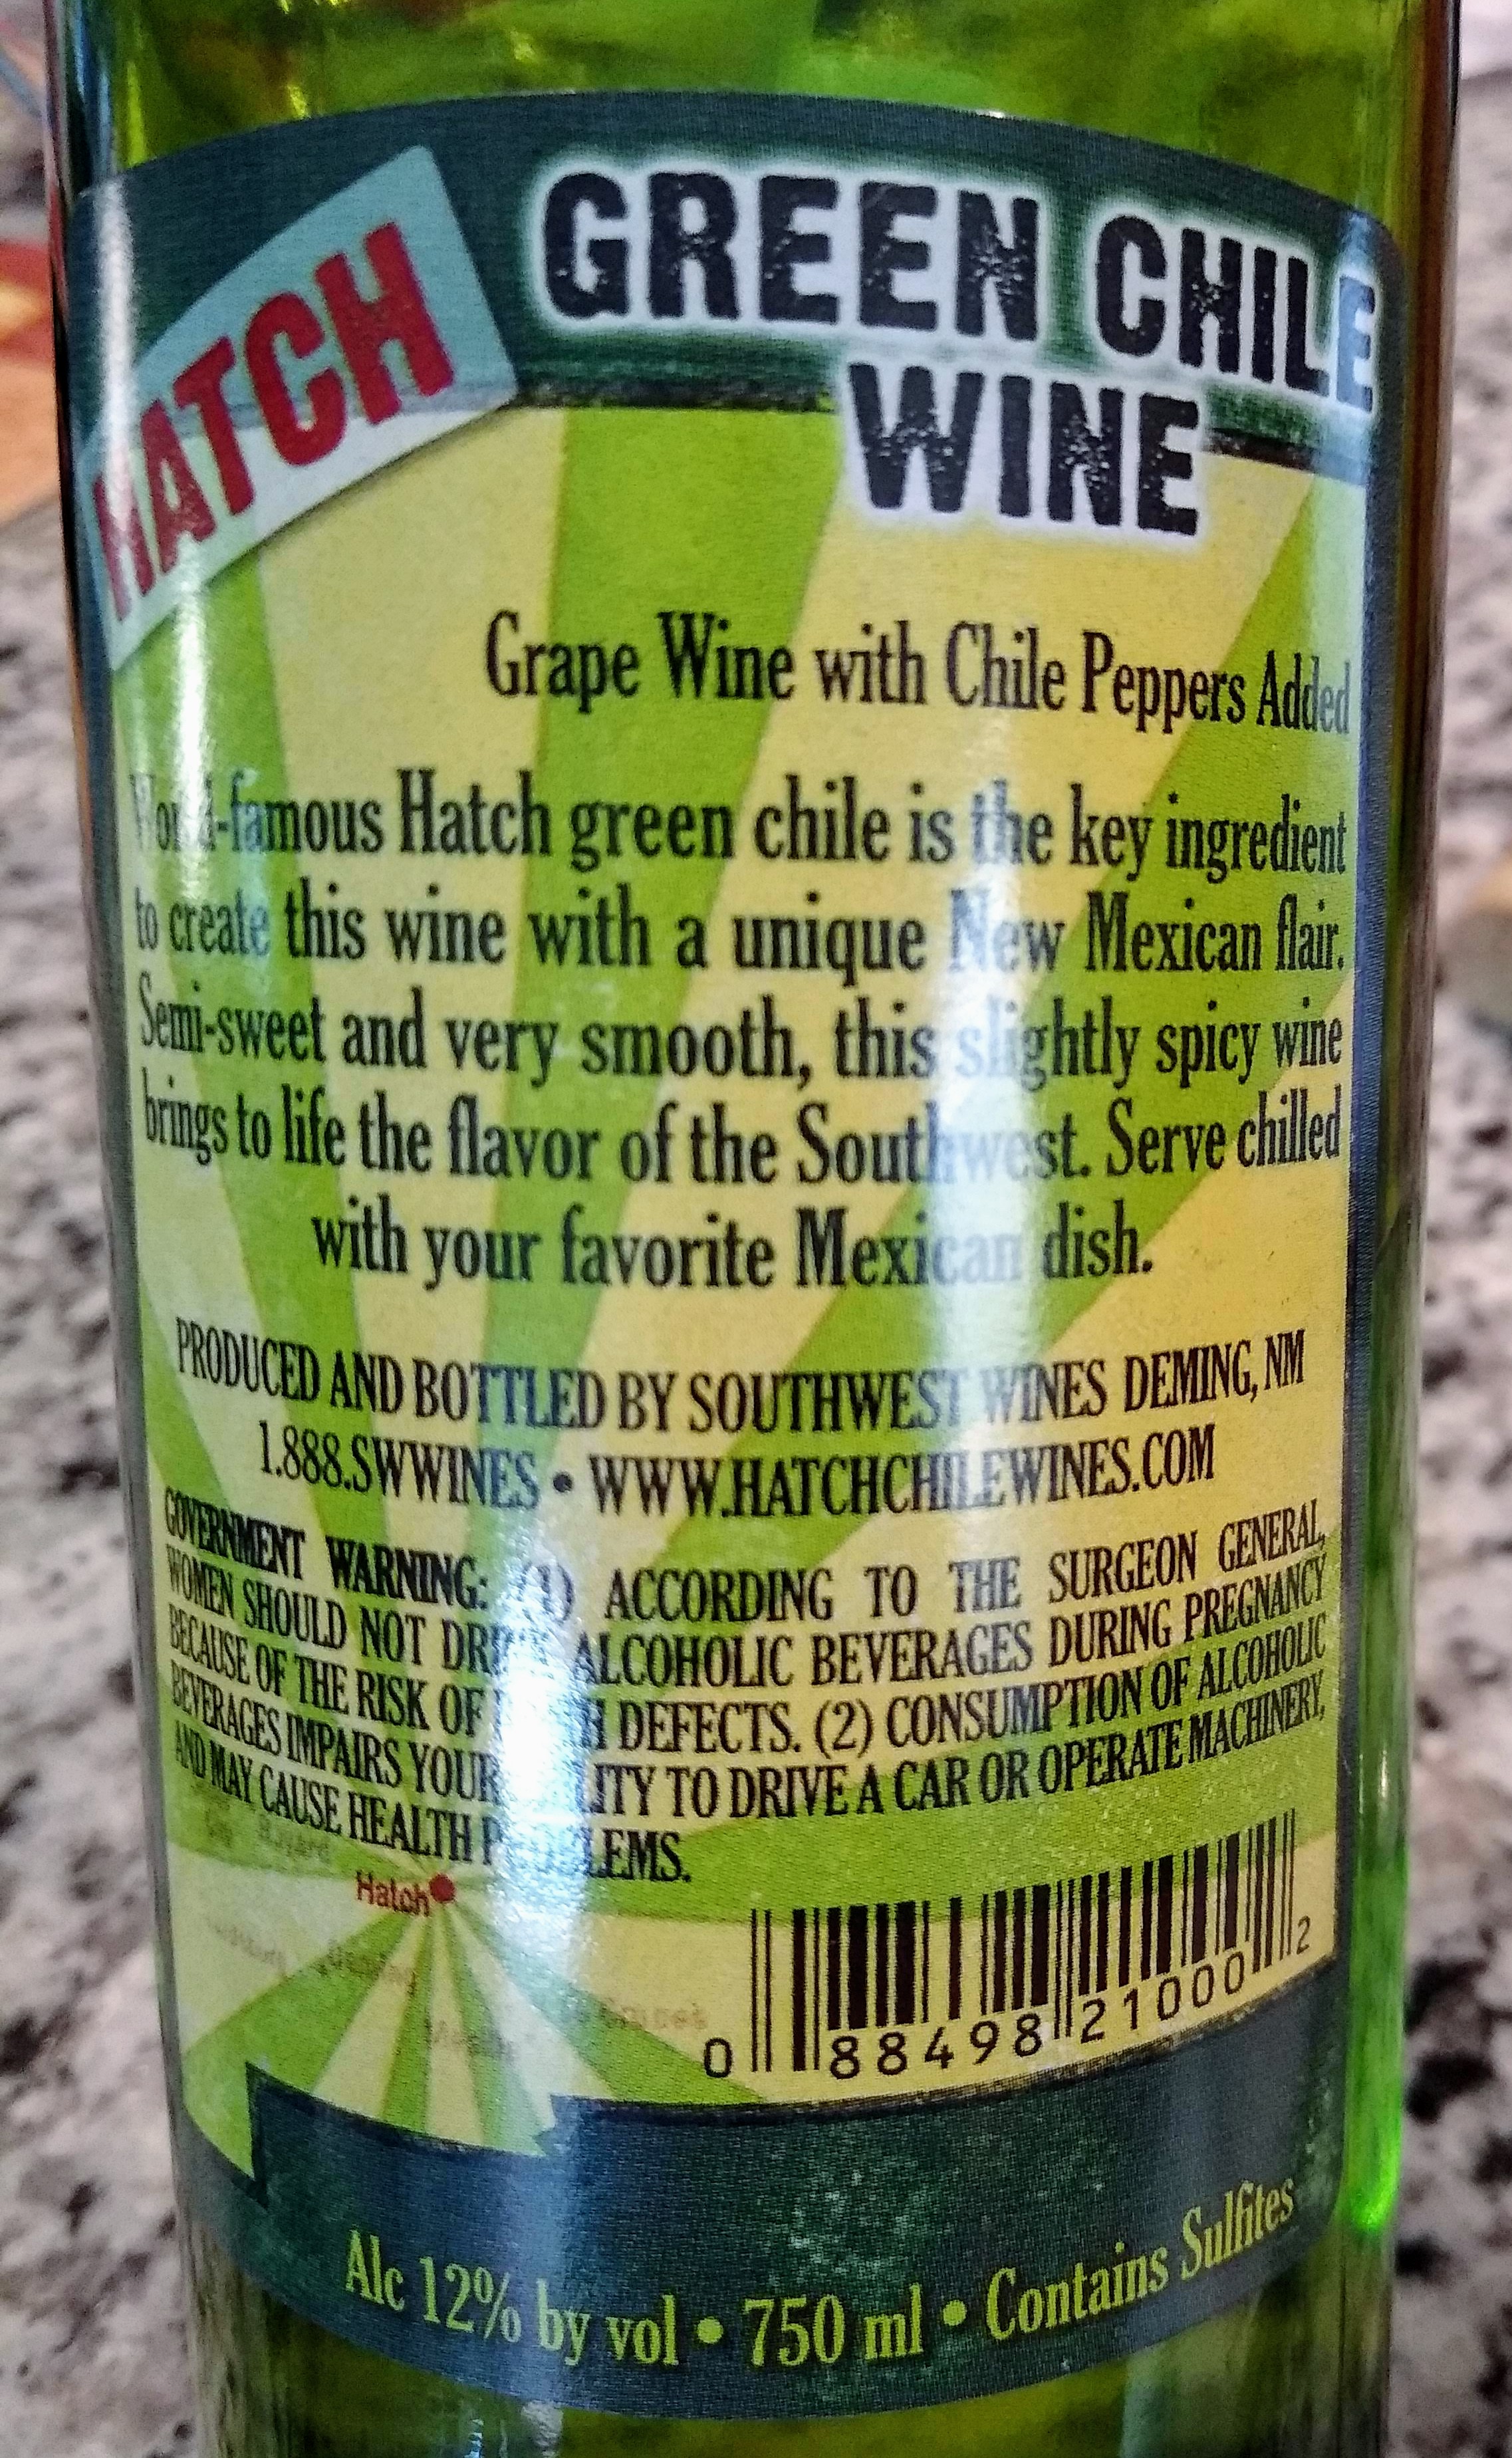
When I was down here a couple of weeks ago I ran across a Total Wines and More in Gilbert. I know it’s cliche, but “kid in a candy store” describes my Total Wines shopping trips. I always pick up a couple of bottles of local wine. When I was in Minnesota, I selected Hotdish Red and Walleye White. 🙂 Here in AZ, the bottle that caught my eye was Hatch Green Chile Wine from New Mexico. You guessed it. It looked more “interesting” than your average local grape selections or the often too-sweet fruit varieties in many Midwestern stores. I bought it and added it to my wine fridge.
Today I decided to try the green chile wine. The label suggests pairing it with Mexican food. That makes sense because there’s a lot of truth to the wine rule about “if it grows together, it goes together,” ie. Italian food, Italian wine, Spanish wine with Spanish dishes, etc. First, I tasted the wine to see what flavor profile to pair it with. The wine is really good all on it’s own! It’s very light colored with a slight greenish tinge. The predominant scent is the chili pepper, but it’s not overwhelming. The wine is slightly sweet, with a hint of the chile pepper flavor.
With this in mind, I perused my fridge to see what was on hand and Pinterest for some inspiration. I had guac ingredients in my fridge and shrimp in my freezer, so I searched for shrimp ceviche on Pinterest. This was the recipe I used for inspiration: https://pin.it/w4hj2vgu3uj2mk. I decided to cook the shrimp. At some point I may decide to let the acid in the lime juice “cook” the shrimp in the traditional ceviche manner, but the evening before I start a new job is not the right time to be experimenting with raw seafood, IMO. Since the wine has a slight sweetness to it, (and because I love pineapple and happened to have one setting on my counter) I decided to add chopped fresh pineapple per one of her suggested variations. Here is my version. Again, make it your own, based on what you like and have on hand.
2 lbs. cooked shrimp, chopped into small pieces. (I only had raw in my freezer, so I cooked them with a little olive oil, S&P and garlic powder. )
juice of two fresh limes (I nuked them for 30 sec. They release their juices so much better!)
2 chopped green onions
a handful of chopped fresh cilantro
one large chopped jalapeno (remove the ribs and seeds or leave them in, depending on your heat tolerance)
1/2 large chopped cucumber
a generous half cup of chopped fresh pineapple and about 1/4 cup of the juices if you get any when you core and cut it
Mix all the ingredients and let it set in the fridge for at least 30 minutes for the flavors to develop. Enjoy with tortilla chips.
Look at all those beautiful colors! The fresh smell is amazing!
I’m sure some of you are thinking “eww – shrimp and pineapple?” Trust me, they are wonderful together! There are so many fresh beautiful flavors going on. This is the perfect dish for a hot summer day or evening. Most importantly, the match of this with the wine was made in gastronomic heaven! The fresh, slightly sweet, chile pepper flavor profile of both made for a perfect pairing. If you aren’t in the neighborhood to buy the wine, the light, bright, flavor and tropical fruit notes of a Chilean Sauvignon Blanc would pair nicely as well.
Let me know if you try this. I’d love to hear your thoughts and suggestions for variations. Here’s to being interesting! Cheers!
How to make chicken rivel soup like your grandma – with a few modern conveniences 🙂
Who doesn’t love a bowl of homemade rivel soup? For those of you who aren’t from the South central part of ND, it’s homemade chicken noodle soup except that the noodles are little pieces of dough about the size of rice but with much more flavor!
The old-fashioned version involved simmering the chicken and other soup ingredients for hours on the stove and making the dough for the rivels and the rivels themselves by hand. To be honest, I don’t even know how to make rivels by hand. One of the first pieces of advice my late mother-in-law gave me over 35 years ago was to buy a food processor so I could make rivels easily. 🙂 Some people still do it the old-fashioned way.
My version uses the same ingredients, but I use a food processor to make the rivels and my Instant Pot to make the soup. That cuts the soup cooking time down to 45 minutes (and we’re talking a huge Hutterite chicken being fall-off-the-bone soft) and about 5 minutes for rivel prep. I’m also including one way to use up the chicken – cream chicken, also known to my family as “Dungas.” (I don’t know how to spell in German but the u is long, like in drool 🙂 ).
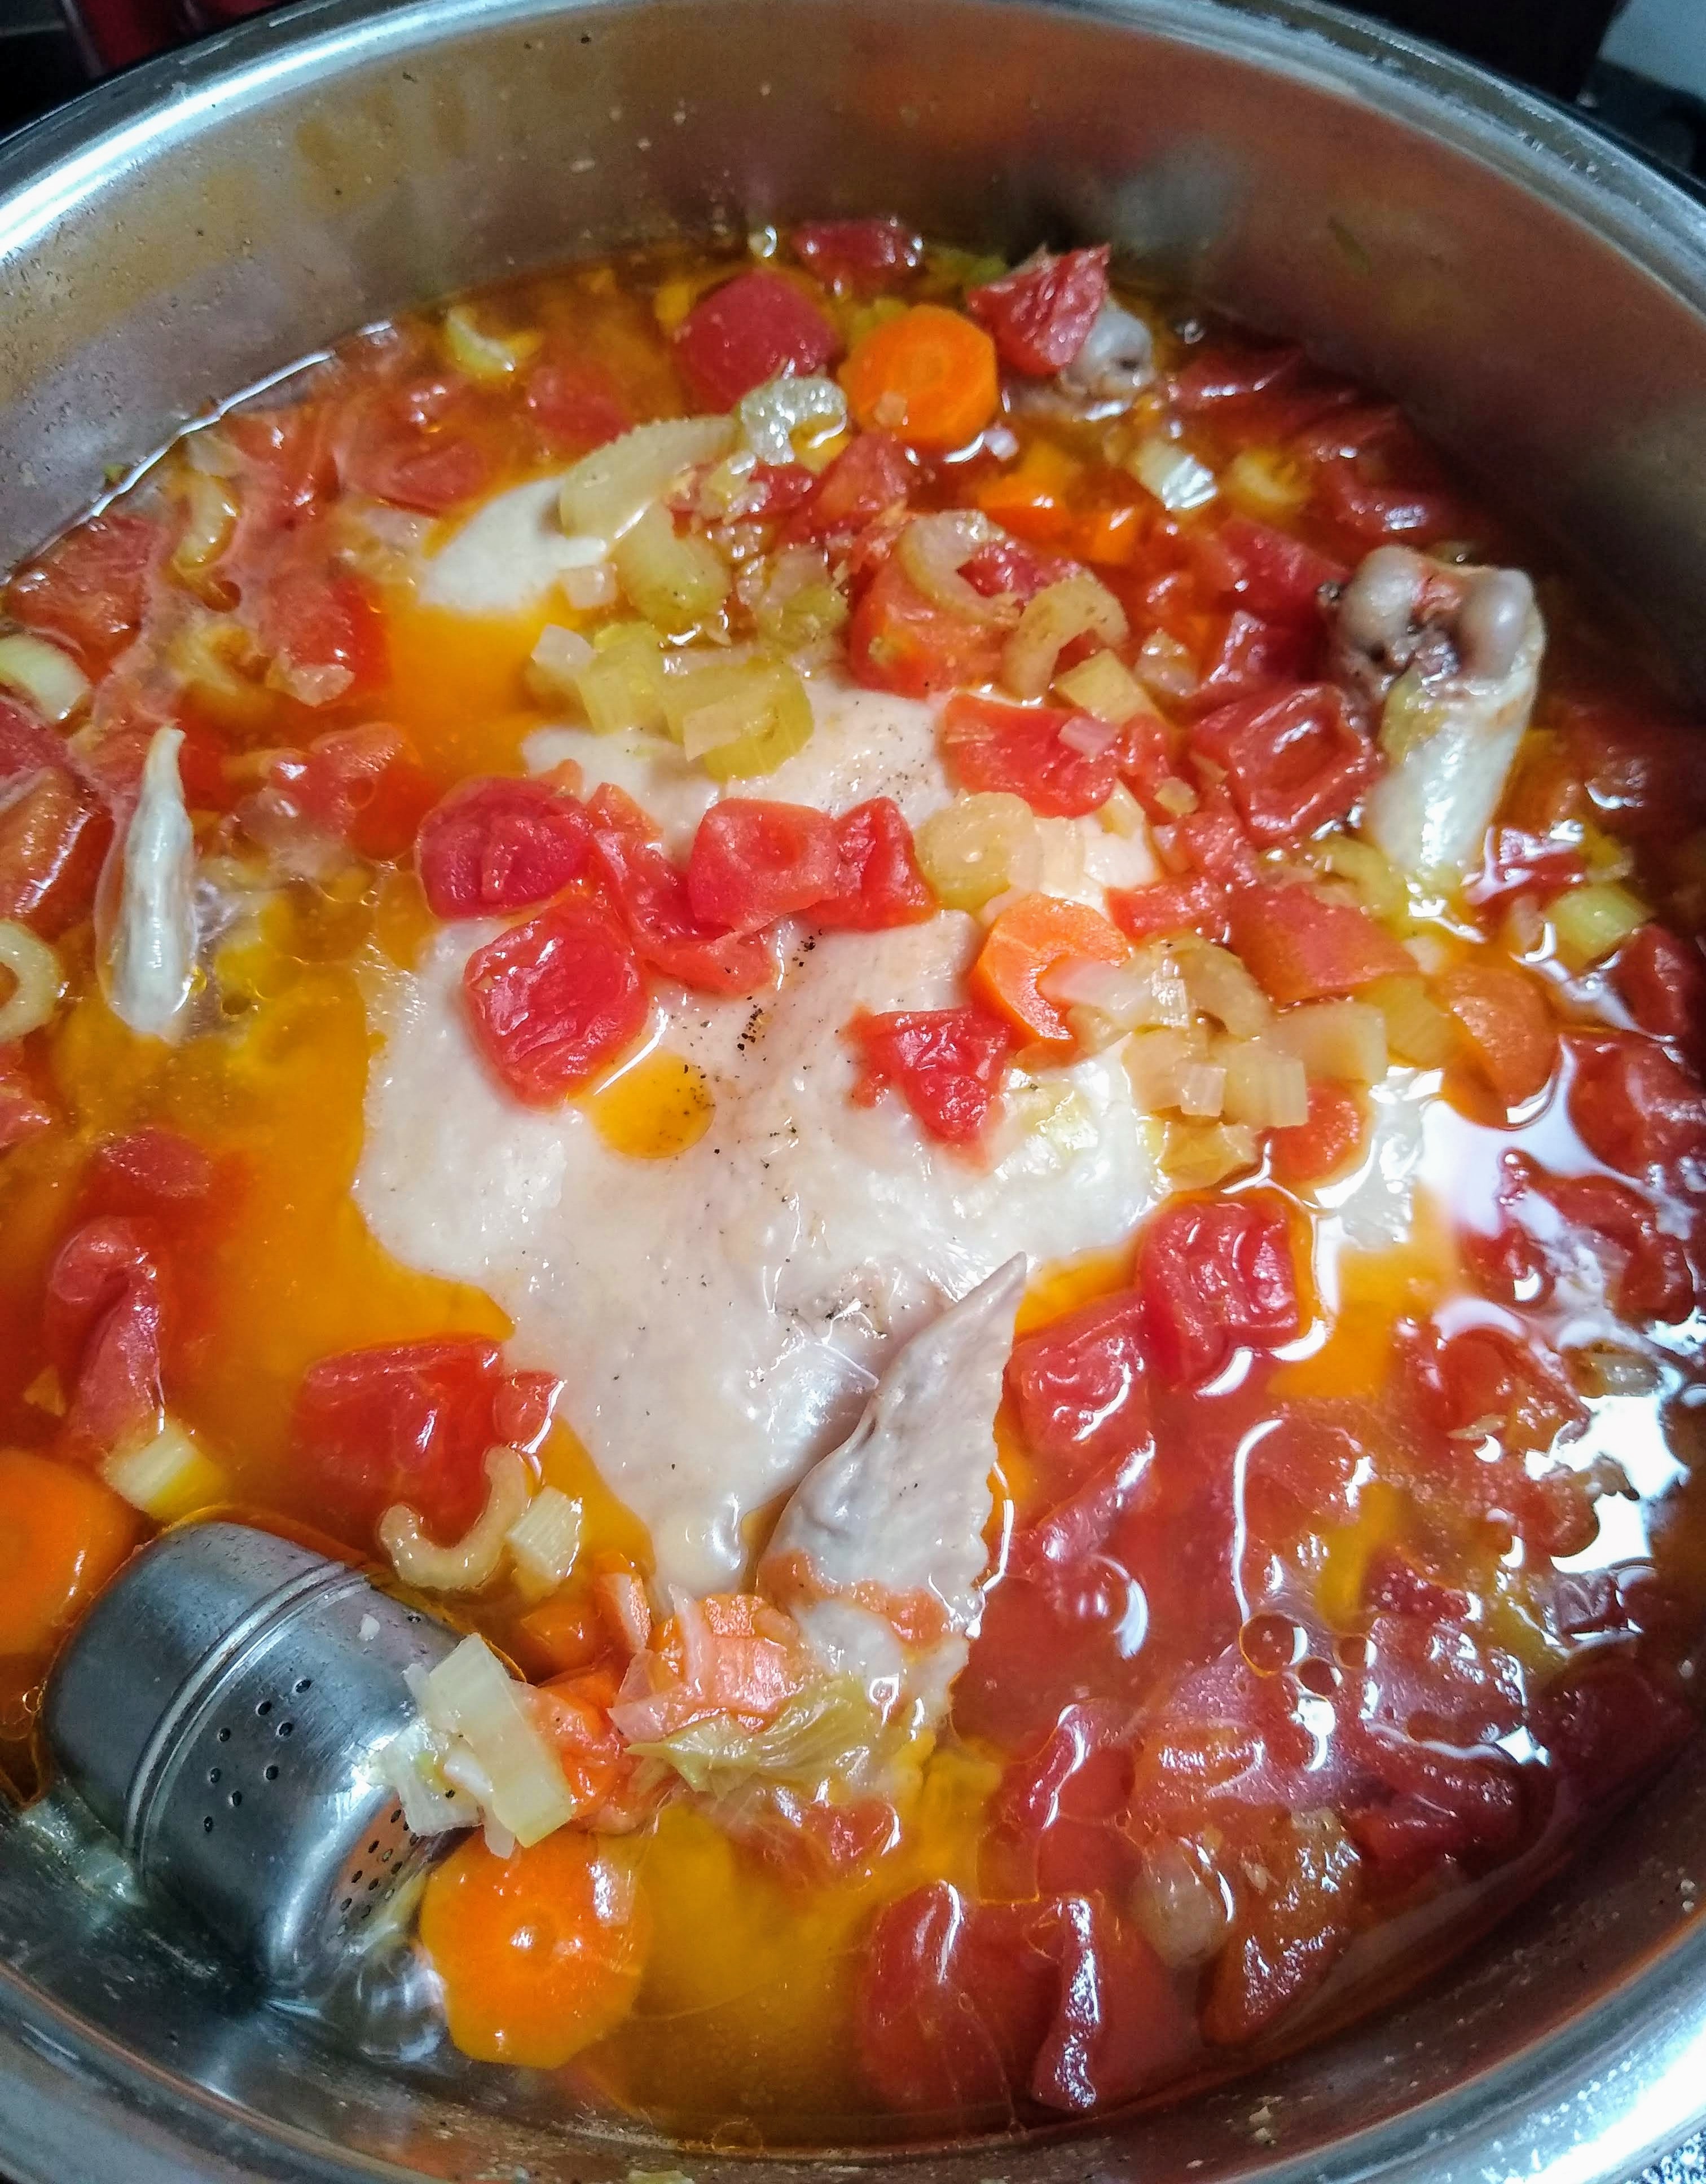
The first step is to get the soup cooking. Here is what you’ll throw in the pot:
1 large whole chicken, skin left on
1 16 oz can diced tomatoes
about 2 cups each chopped onion, celery, and carrots
1/4 cup salt
1 Tbsp pepper
a soup ball/tea ball with a Tbsp pickling spice, a couple of bay leaves and 2-3 crushed cloves of garlic
water to the max line of the instant pot
Set the pot to 45 minutes. (Tip: I usually add some water to the pot first and then put the pot on the saute function while I prep and add the rest of the ingredients. This will save some time getting it to pressure.)
Now, while the soup is cooking, you’ll have time to make the rivels. The ingredients are simple:
3 cups flour
1 tsp. salt
1 tsp. baking soda
5 eggs
a couple of Tbsp water – if needed
Put the flour, baking soda, and salt in the food processor and pulse a few times to mix it.
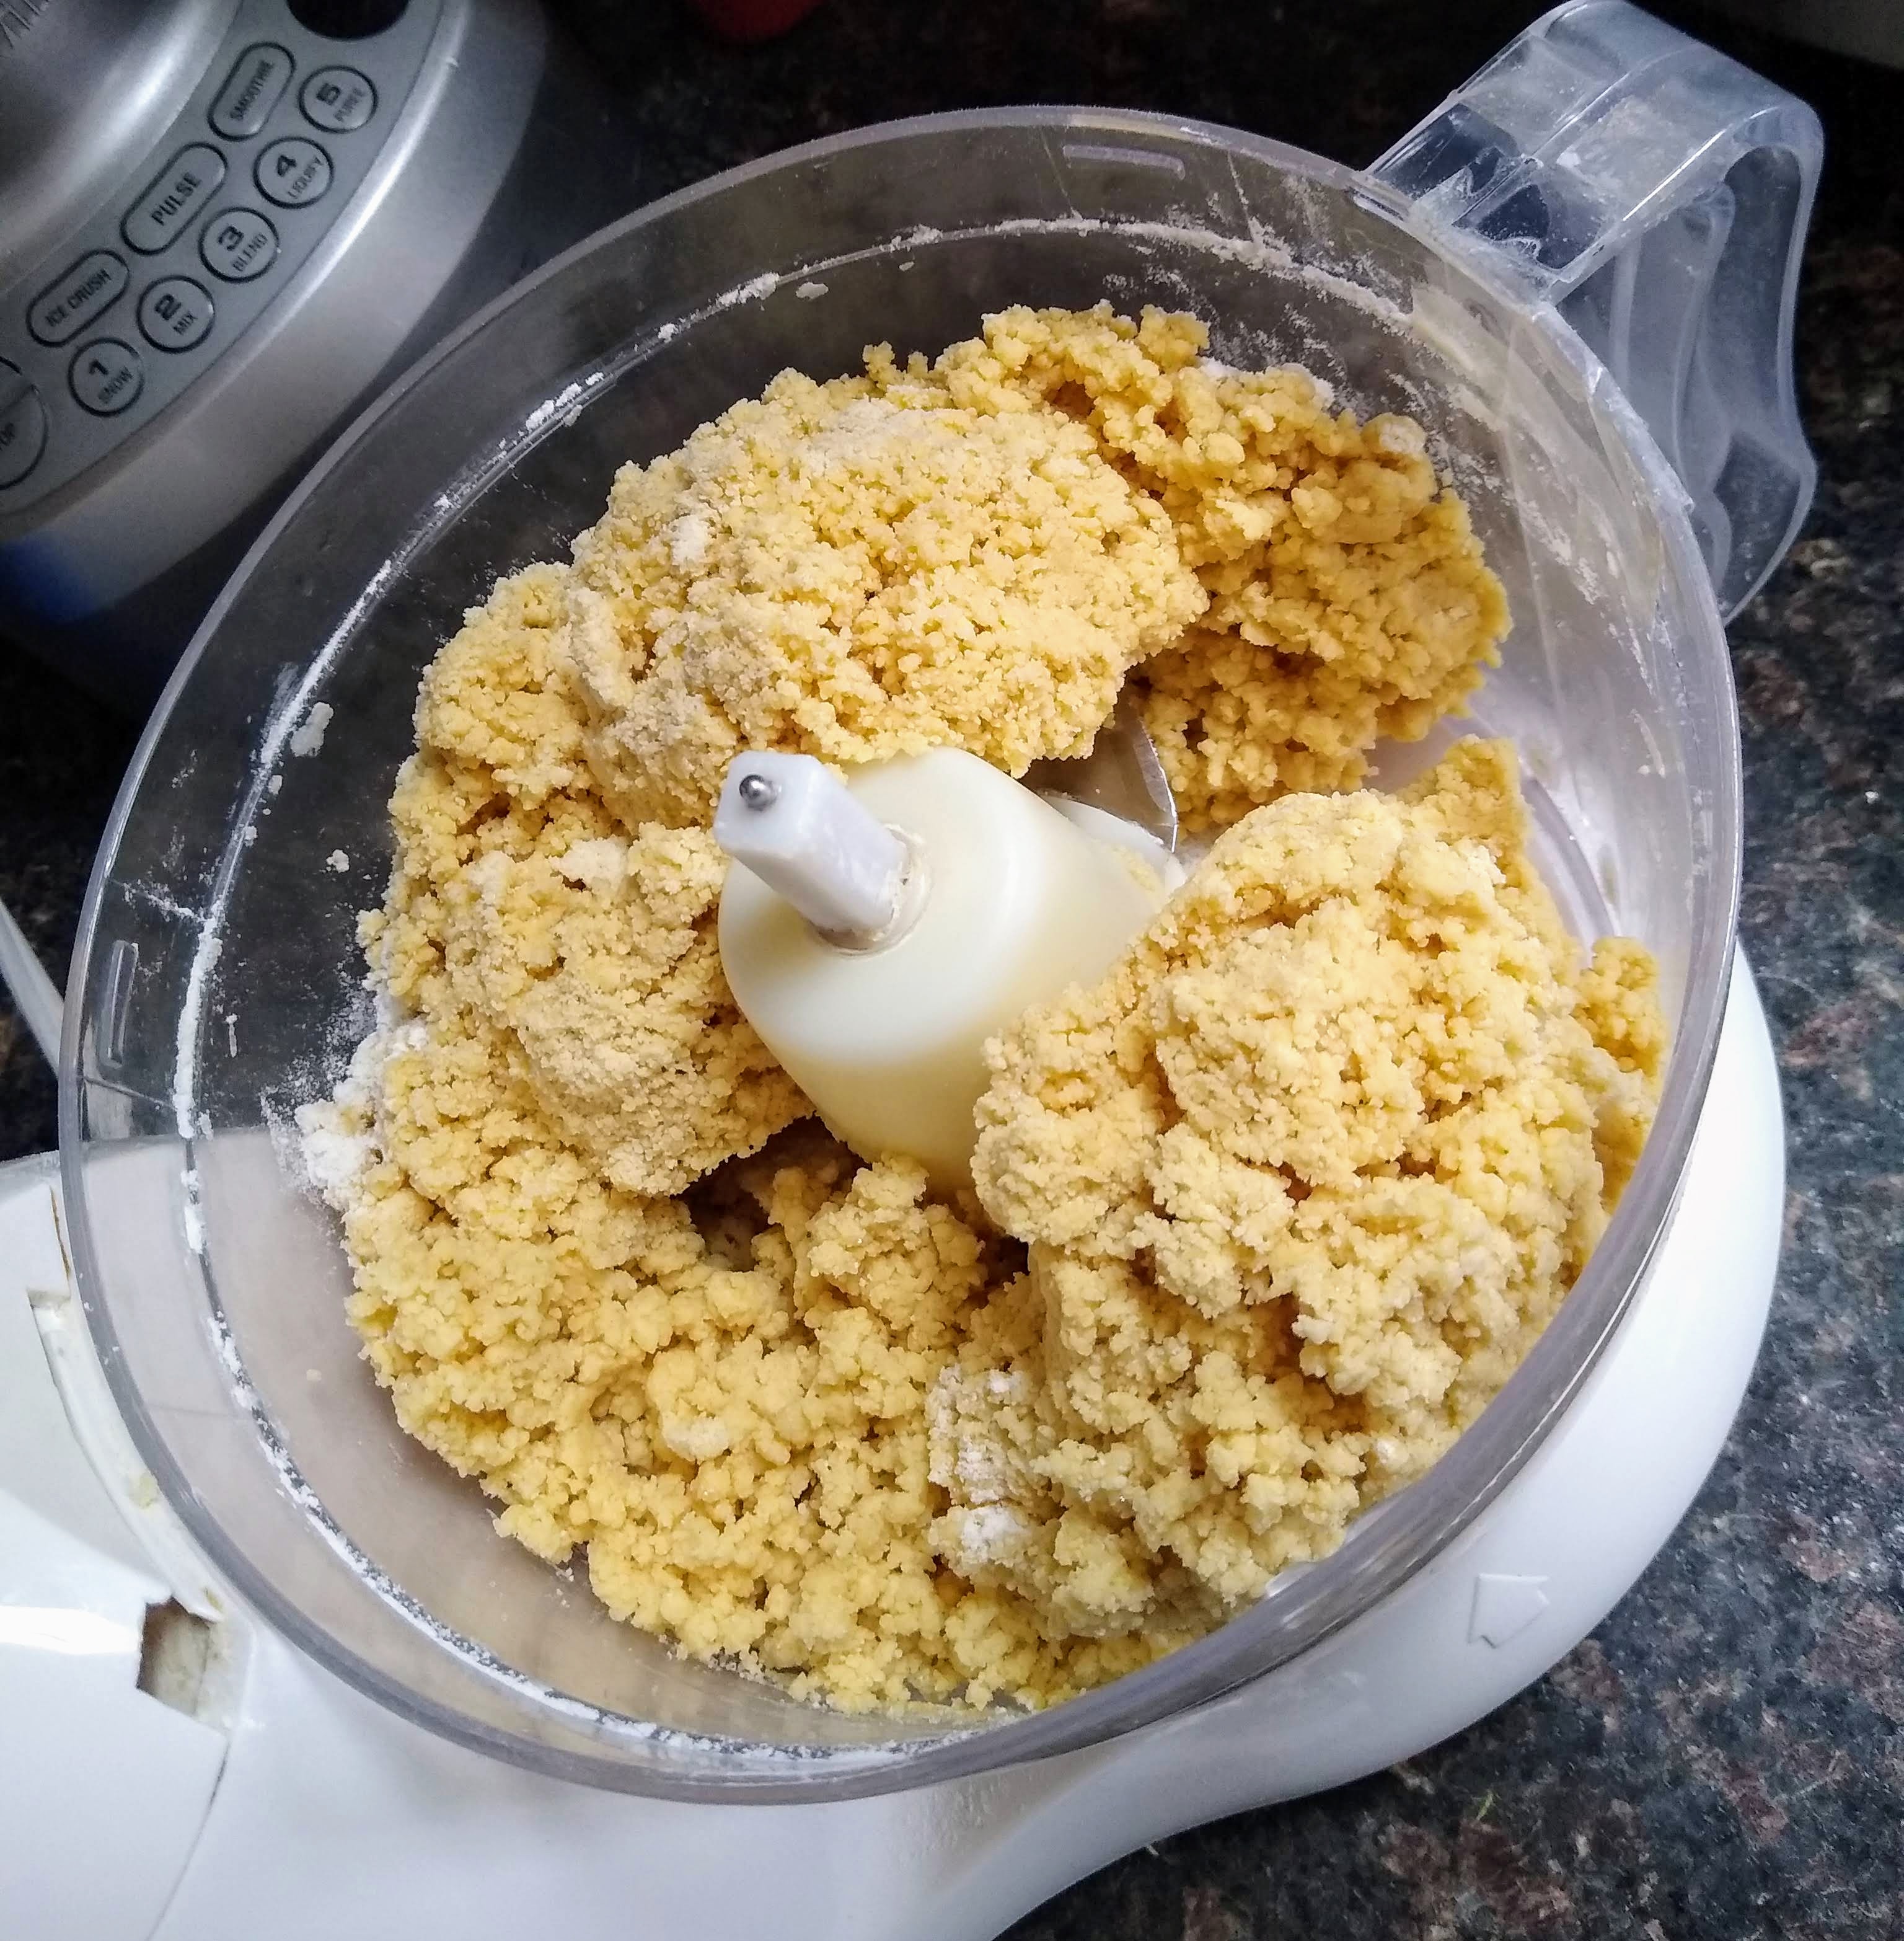
Turn the processor on and pour in the eggs slowly, mixing until it forms a stiff dough. If you need to, add a little water, a couple Tbsp at a time. The dough can appear a little crumbly – as long as it holds together when you press it.
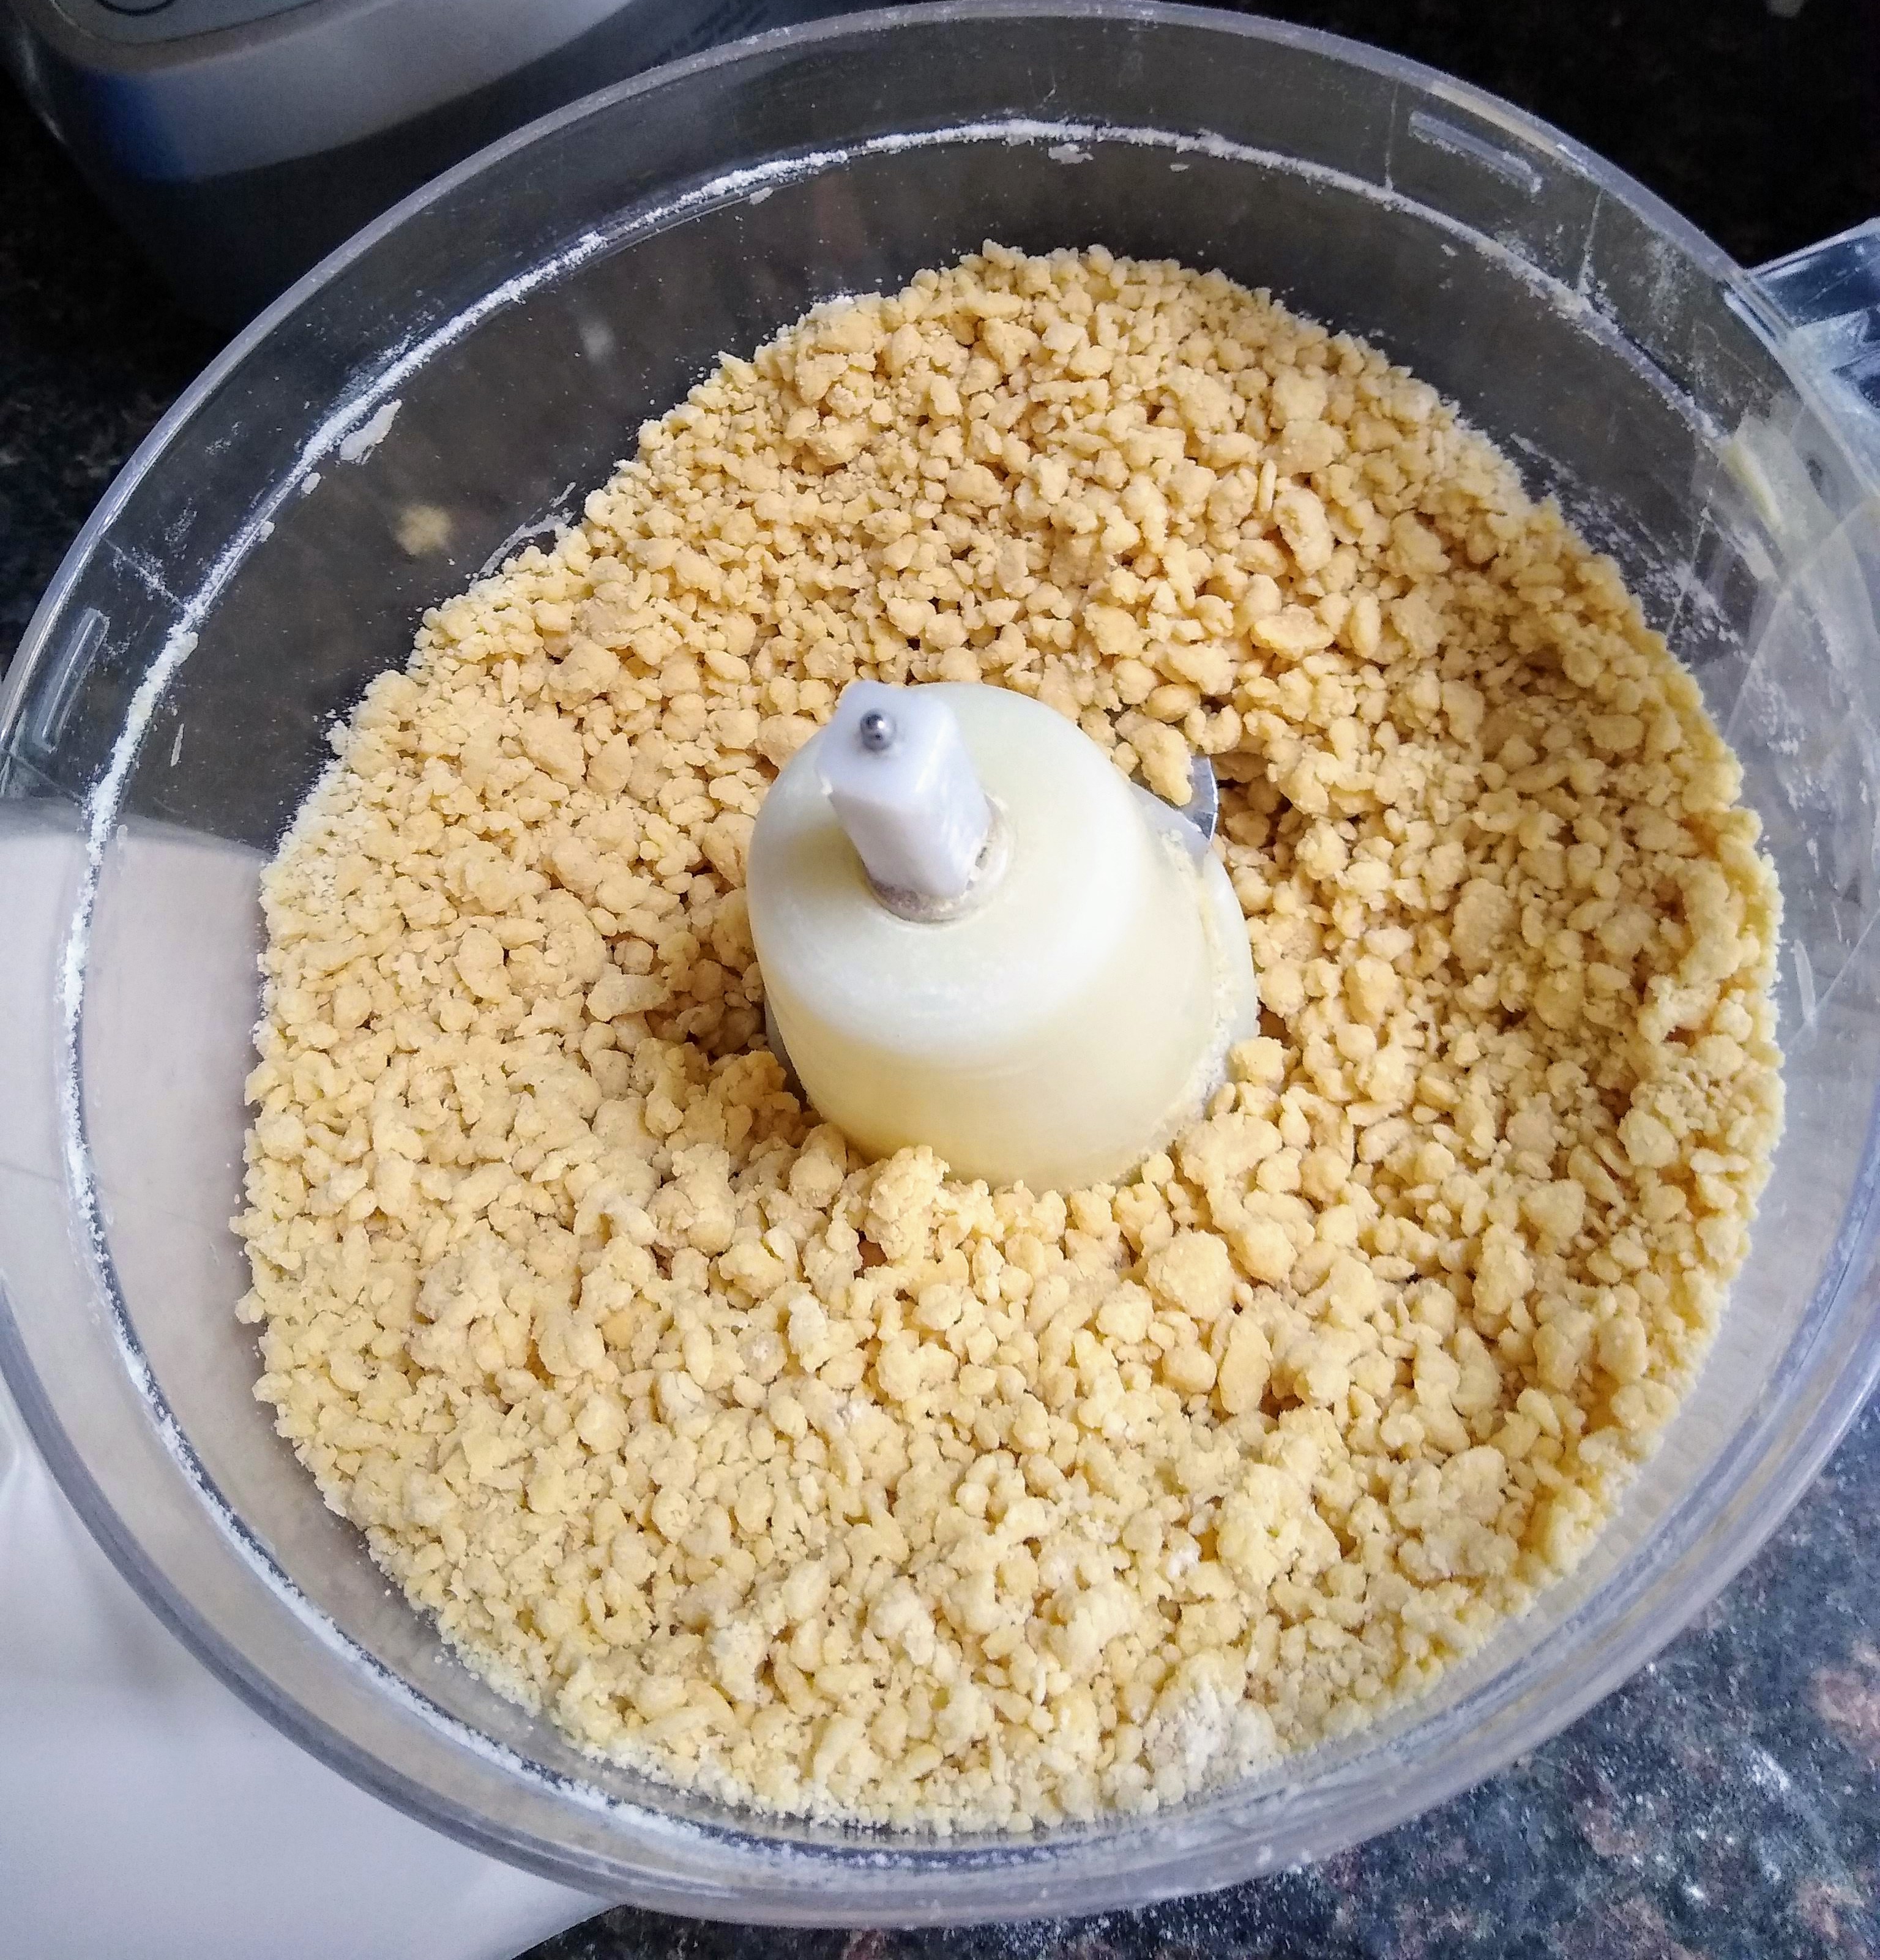
Now that it’s formed a dough, remove about half of it and set it aside. Sprinkle a few Tbs of flour over the remaining dough and pulse until it forms the rivels. Dump them onto a clean dishtowel and repeat with the other half of the dough. Spread them out in a thin layer and let set until you are ready to put them in the soup. The dishtowel will absorb any extra moisture or flour and allow the rivels to dry slightly so they don’t stick together when you throw them in the soup.
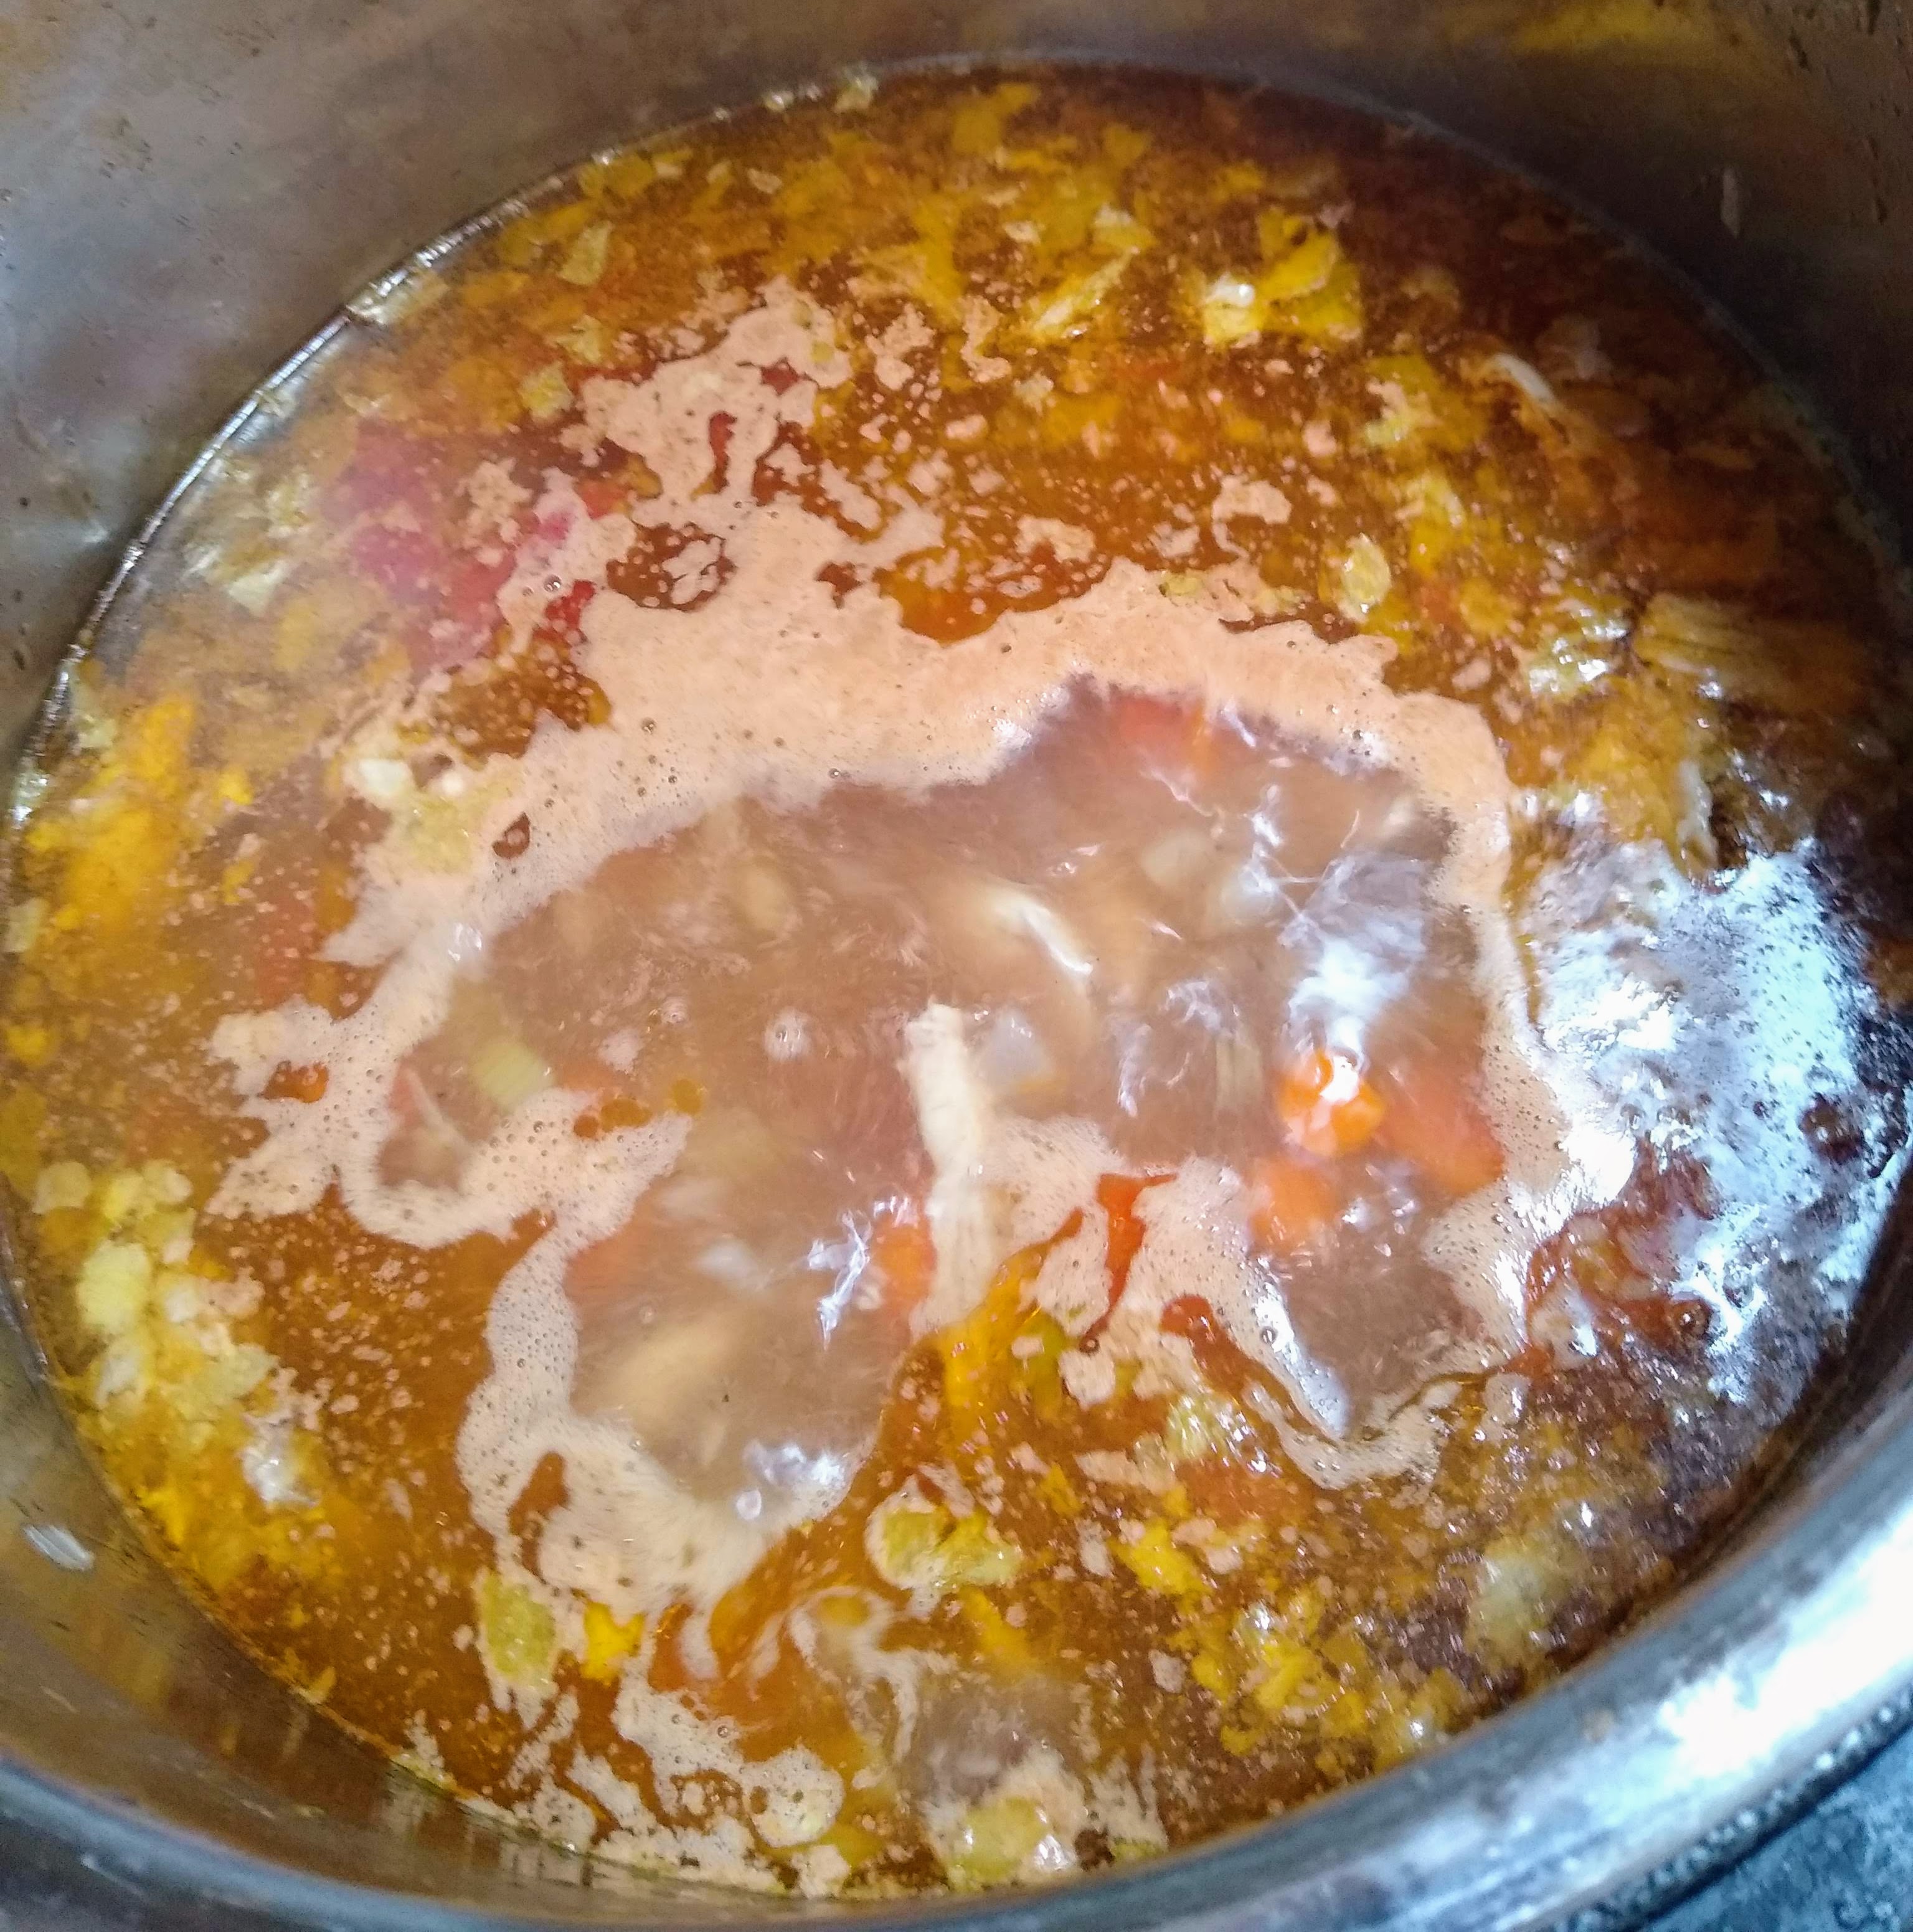
When the 45 minutes is up, let the pressure naturally release for 10-15 minutes then do a quick release.
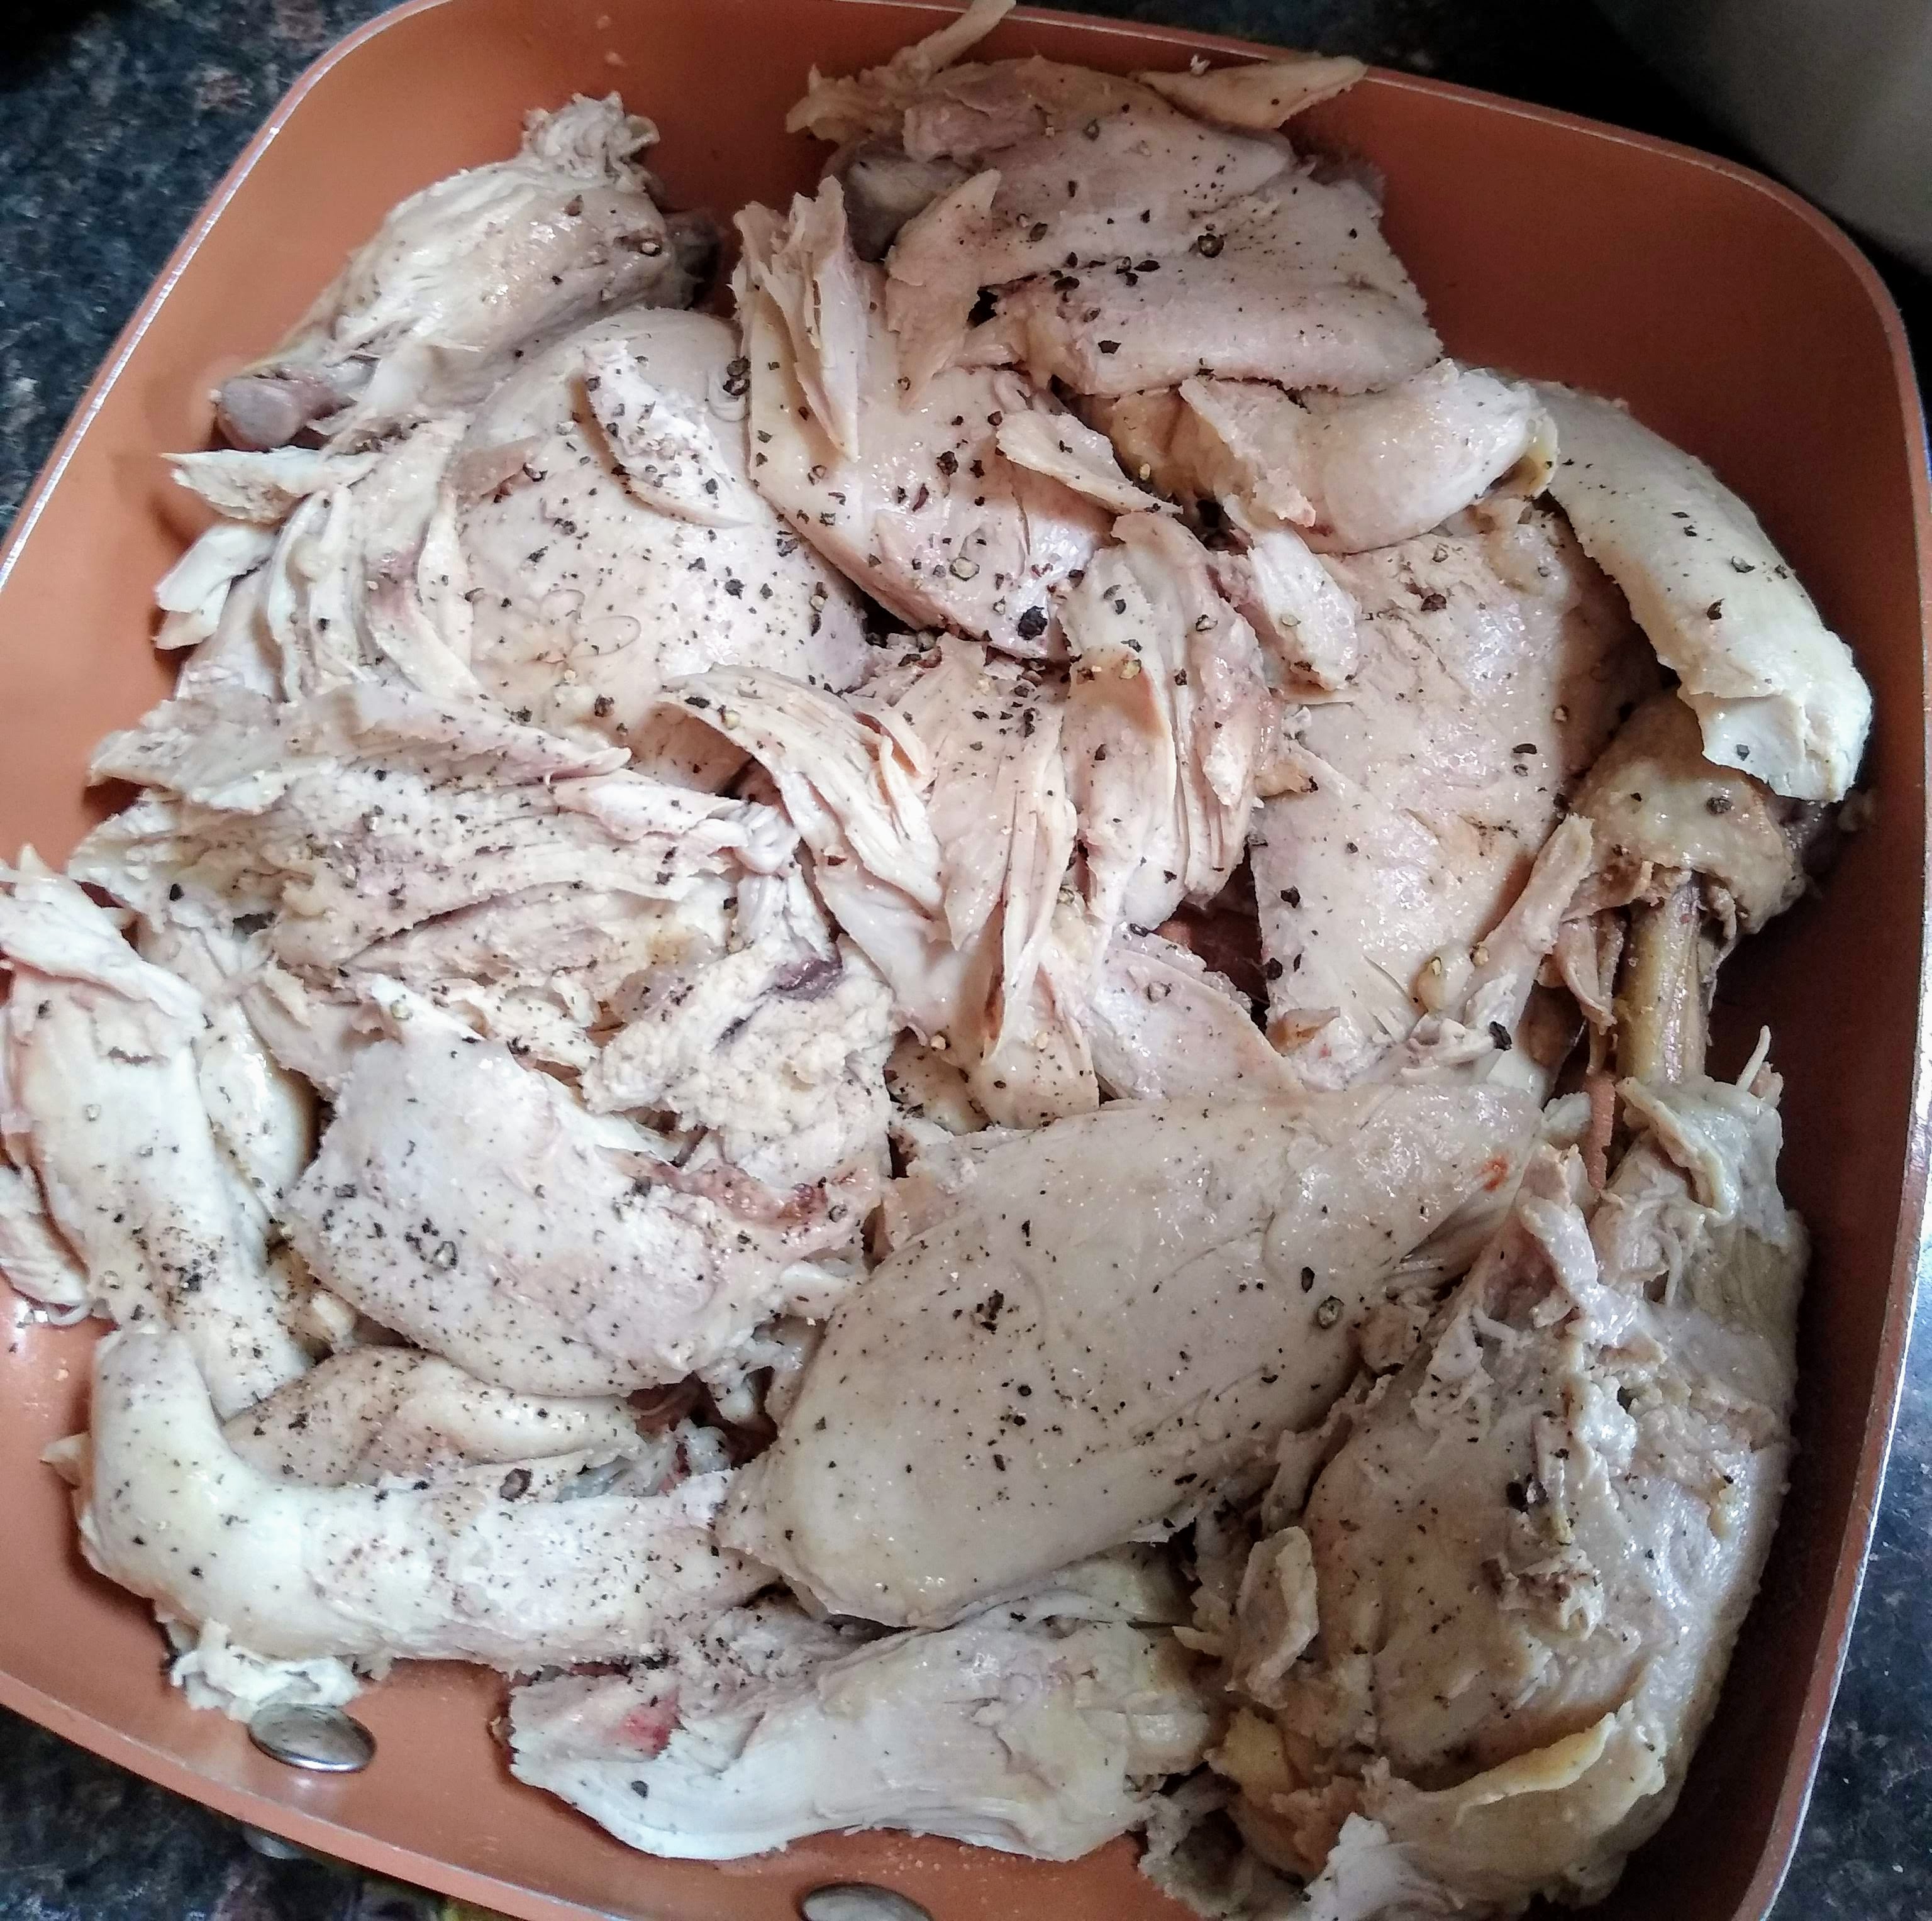
Pull just the chicken out of the pot and set it on a plate to cool a bit. (If you have picky eaters who object to a few vegetables in their soup tell them to make their own dinner – or if you’re feeling indulgent or you’re the picky one, just strain out all the other ingredients and return the plain broth to the pot.)
At this point I skin and debone the chicken. I put the tiny pieces from the back, ribs, neck, and wings back into the soup. I cut the breast meat into several smaller pieces so it can soak up more dungas! I also reseason the chicken with salt and pepper. Pour a mixture of about 3/4 heavy cream, 1/4 ketchup, and a Tbsp or two brown sugar over the chicken. (Don’t judge – it’s comfort food, not health food!) I only made a little cream sauce this time. You can make more and serve it over mashed potatoes or make just enough to flavor and moisten the chicken and soak up with some bread. Simmer the cream chicken over low heat, stirring occasionally until the soup is done.
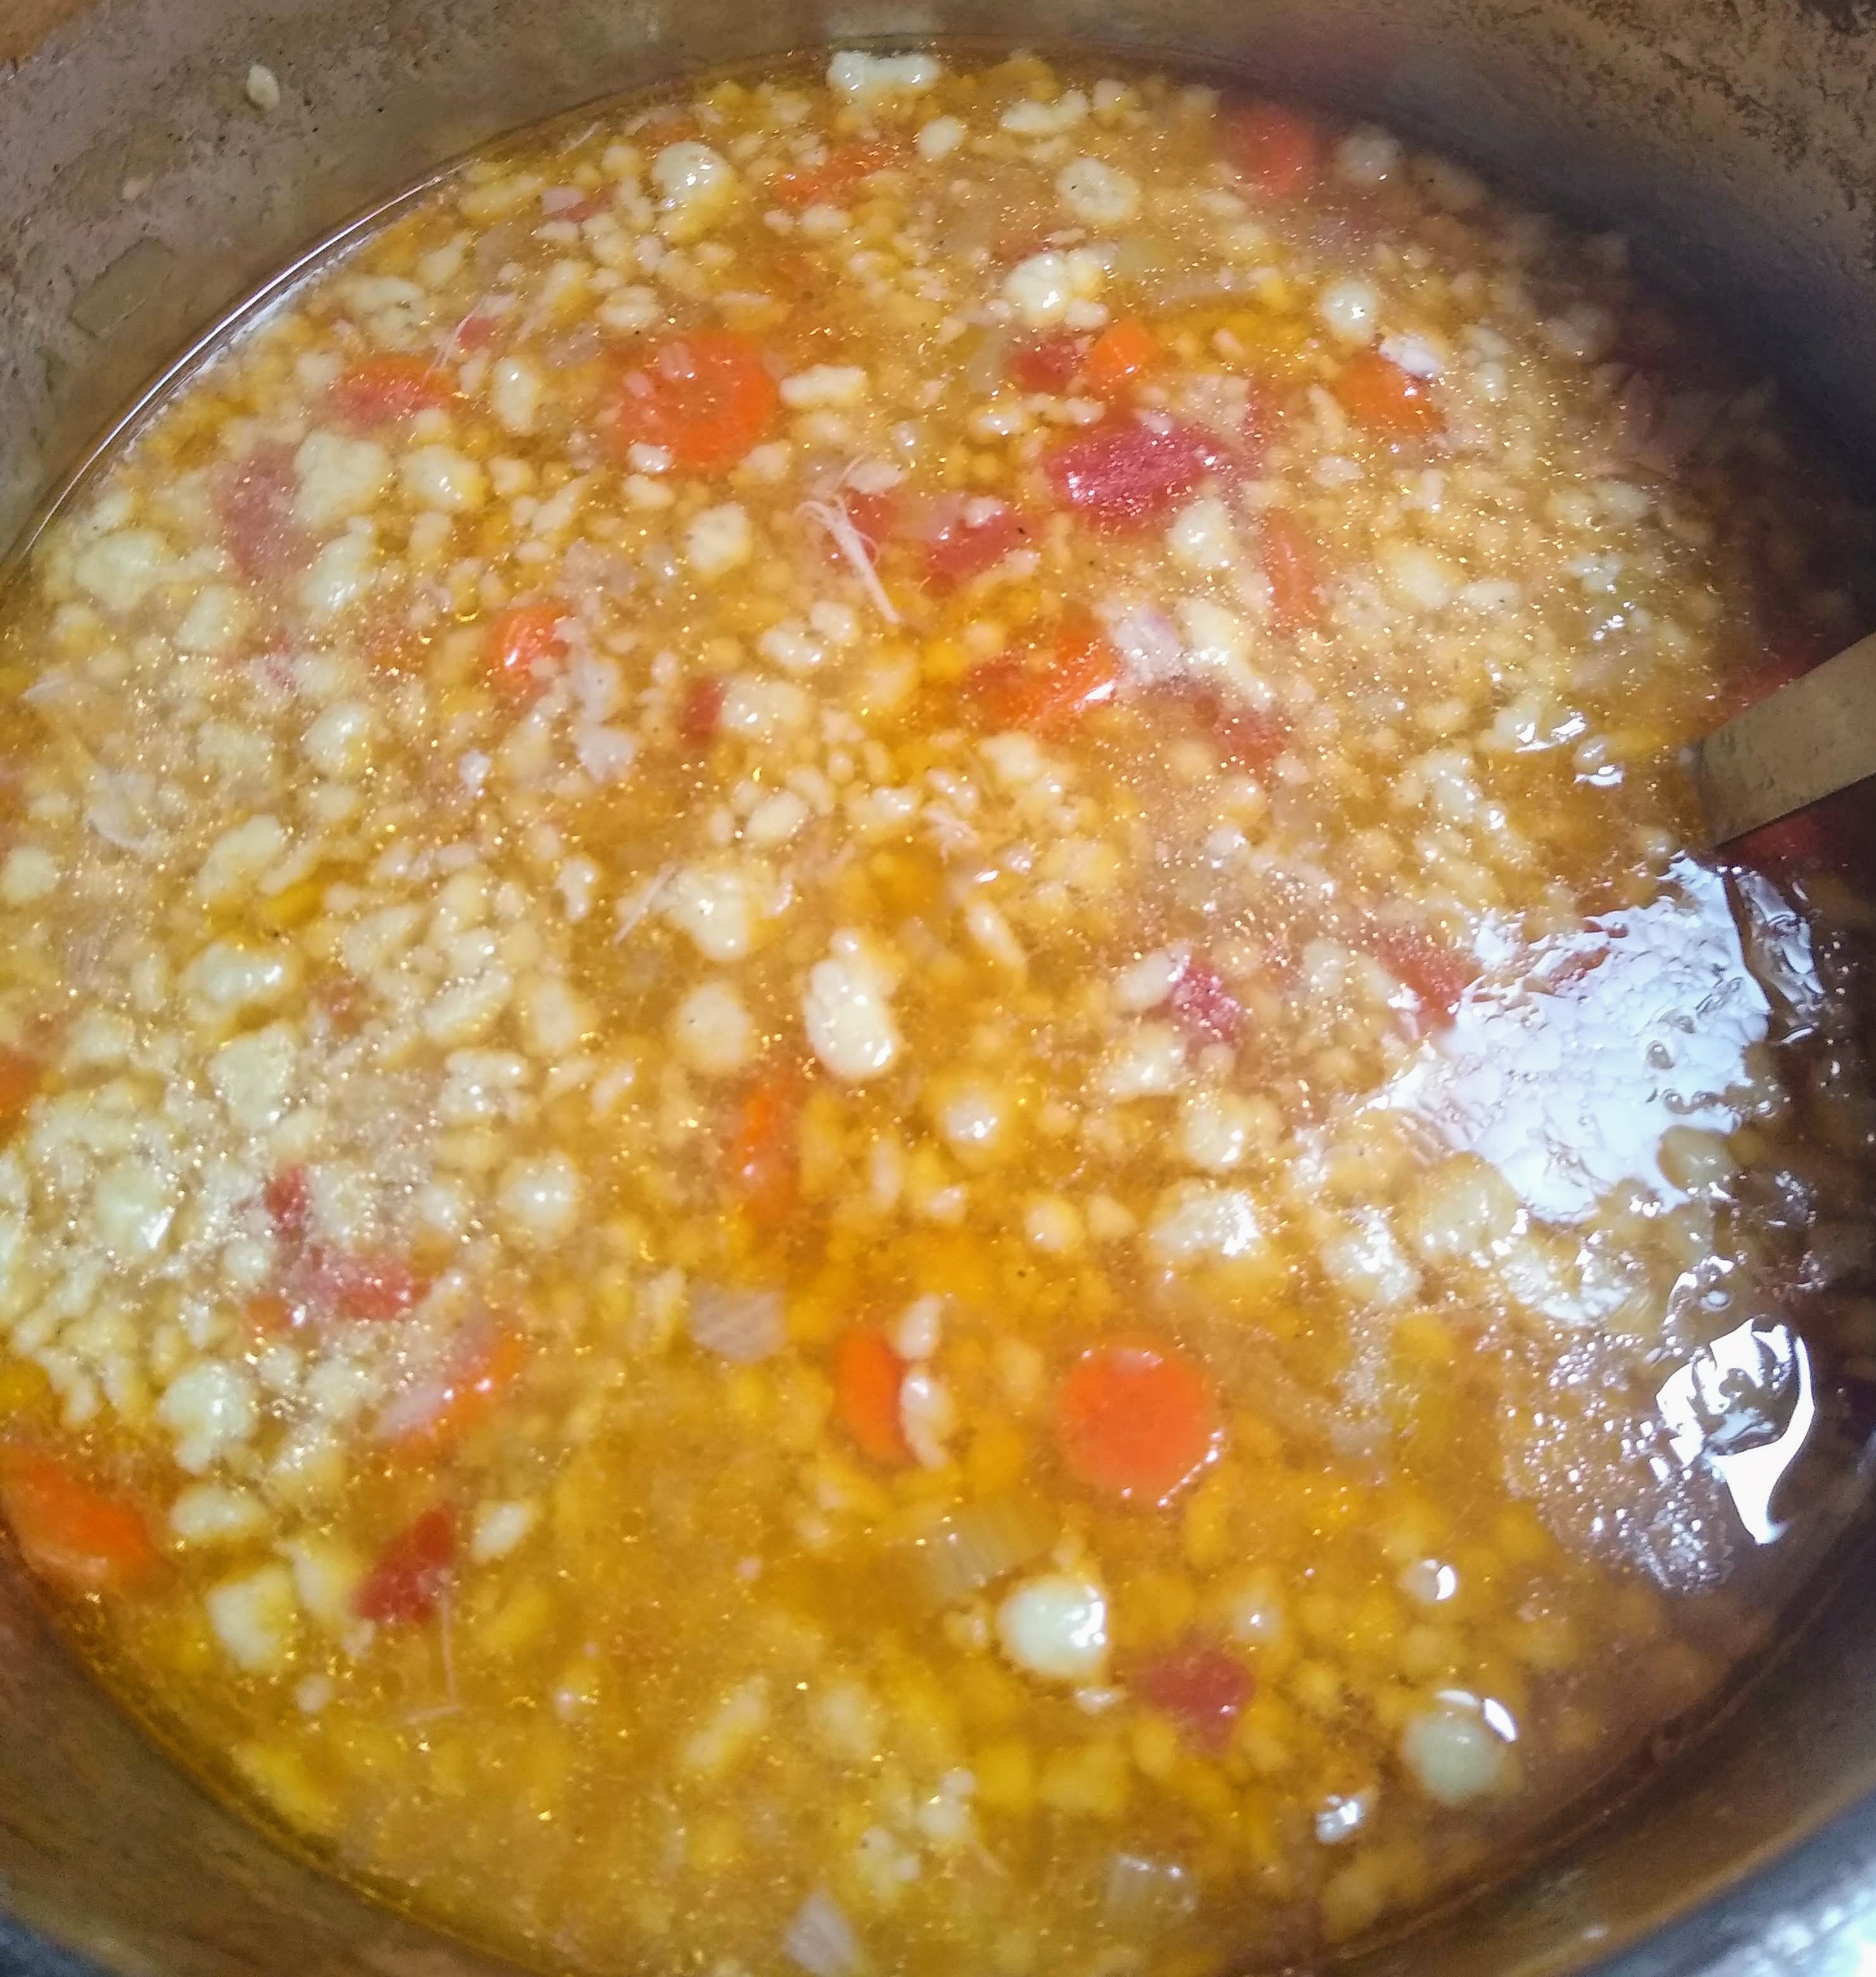
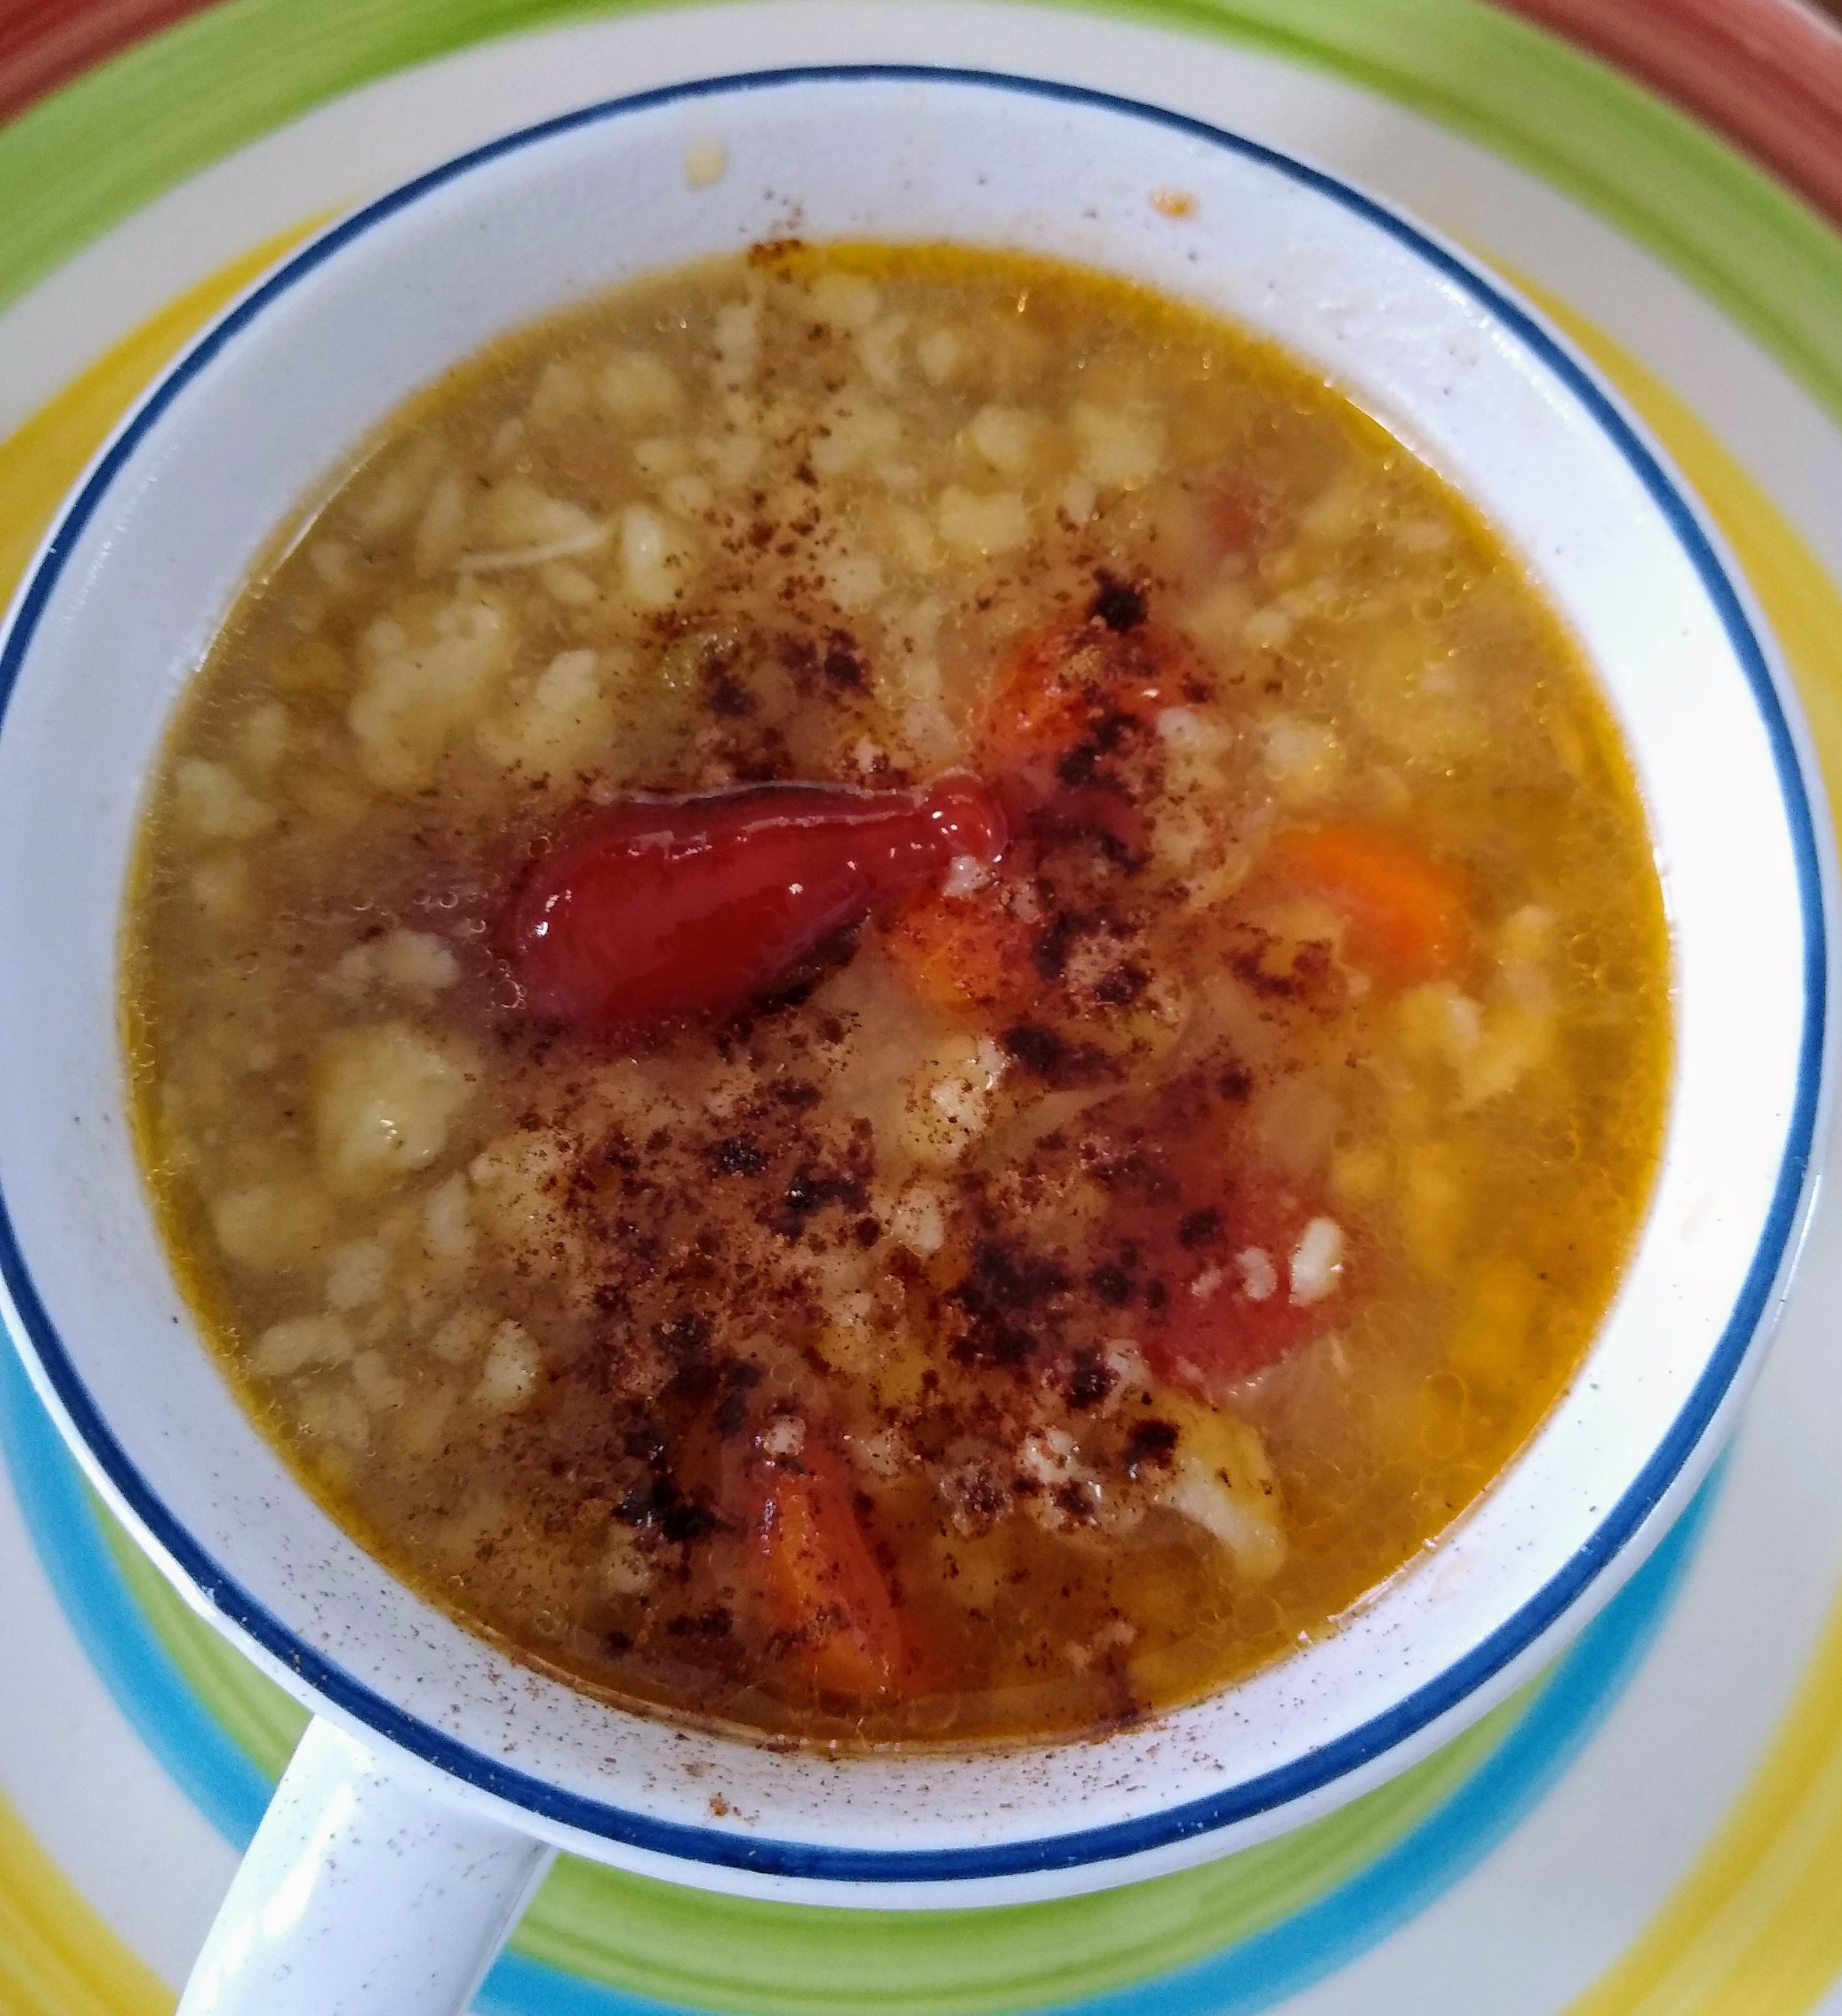
Okay, back to the soup. Hit the saute button on the pot and when the broth comes to a boil, pour in the rivels. Let them cook for about 10 minutes. Your soup is ready! Serve with the traditional south central ND condiments of ketchup and cinnamon (don’t judge until you’ve tried it :))
If you don’t want to make the cream chicken, you can use the chicken for chicken salad, chicken enchiladas, or any of your other favorite uses for cooked chicken.
Also, please note that some of the measurements above are approximate. I usually measure with my eyes and my hands. Adjust according to your taste.
Thank you for hanging out with me. Please ask questions or comment and let me know how you like it!