A Beet and Cabbage Kind of Weekend

Fall in ND means it’s time to harvest the last of the garden vegetables. While tomatoes are usually my bumper crop, this year it was my beets and cabbage. An unusually wet summer caused all kinds of issues with my tomatoes, so I’m thankful I still have salsa, pasta sauce, tomato basil soup, Bloody Mary mix, chili, and even ketchup canned from last year.
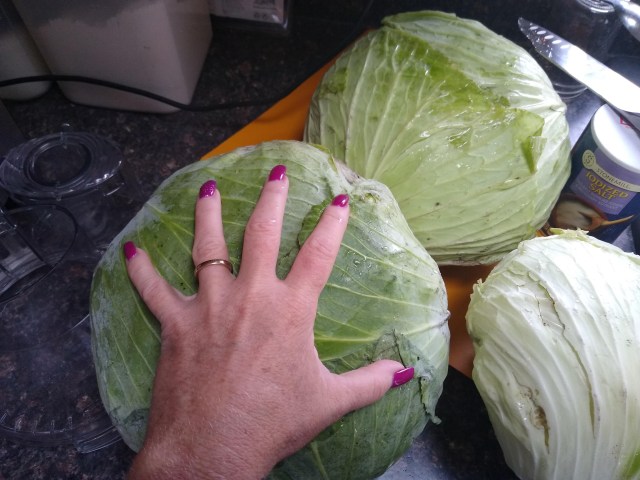
My cabbage heads are huge, and I think every beet seed I planted grew, so this year I need to get creative with those two vegetables. I love beets in pretty much any way, shape, or form, but if I do anything with them other than make borscht, I am eating them by myself. 🙂 Unless of course my food purist of a husband discovers a new recipe in the Green Sheet (our local farm news publication – my ND and SD friends know exactly what I’m talking about). Recipes in the Green Sheet are often brought to my attention; whereas, I could present him with the identical recipe from Pinterest and be met with skepticism.
This week his discovery was a borscht recipe which included chopped beet leaves because “they are supposed to be really good for you” (his words, not the recipe publisher). The day he wants to try a new food, ESPECIALLY beet greens, ESPECIALLY because it is good for him, is the day I get to cooking IMMEDIATELY – before he can change his mind.
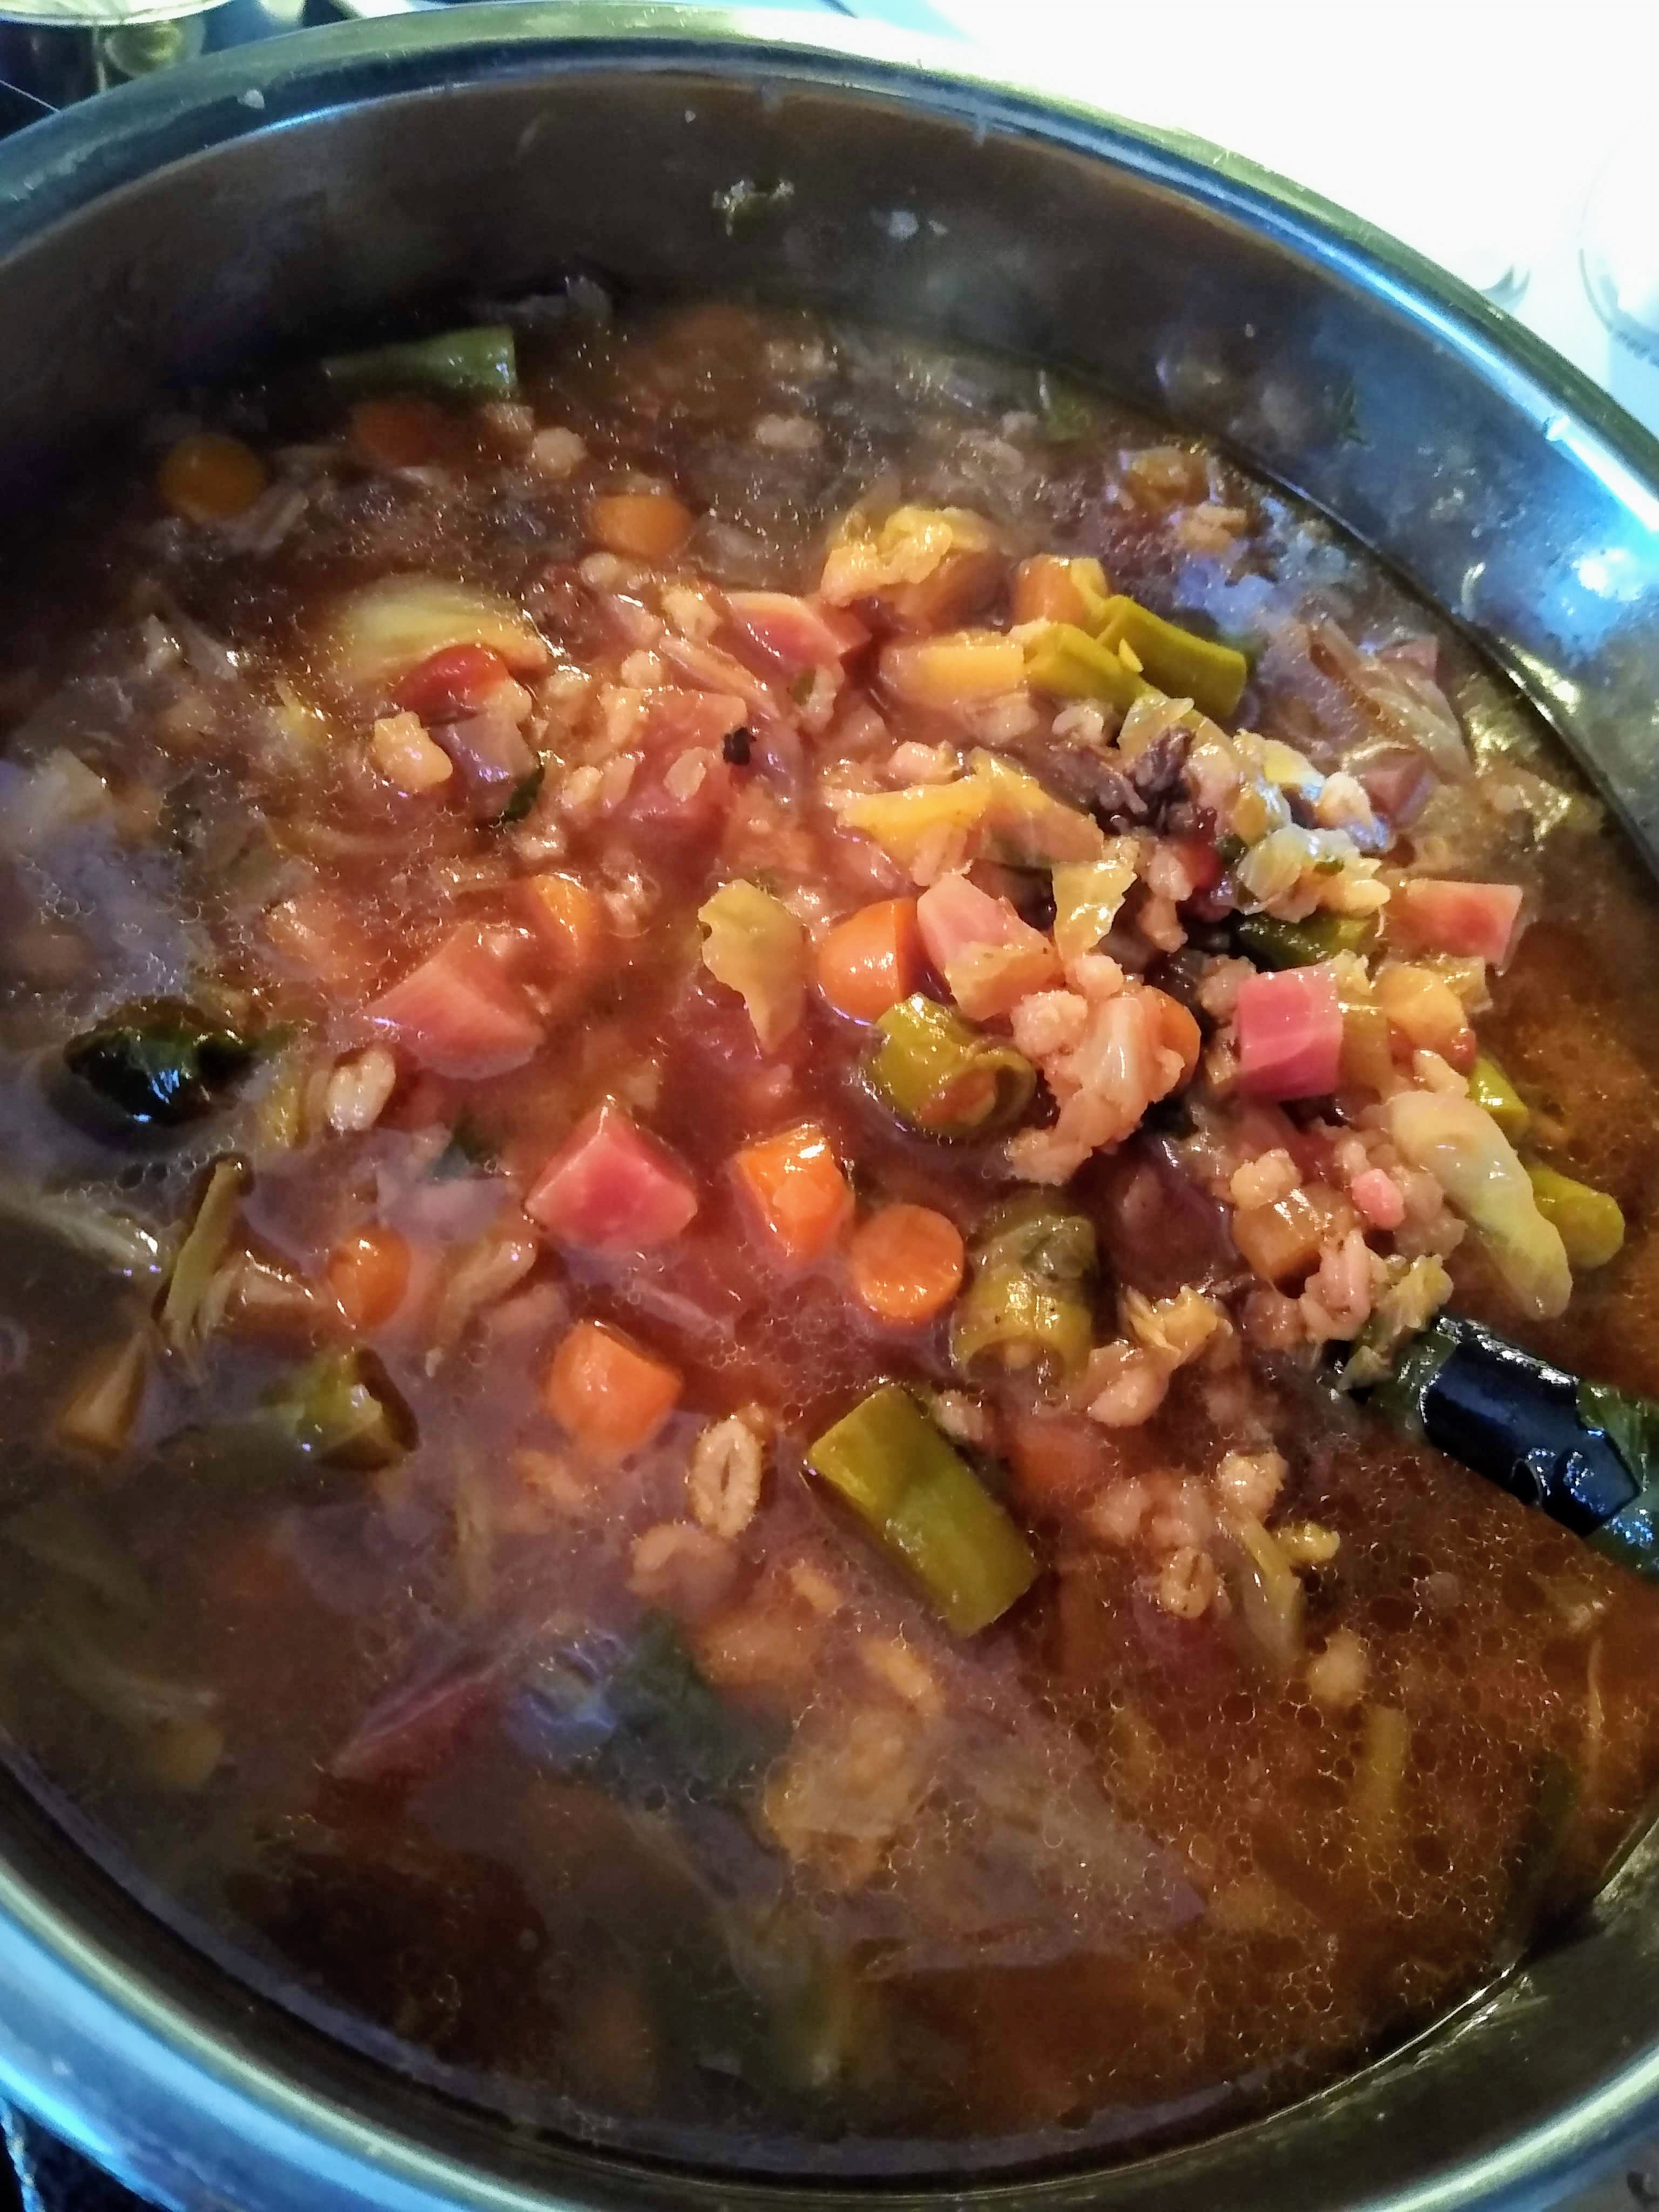
Everyone has a different borscht recipe, but if they are true to Russian/Ukranian tradition they pretty much all contain beets and cabbage, potatoes, and beef. I used my normal recipe rather than the one from the Green Sheet and then added chopped beet greens. Here it is – modernized to be made in an Instant Pot because that is where I make all my soups. It’s so much faster. Note: Measurements are approximate – I don’t measure. I eyeball it.
- Beef soup bone or short ribs
- 1 can diced tomatoes
- 1 large chopped onion
- 2 cups chopped celery
- 1 cup barley
- soup ball or tea ball with 1 Tbs. pickling spice, 3 bay leaves, and 3 crushed cloves of garlic
- 1 Tbs pepper
- 1/4 c salt
Put these ingredients with enough water to cover in the instant pot and set for 45 minutes. At the end of the time let the pressure release on its own for 10 minutes or so and then quick release if you want. Pull the meat out and let it cool a bit while you add the veggies. Then chop it up and throw it back in the soup. For the veggies:


- 3-4 large chopped carrots
- 2-3 cups chopped green beans
- 2-3 cups chopped beets
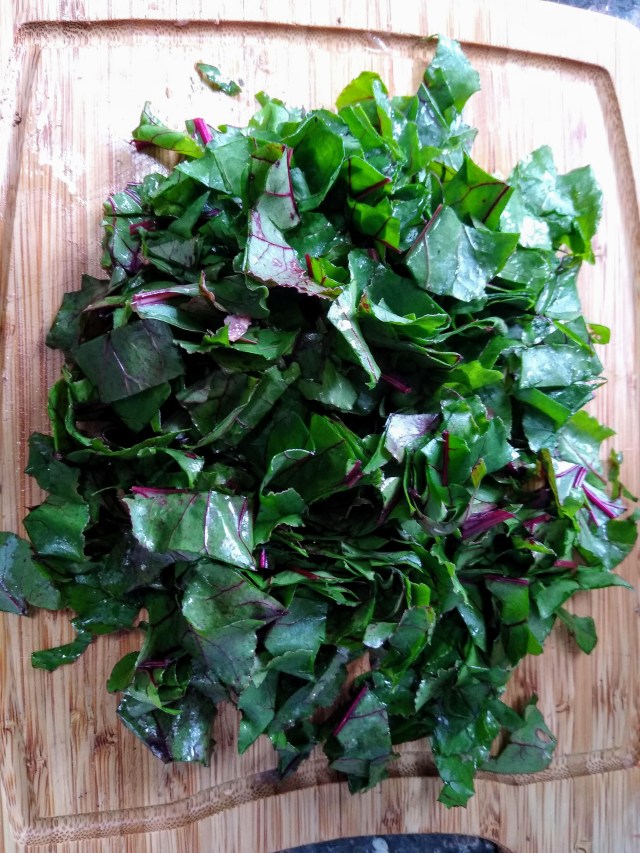
- 2-3 cups chopped beet greens
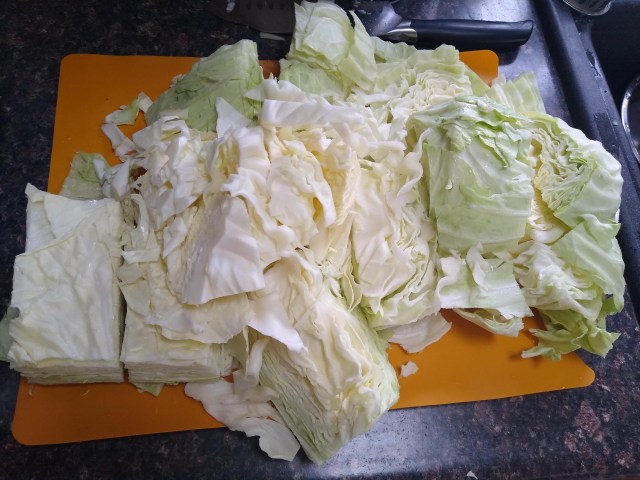
- 4 cups chopped cabbage
- 2 large diced potatoes
- a small handful of finely chopped fresh dill weed
- You will need to add some more liquid as well, so either add a couple of cups of chicken broth or water. If you use water, add a heaping spoon full of chicken bullion – the paste-like kind that comes in a jar. Don’t go past the max fill line in the instant pot. You can always add more liquid later if it’s too thick. You should definitely be using an 8-qt. pot. Set the Instant Pot for another 10 minutes. Slow release for a bit and then quick release. Dinner is served! We add a dash of cream when serving.
Note: If you are making this in a traditional stock pot, cook the first stage until the meat is soft and the second stage until the veggies are done.
Note: We both liked the addition of the chopped beet greens. With all the veggie flavors already in the soup, it didn’t change the flavor much, but I would say it added a little depth to it.
Beets Part 2
When the hubby mentioned beet leaves, I remembered seeing a recipe in a Facebook group about dumplings wrapped in beet leaves. I thought it would be the perfect accompaniment for borscht. I checked Pinterest and found this recipe for Ukrainian Beet Leaf Rolls with Creamy Dill Sauce
A little explanation of the “Ukrainian by Osmosis” title: I was raised with Germans from Russia food traditions. This means that my ancestors were German, but their migration to the US was by way of about a 100 year stay in the part of Russia that is now the Ukraine. Borscht is also very much a Russian/Ukranian tradition.
Almost every culture has some type of dumpling – dough of some type, sometimes stuffed, basically cooked by steaming. In German (at least the South Central ND dialect I learned to speak growing up) they are called Dampfnoodla which literally means “steam noodles.” The dumplings in this recipe are baked in the oven, but steamed in a sense by the moisture of their beet leaf wrapping and the fact that they are covered tightly while baking, keeping the steam in. The next time I make these, I will also add some water to the bottom of the pan, as I thought these could have been a little more moist.
Because of the time frame I was working with that day, I used my own dough recipe and modified it to include the eggs but skip a step in the dough rising process compared to the above recipe. I mixed the dough in one step, let it rise an hour, punched it down and added flour as needed so I could work with it, formed and wrapped the dumplings, let them rise a second time, and then baked them.
My dough recipe:
- 1 Tbsp. dry yeast
- 1 1/2 c. warm water
- 1 Tbs. sugar
- 2 tsp salt
- 2 room-temperature eggs beaten
- 1 Tbs. melted butter
- 3 c. flour
Mix the yeast, sugar, and water and let set for about 10 minutes until bubbly. Mix in the rest of the ingredients. The flour measurement is approximate. Add and mix a cup at a time for the first two cups and then less at a time until it forms a soft dough that holds together. I use my stand mixer with the dough hooks. Some people mix with a spoon and then by hand. Do what works for you. Cover the bowl with a damp towel and put somewhere warm for about an hour until doubled in size. In cool weather I preheat the oven to about 125, then turn it off and put the dough in. In AZ I can just set it on my outdoor island for a good part of the year.


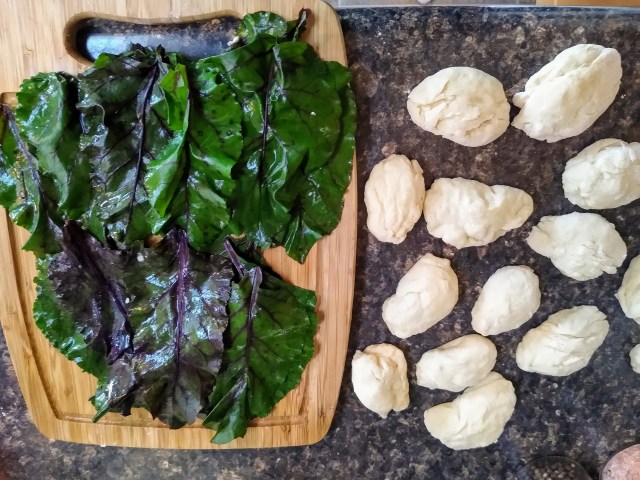
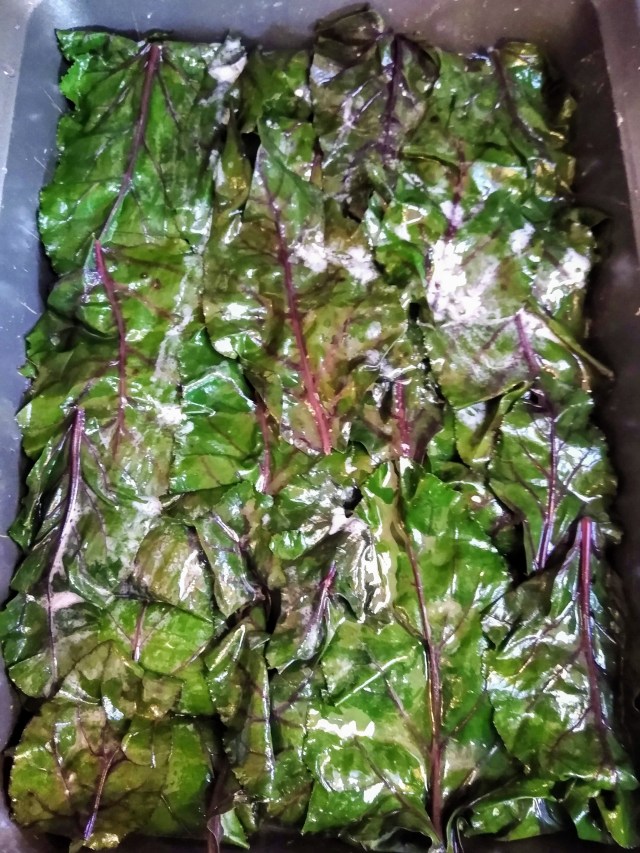
While the dough is rising I prep and blanch the beet leaves. I wash them and cut the stems off and then dip them in boiling water for about 30 seconds, and then plunge into ice water. Drain them and lay them out to get ready for the dumplings.

When the dough has doubled in size, punch it down and knead it for a minute or so, adding flour to prevent it from sticking to your hands. Separate into 24 pieces, a bit bigger than a golf ball and roll into an oval shape. Roll them loosely inside the beet leaves. Remember, they need some room to rise.


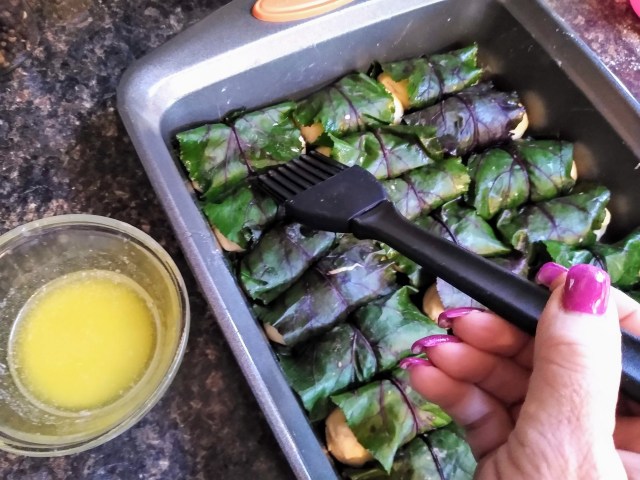
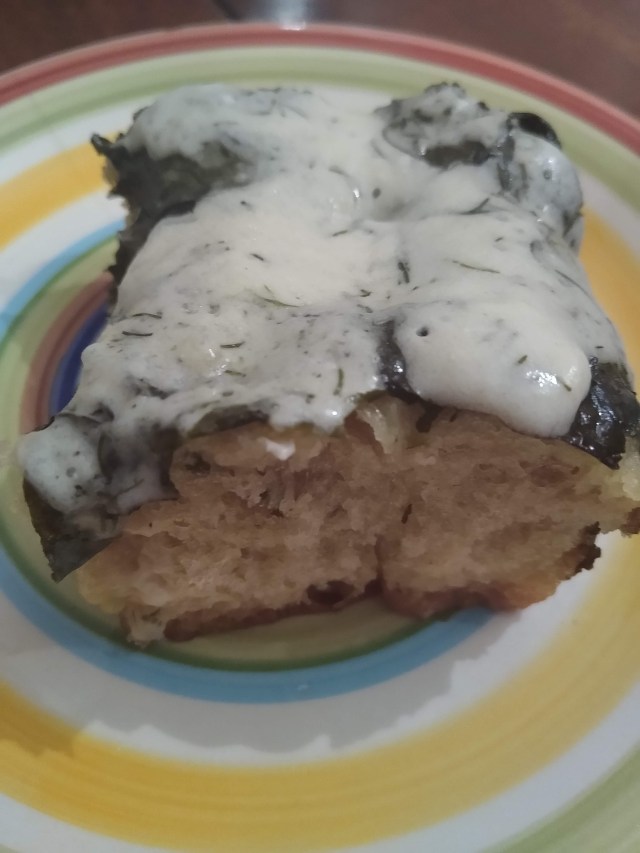
Melt a couple of Tbs butter in the pan while you’re preheating the oven for the second rising. Place a layer of leaves in the bottom of the pan and lay the wrapped dumplings on top. Leave some room in between. (I should have left more). Brush them with melted butter, add another layer of leaves and more melted butter. This last layer can also be added after rising and before baking. Cover with the damp towel and put back in the warm place for about an hour to rise again.


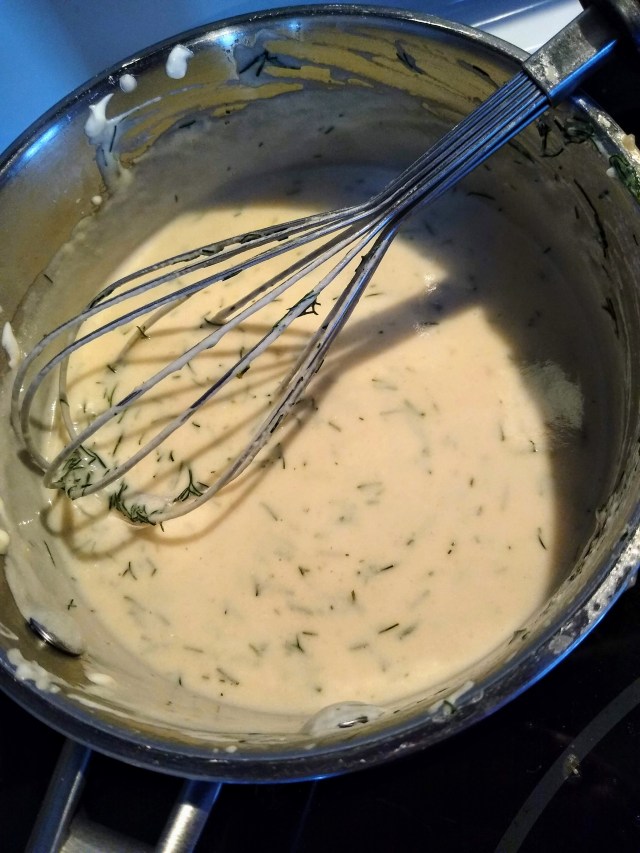
Remove the pan from the oven and preheat it to 350. Cover the pan tightly with foil and bake for 45 minutes. While they are baking, make the dill sauce. Make a roux with 2 Tbs. each butter and flour. Slowly add 1 c. chicken broth while whisking. Bring to simmering. Put the 3/4 c sour cream in a bowl and temper it with a little bit of the broth. Add it back into the thickened broth, turn the heat to low and stir in 3 Tbs. chopped fresh dill weed and salt and pepper to taste. Keep warm until serving.
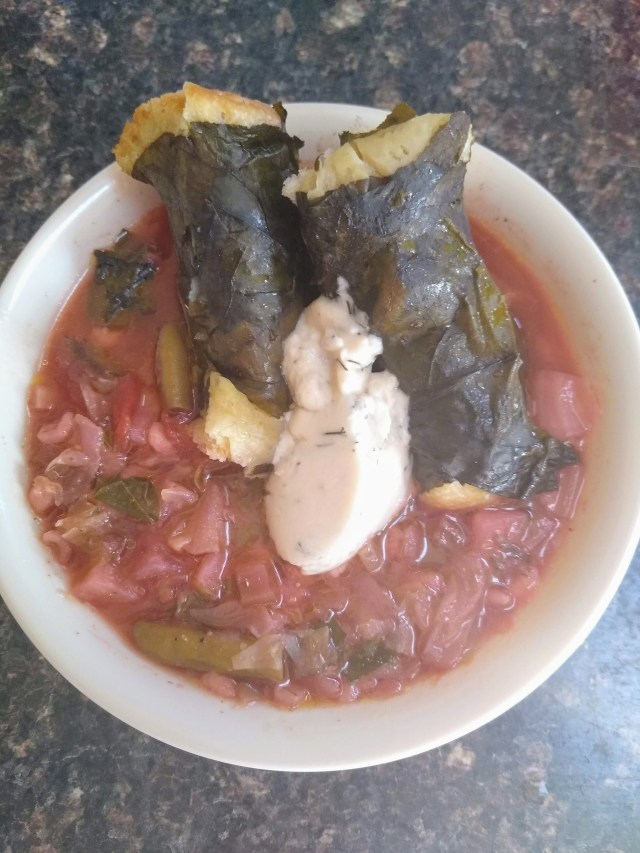
You can have just the dumplings with the dill sauce, or add a dollop of the dill sauce to your borscht and then eat the dumplings like you would a crusty bread with soup. Either way is delicious!
Cabbage Part 2: Sauerkraut
So, the borscht used up one small head of cabbage. What do I do with the other ones? I freeze a few whole, wrapped in saran wrap and then foil. When I want to make pigs in the blanket (hamburger-rice dressing wrapped in cabbage leaves, and baked in a tomato sauce), I take it out to thaw and the leaves are nice and soft without the mess of boiling the cabbage. That still leaves me with three heads to ferment for sauerkraut.
Sauerkraut is so good and good for you. It has all the helpful bacteria for gut health – which gets killed when canning it. Homemade sauerkraut is so much better than store-bought and it is literally 2 ingredients – cabbage and salt. You can let it ferment in a jar or a crock or a food-safe plastic bucket. I use a plastic bucket lined with a plastic garbage bag. Make sure it is unscented! I use the slicing blade on my food processor because the shredding blade makes it too fine. I use 1/4 cup of salt to a head of cabbage. Shred one head of cabbage and put it in the bucket, add the salt, knead it in by hand until you can feel it start to release the juices and repeat with other heads. That’s it!


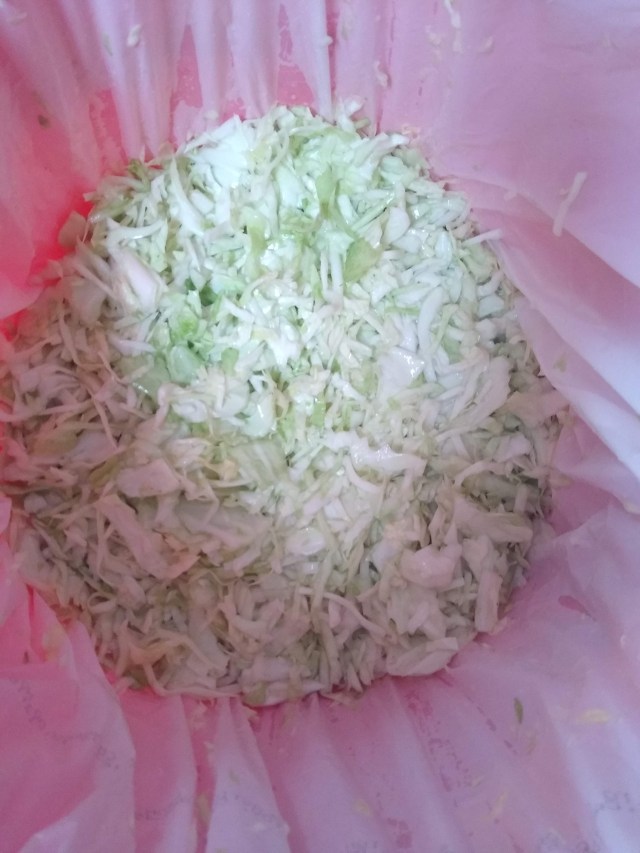
The only thing you have to do now is weight it down to keep it in its own juices and have patience. I used a plate with weights in a gallon bag. The key is for it to be able to breathe, so you can’t cover it with an airtight lid. I just cover with a dishtowel. Put it somewhere where the temp will hold steady within 5 degrees of 70 and it won’t be disturbed for at least three and up to six weeks. If you lift the dish towel and peek in between and see a little mold or scum on top, just scoop it off. When it’s done fermenting, you can put it in jars in the fridge for at least 6 months and possible longer. If you want to keep it longer than 6 months, I would recommend canning it. It will taste just as good and still be healthy, but won’t have the gut-healthy bacteria because the heat of cooking will kill it. Water bath can for 30 minutes for raw-pack quart jars.

Enjoy! Let me know how these recipes work out for you or if you have questions!

